Japanese Midget Submarine Attack on Sydney Harbour
Imperial Japanese Navy Midget Submarine Attack on Sydney Harbour, 31 May-1 June 1942
On 29 May 1942 five large Japanese I Class submarines rendezvoused some 35 nautical miles northeast of the entrance to Sydney Harbour. Before daylight the next morning an E14Y Glen float plane launched from one of the submarines, I-21, and crewed by Warrant Flying officer Susumo Ito and Ordinary Seaman Iwasaki, flew a daring reconnaissance mission over the harbour, twice circling the cruiser USS Chicago before flying off to the east.
The aerial intrusion was observed and reported but it did not initiate any special harbour defensive measures being implemented. Many mistakenly believed it an American floatplane conducting a routine training flight. For the Japanese raiders, it was the latest of a number of reconnaissance flights conducted over Sydney providing valuable intelligence for an impending surprise attack on the numerous Allied warships anchored peacefully in the harbour. Prime targets included the cruisers HMAS Canberra and USS Chicago.
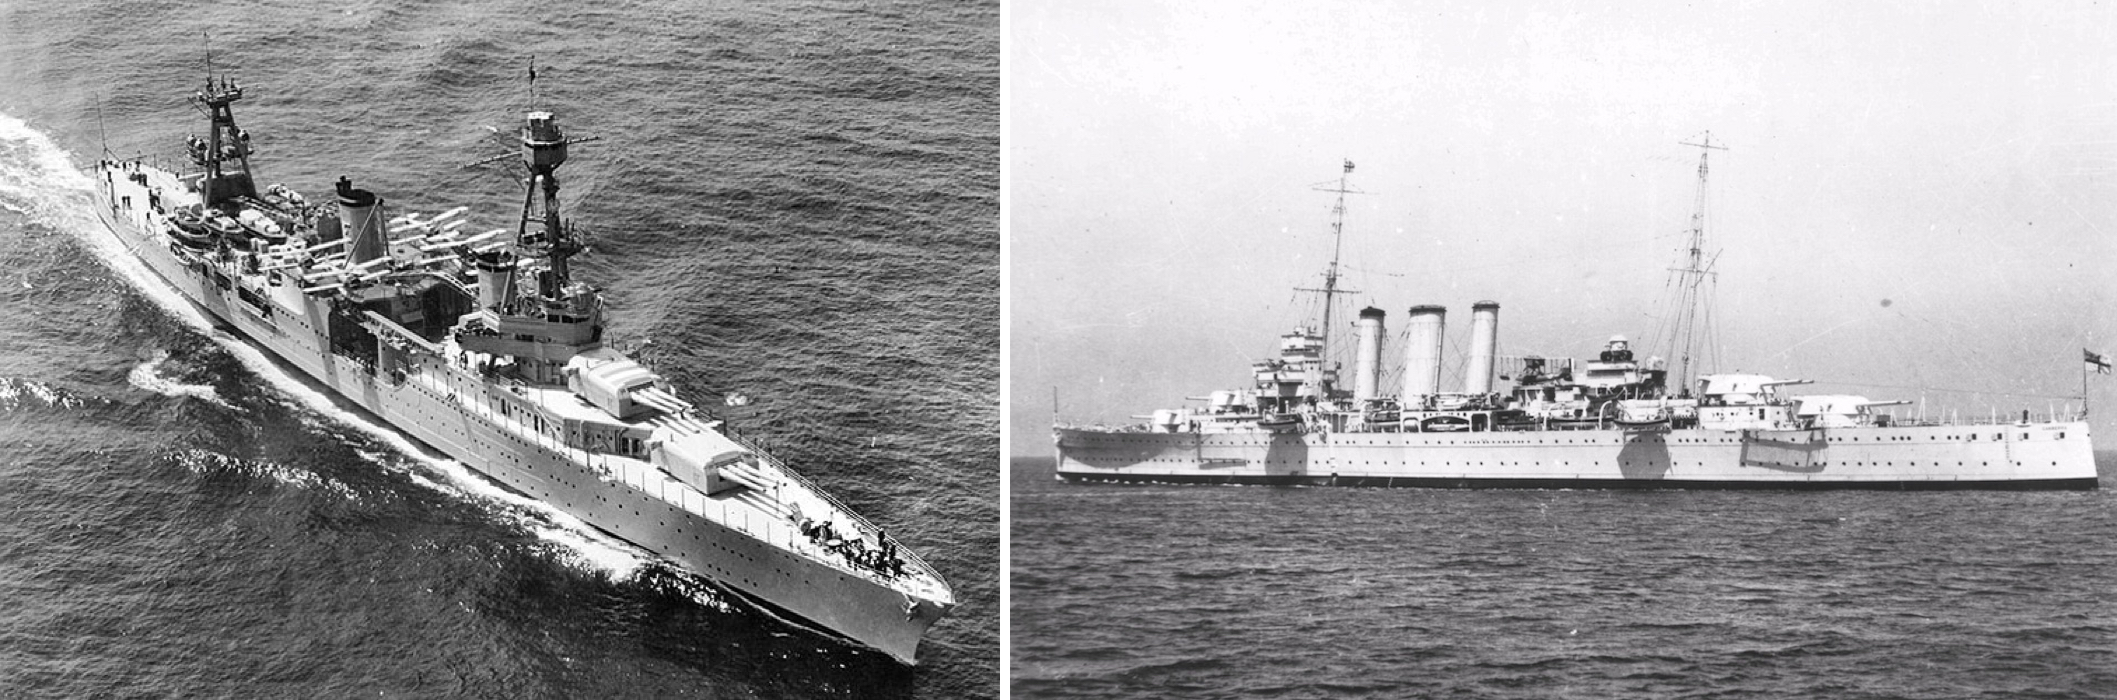
The cruisers USS Chicago and HMAS Canberra were two of the Japanese intended targets.
The next night, 31 May, the Japanese ‘mother ships’, I-27, I-22 and I-24 dispersed in an arc formation outside the harbour entrance before each of them released a two man midget submarine, precipitating what came to be referred to by some as ‘the battle of Sydney’.
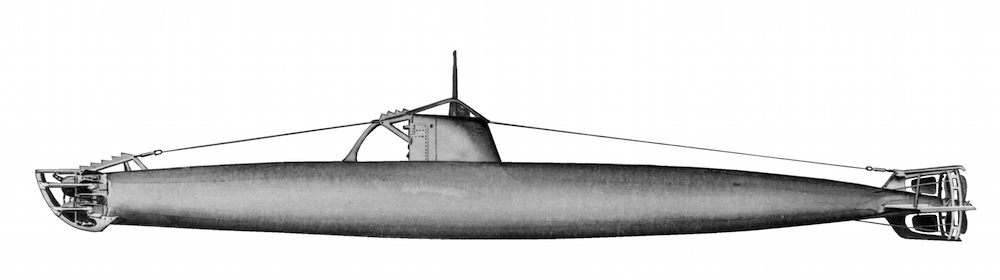
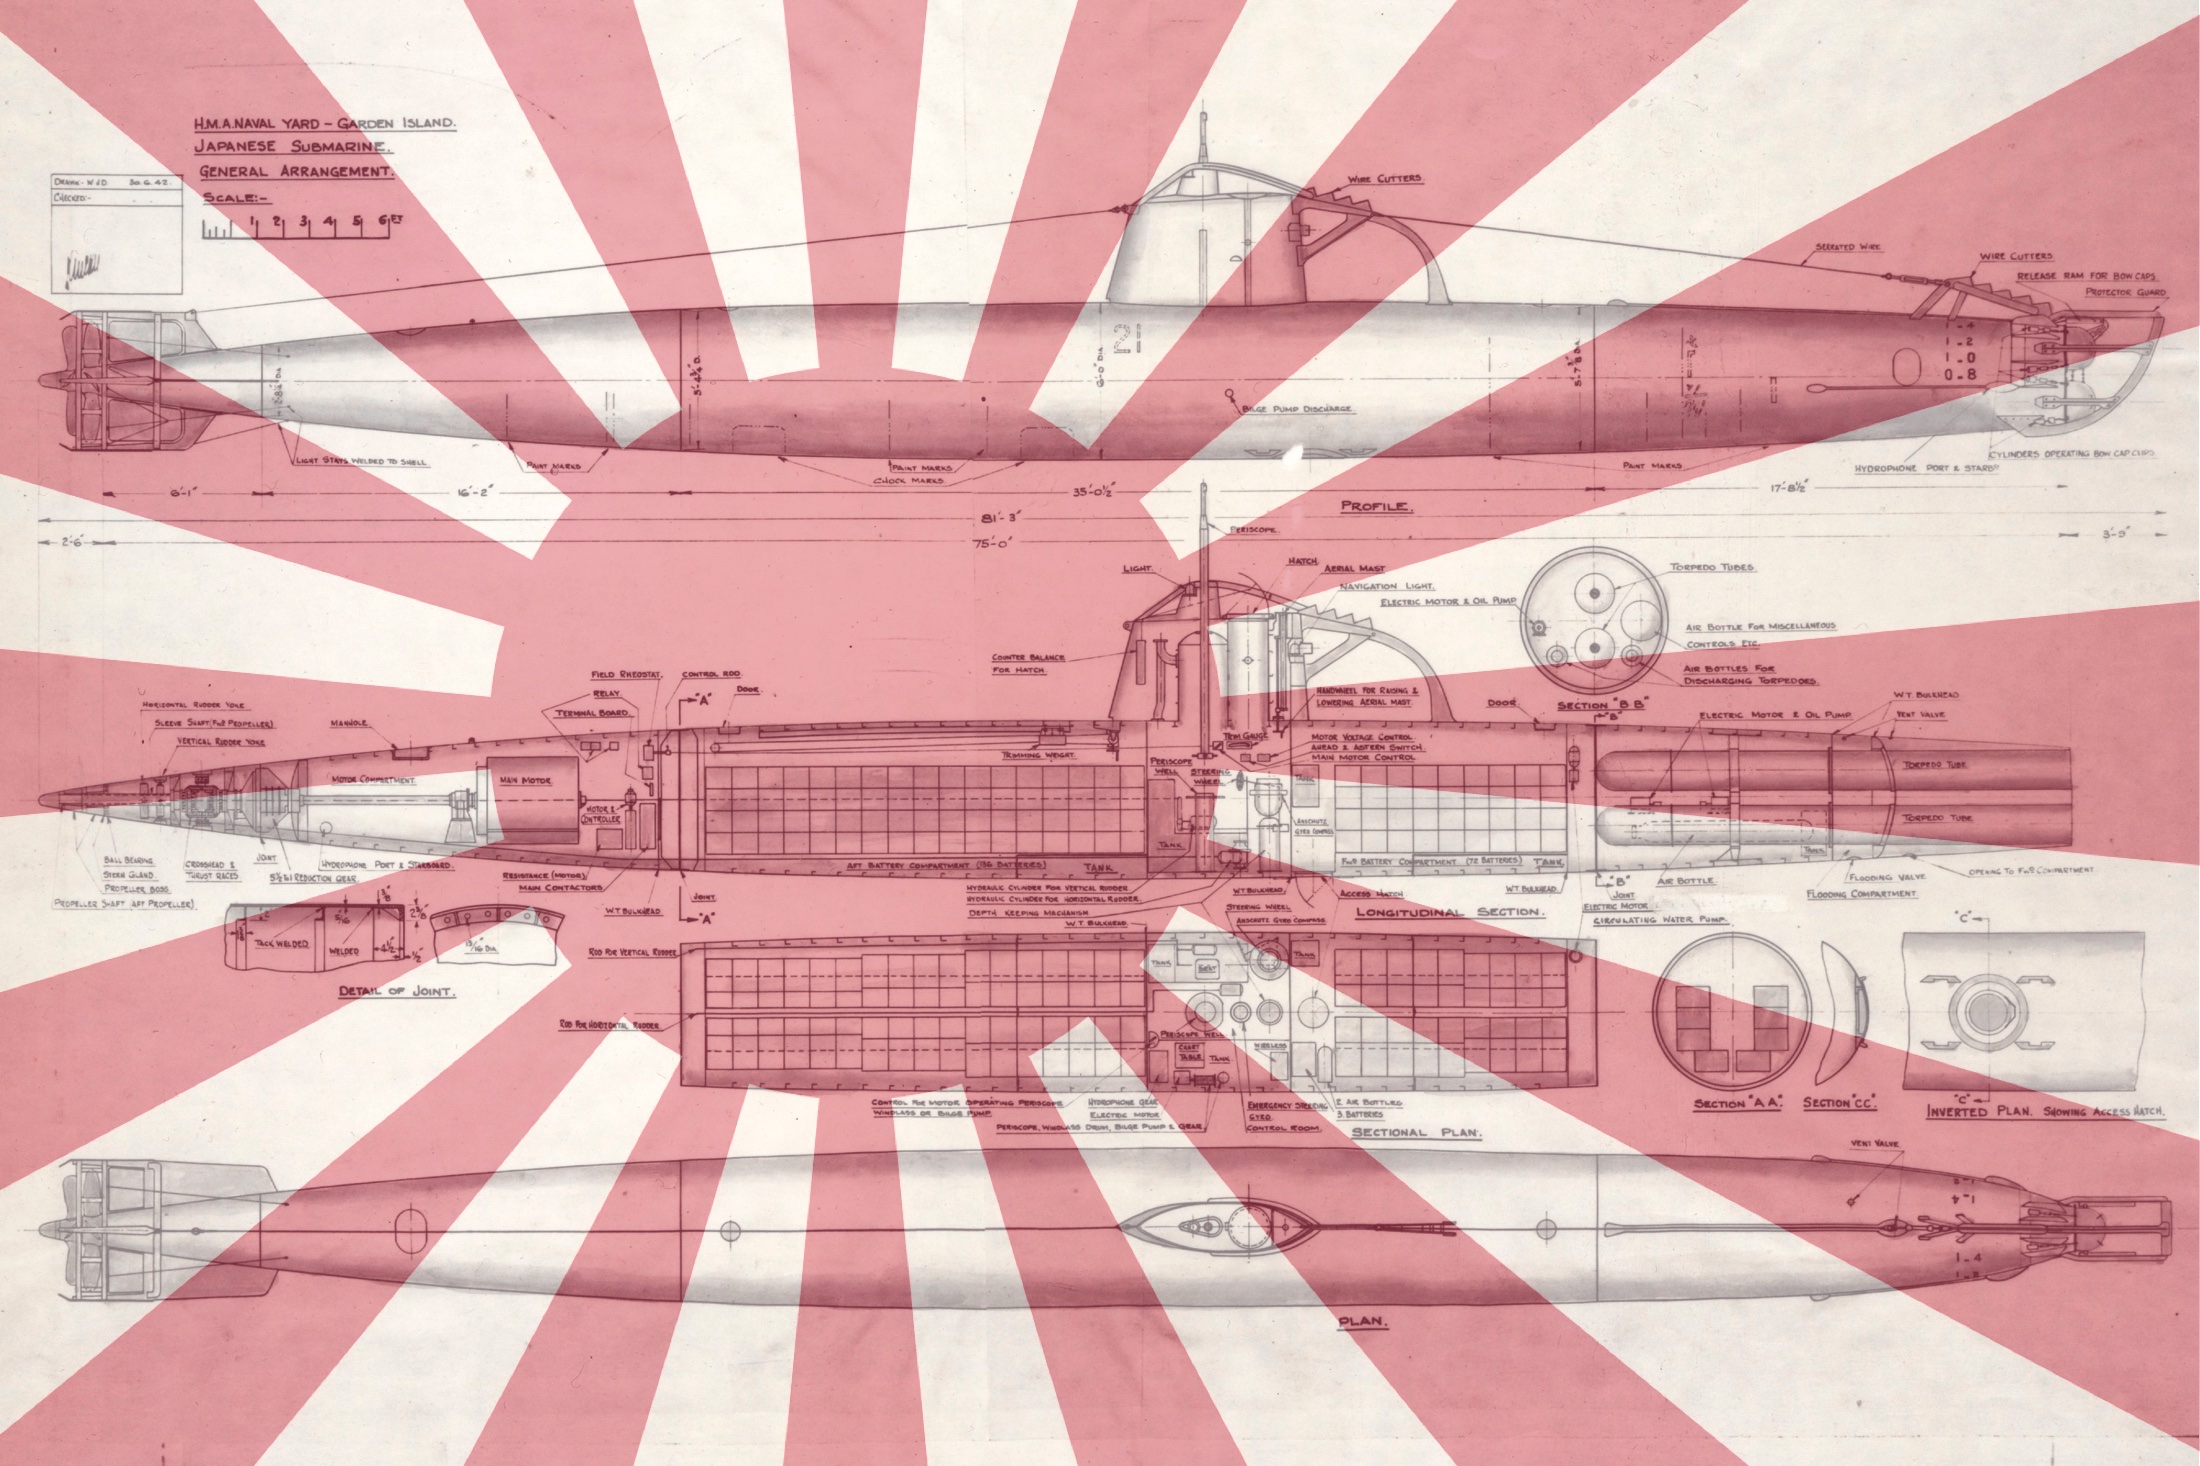
The Japanese A type midget submarines carried two torpedo tubes and a crew of two. They displaced 46 tons submerged and were capable of attaining a submerged speed of 19 knots.
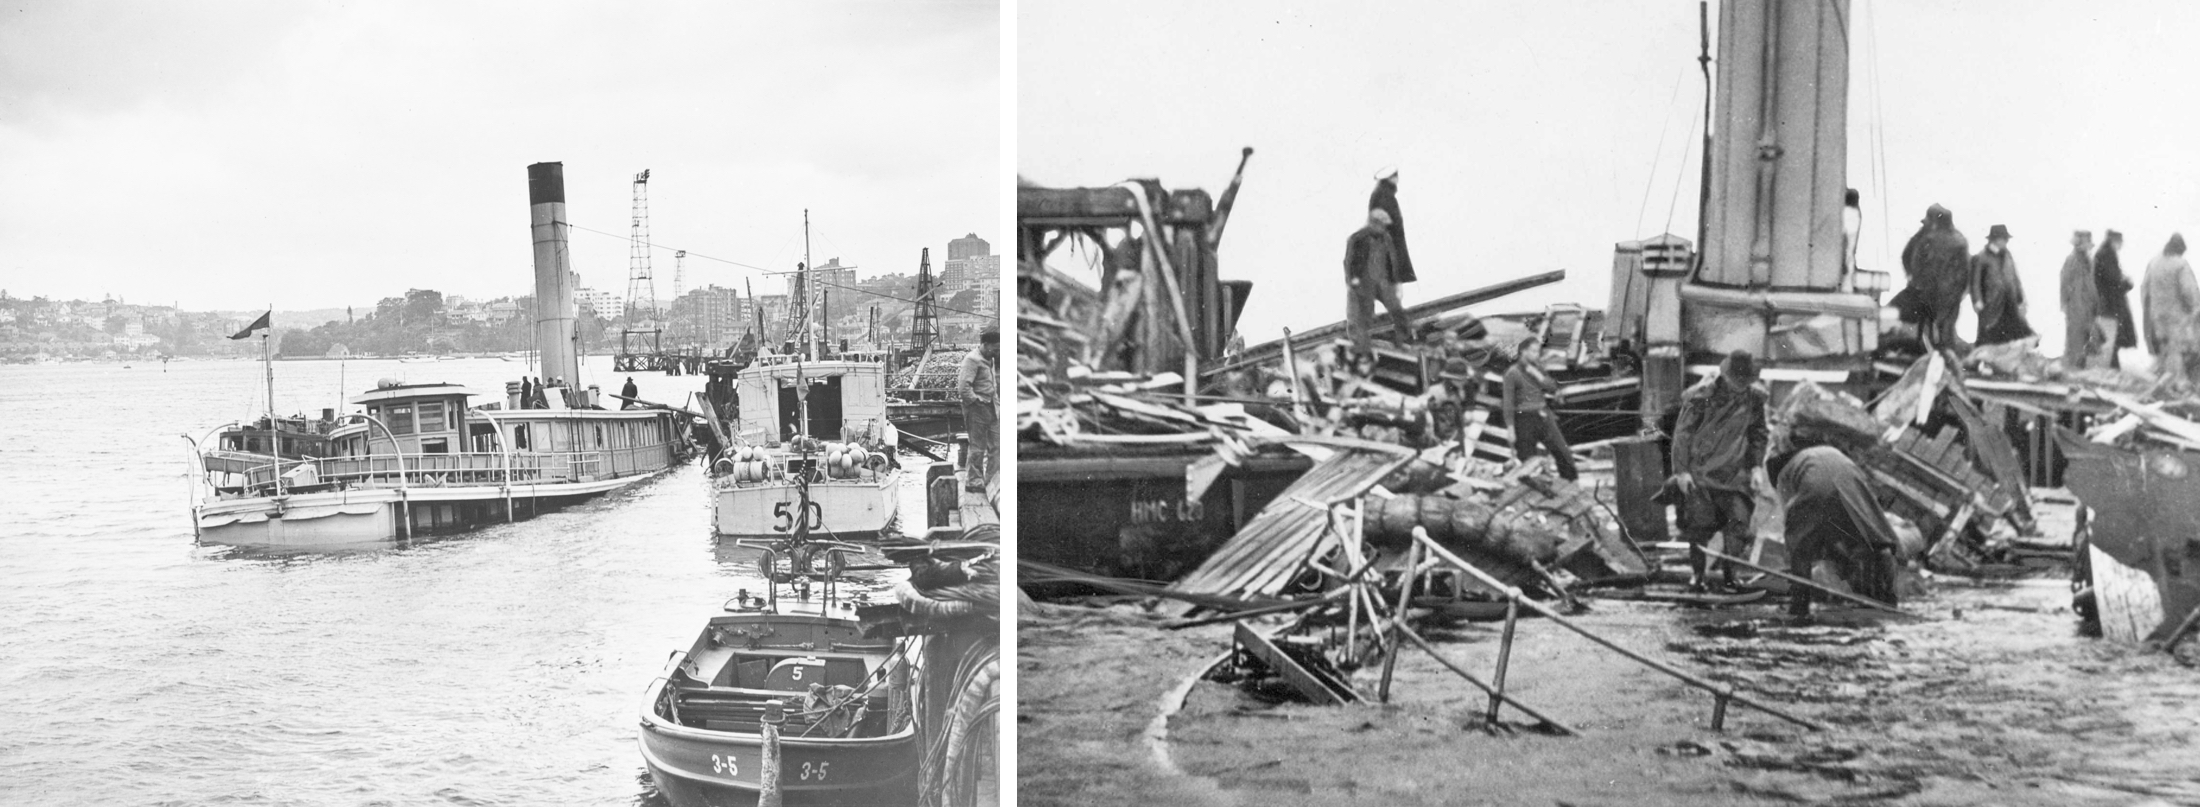
The first midget submarine to enter Sydney Harbour, M-27[1] manned by Lieutenant Kenshi Chuman and Petty Officer Takeshi Omori, did so at approximately 8:00pm. It had not gone far, however, when the vessel’s propellers became entangled in anti-submarine nets close to the western boom gate. The disturbance in the water caused by the snared submarine was soon observed and subsequently reported at which time the patrol boats HMAS Yarroma and HMAS Lolita were ordered to investigate. They were cheated of their prey, however, when the submarine’s crew, realising that they could not free the midget’s propellers, chose a warrior’s death, firing demolition charges that destroyed their craft at 10:37pm and raising a general alarm.

The recovery of the remains of M-27 showing the effect of the demolition charges fired by Chuman.
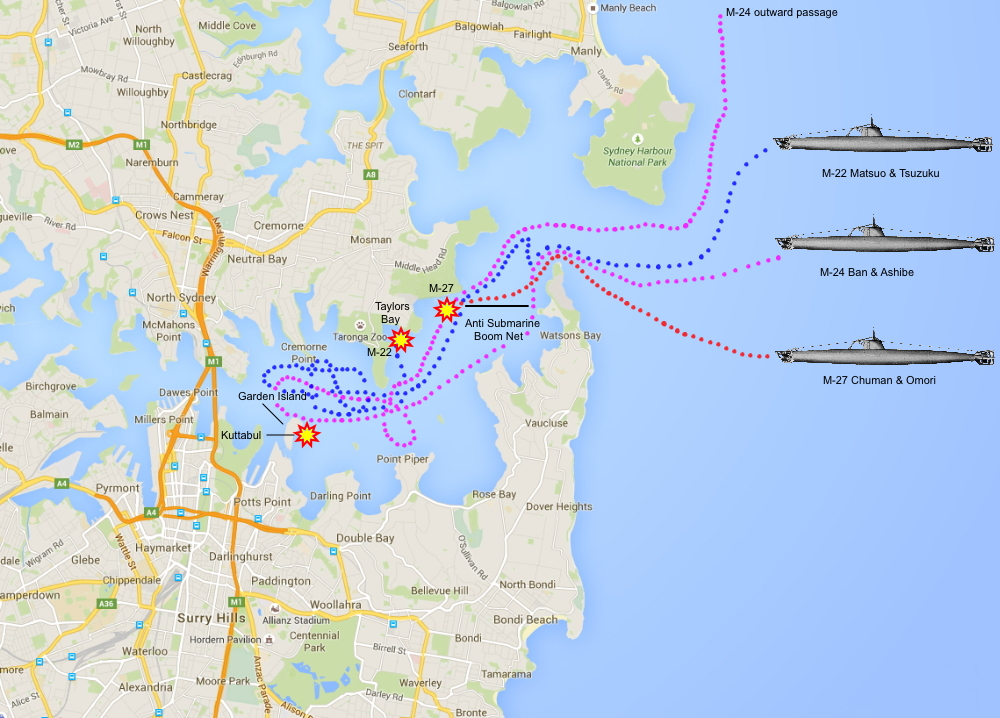
The tracks of the three midget submarines through Sydney Harbour.
The second midget submarine, M-24, crewed by Sub Lieutenant Katsuhisa Ban and Petty Officer Mamoru Ashibe, successfully entered the harbour at 9:48pm. Some time later Chicago, lying at the Man-of-War anchorage, sighted the midget’s periscope about 500 yards distant. Searchlights were quickly illuminated and shots were fired in its general direction. However, Chicago’s guns could not be depressed sufficiently and her gunfire had no discernible effect. Half an hour later, Sub Lieutenant Ban fired two torpedoes at Chicago both of which missed the intended target. One ran ashore at Garden Island failing to explode, while the second passed under the Dutch submarine K9 striking the sea wall on Garden Island. It exploded on impact beneath the requisitioned Sydney Harbour ferry Kuttabul, which at that time was being used as an RAN depot ship. Kuttabul sank immediately and 21 Allied naval ratings, 19 Australian and two British were killed.
Left: The requisitioned ferry Kuttabul lying on the seabed following M-24's torpedo attack. Right: Workers sift through the remains of Kuttabul.
Others were badly injured or trapped. Bandsman MN Cumming had boarded Kuttabul only five minutes prior to the explosion and was fortunate to receive only minor cuts from the blast. At first he thought a bomb had hit the ship but instead of heading for the safety of shore, he stripped off and dived repeatedly into the bitterly cold watery wreckage ignoring shattered glass and jagged woodwork in a frantic search for survivors. He is credited with rescuing three critically injured shipmates. Ordinary Seaman LT Combers was another who disregarded his own safety to return to the dangerous wreck and save the life of another.[2]
Ban and Ashibe, meanwhile, evaded further detection and their vessel disappeared without trace, not to be seen again until 2006 when recreational divers discovered its wreck off Sydney’s northern beaches.
Although the harbour was alive with activity following the attack on Chicago, confusion reigned with some believing the gunfire to be part of a naval exercise as ships began to weigh anchor and proceed to sea.
Later in the early hours of 1 June a third enemy midget submarine, M-22, crewed by Lieutenant Kieu Matsuo and Petty Officer 1st Class Masao Tsuzuku, entered the harbour. It was later detected in Taylors Bay where it was depth charged repeatedly by the patrol boats Sea Mist, Steady Hour and Yarroma. The following day RAN divers were sent to investigate the crippled vessel, finding its engines still running and its contra-rotating propellers slowly turning. It was subsequently raised and its two man crew found dead inside from self inflicted gunshot wounds.
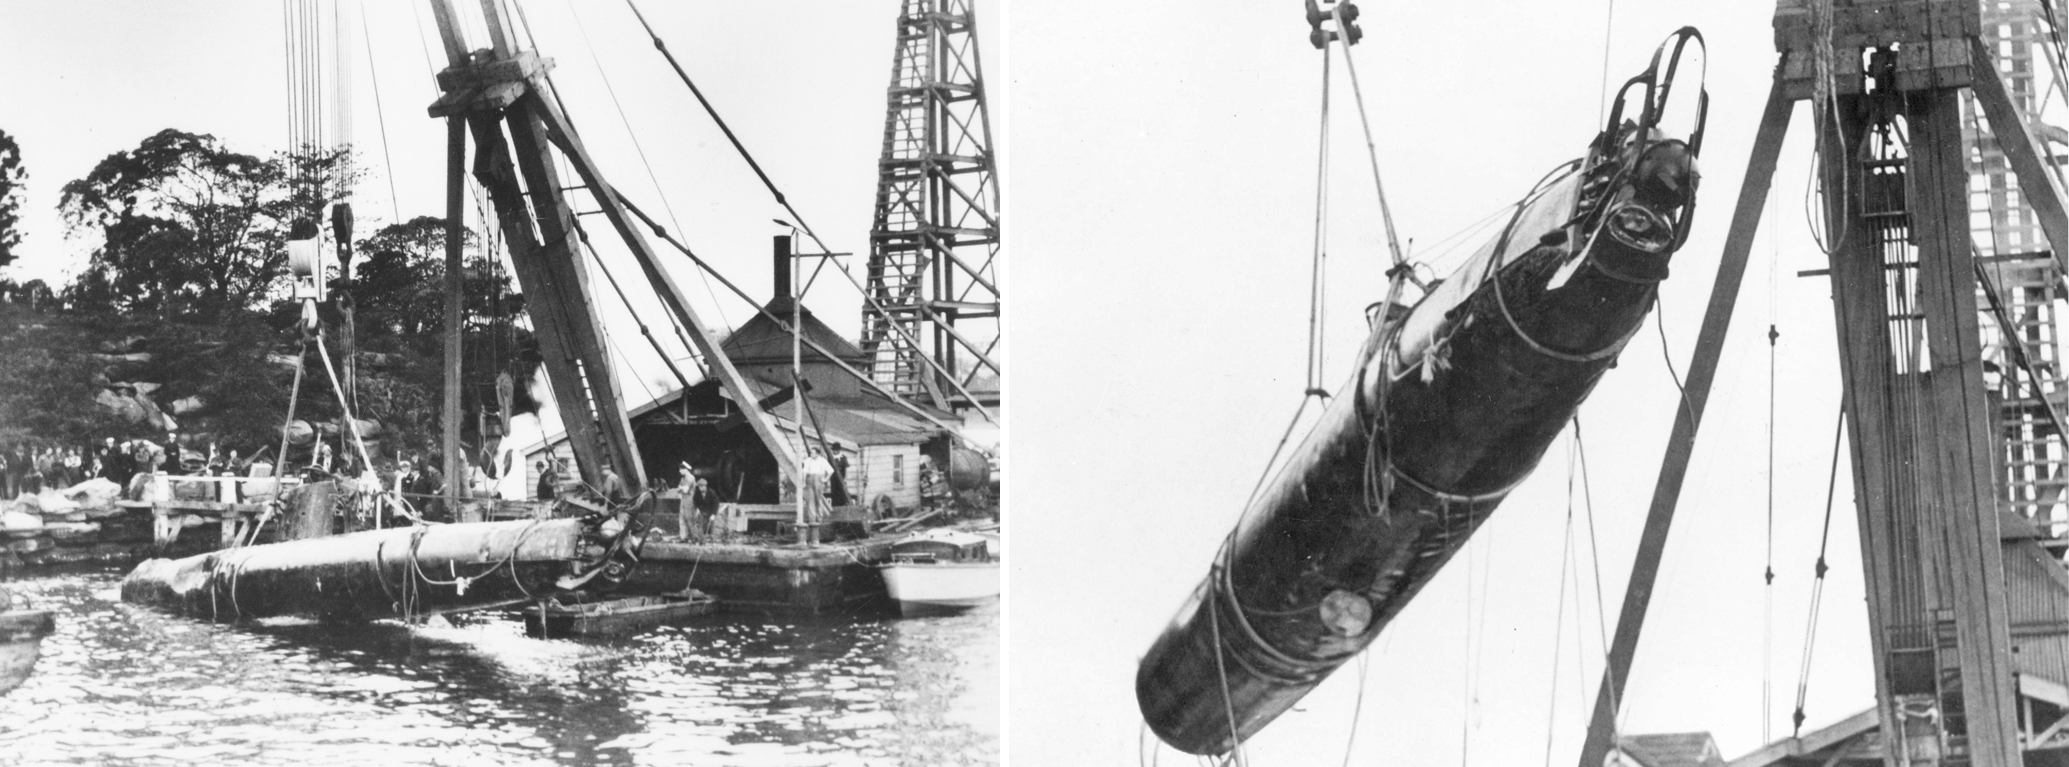
The recovery of M-22 from Taylors Bay. The effect of the depth charging can be seen on the submarine's casing.
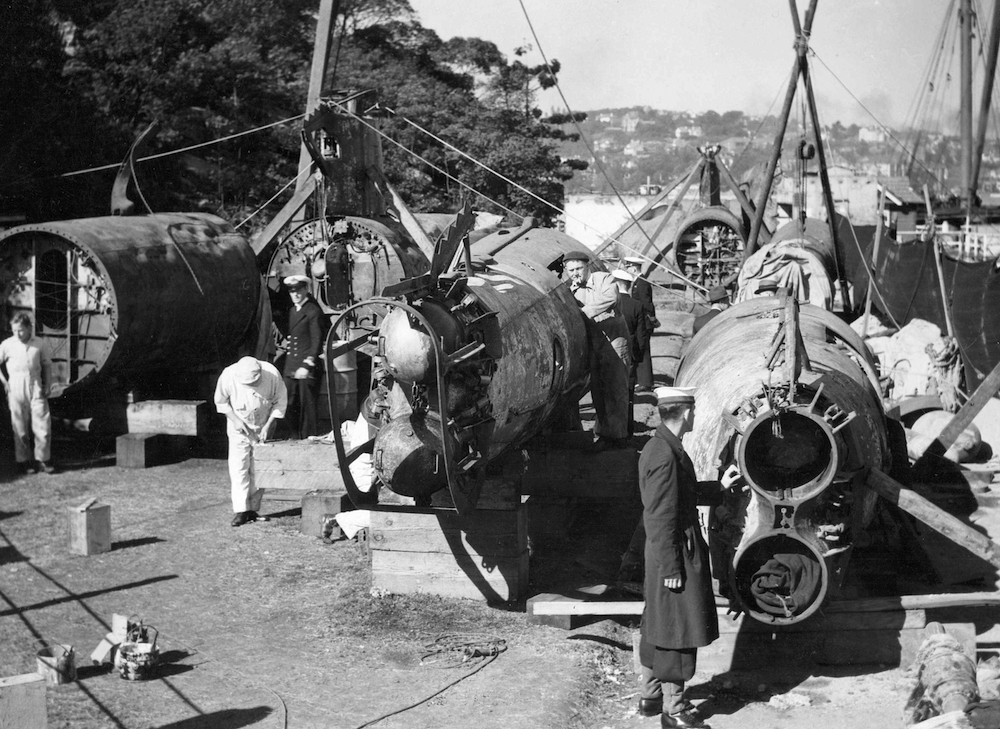
Following their recovery from the harbour, midgets M-27 and M22 were thoroughly examined. Parts of both vessels were later mounted on a trailer, touring Australia to raise war bonds and boost morale. (SLV Pictures Collection H98.104-898)
The audacious attack by the Japanese midget submarine crews proved to be a sharp wake-up call to Sydneysiders for whom the war had hitherto seemed somewhat distant.
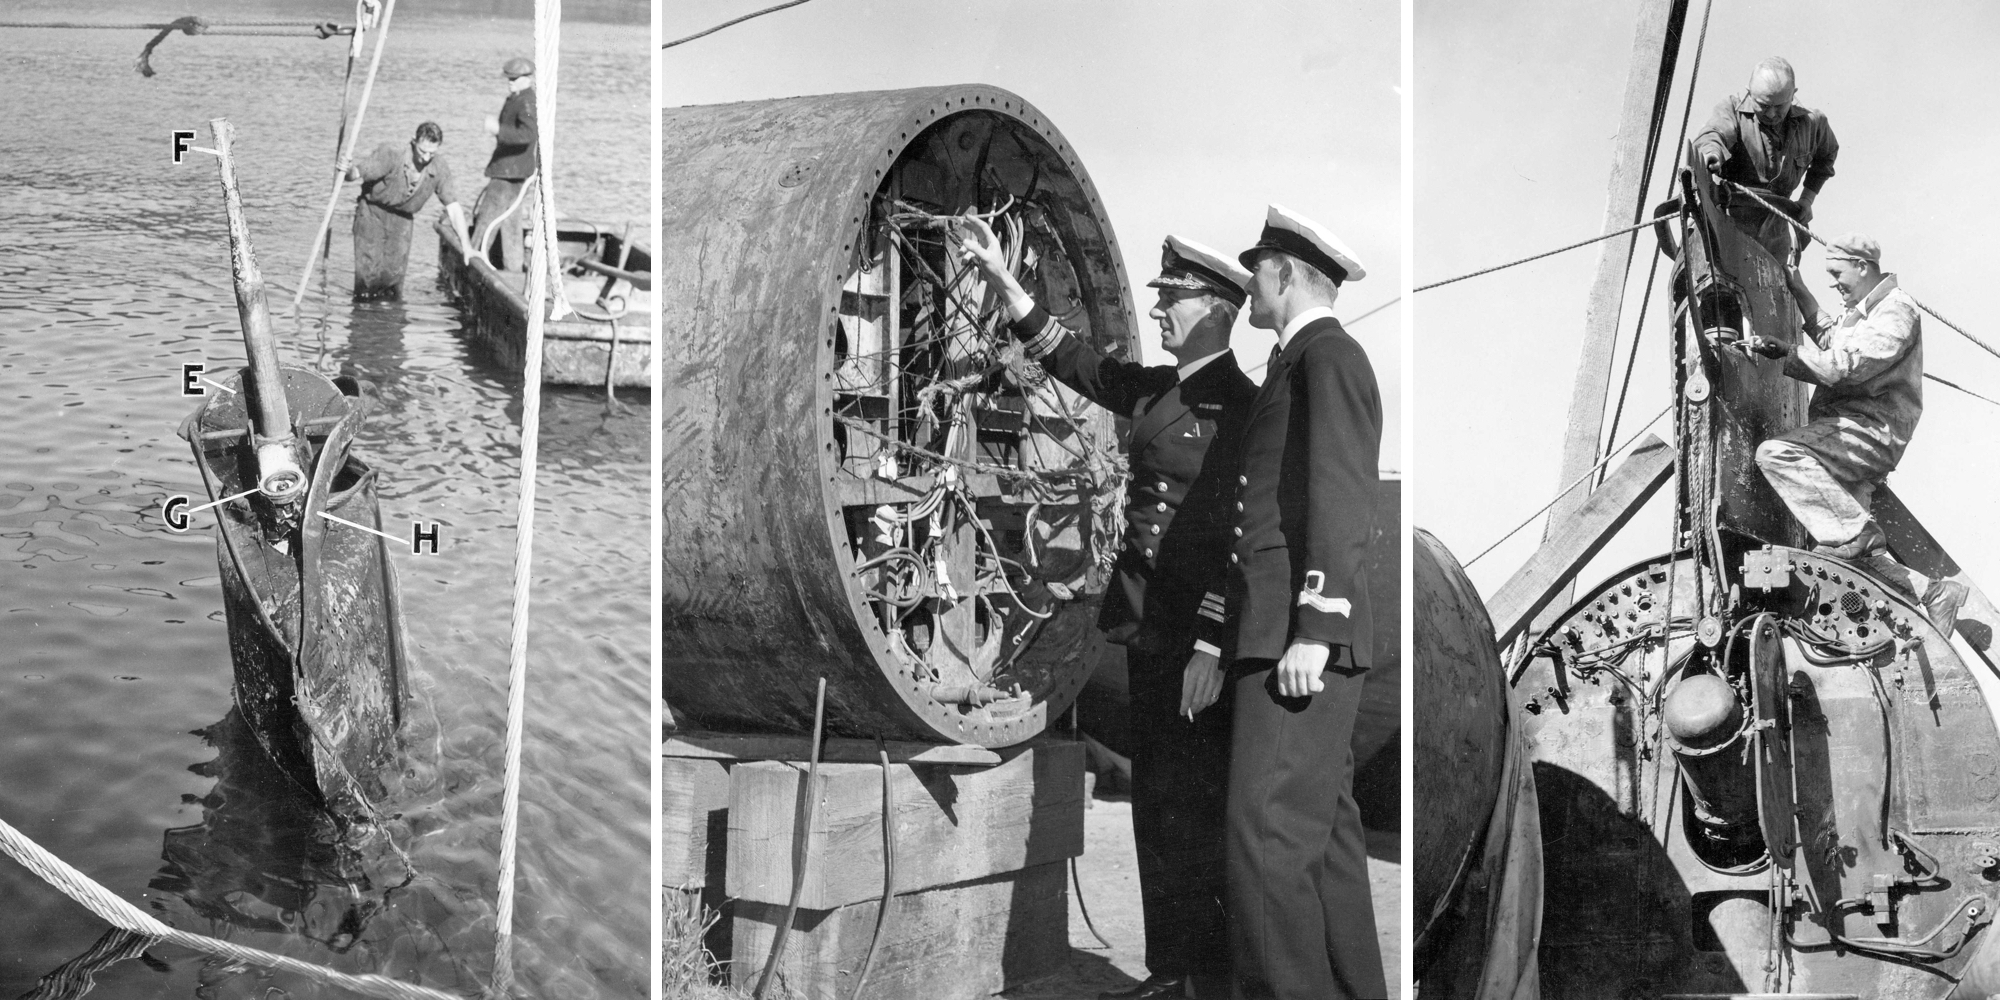
Valuable intelligence was obtained from the captured midget submarines.
It took several days to recover and account for the 21 ratings that were killed in Kuttabul. On 3 June 1942 Rear Admiral GC Muirhead-Gould, DSC, Flag Officer-in-Charge Sydney, and over 200 Navy personnel attended a burial service conducted with naval honours for those killed in Kuttabul. On 1 January 1943, the naval depot at Garden Island was commissioned as HMAS Kuttabul to further perpetuate the memory of the 21 men killed during the attack.
The RAN also recognised the bravery of the four Japanese submariners recovered from the two submarines destroyed in the harbour. They too were accorded a funeral with naval honours at Rookwood Cemetery, a gesture much appreciated in later years by the Japanese. The cremated remains of the submariners were returned to Japan two months later as part of an arranged diplomatic exchange.
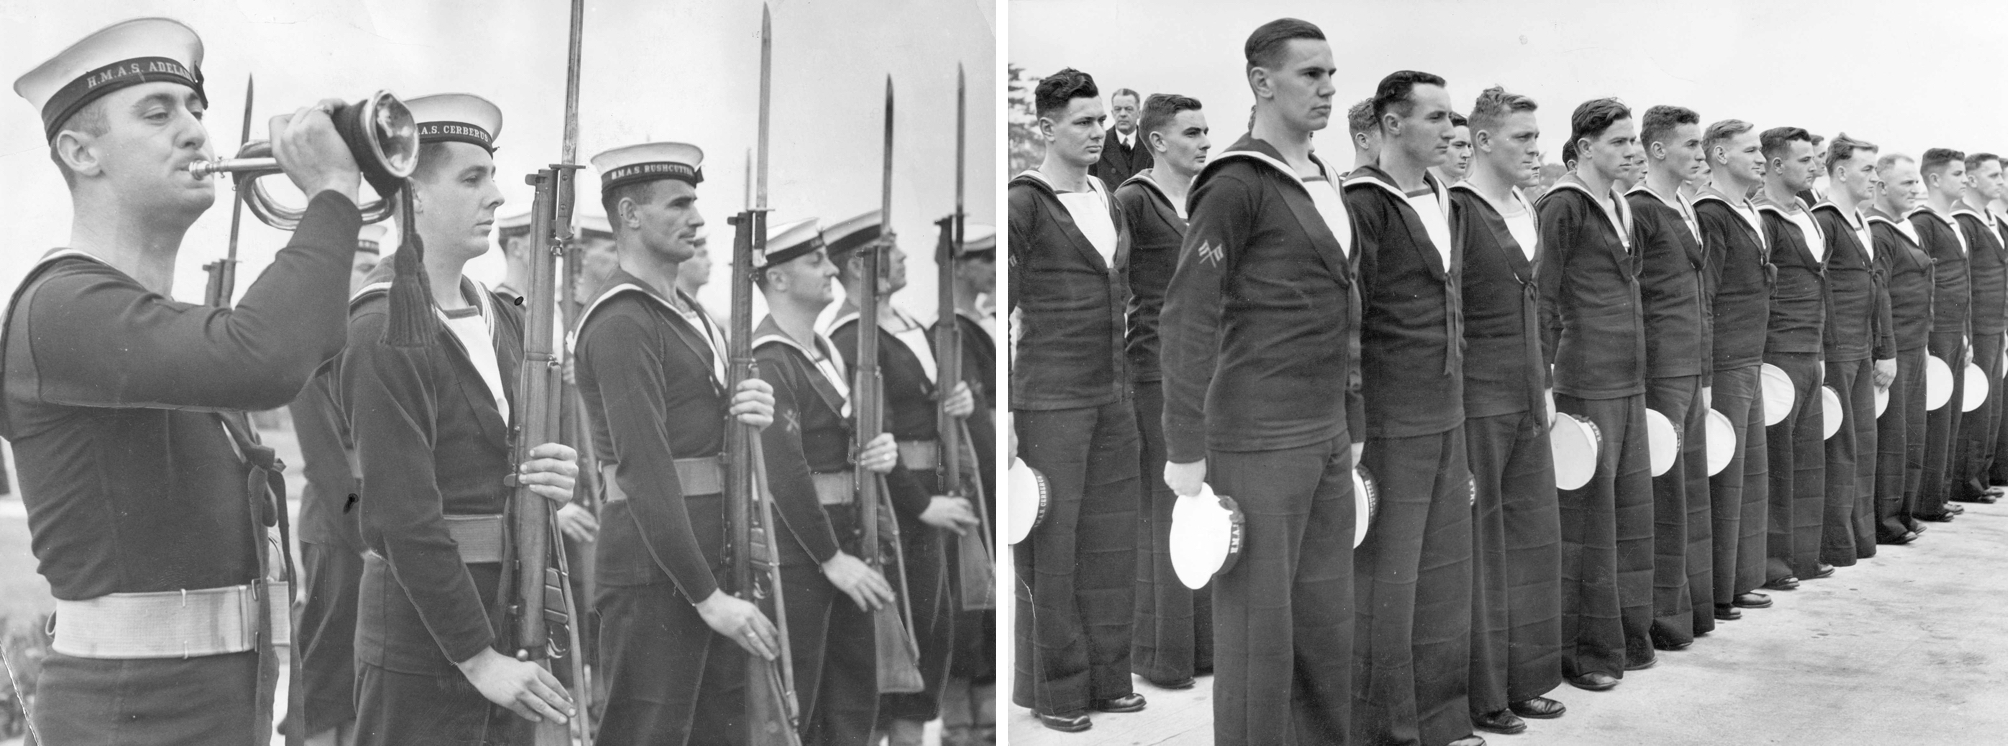
Those killed in Kuttabul were commemorated with full naval honours, as were the four Japanese submariners confirmed killed in the raid.
Large parts of the two midget submarines recovered from the seabed of Sydney Harbour were used to construct one composite vessel, which currently forms a major exhibit, along with the wheelhouse from Kuttabul, in the Australian War Memorial, Canberra. The conning tower of Lieutenant Matsuo’s M-22 is on display in the Naval Heritage Centre, Garden Island, Sydney.
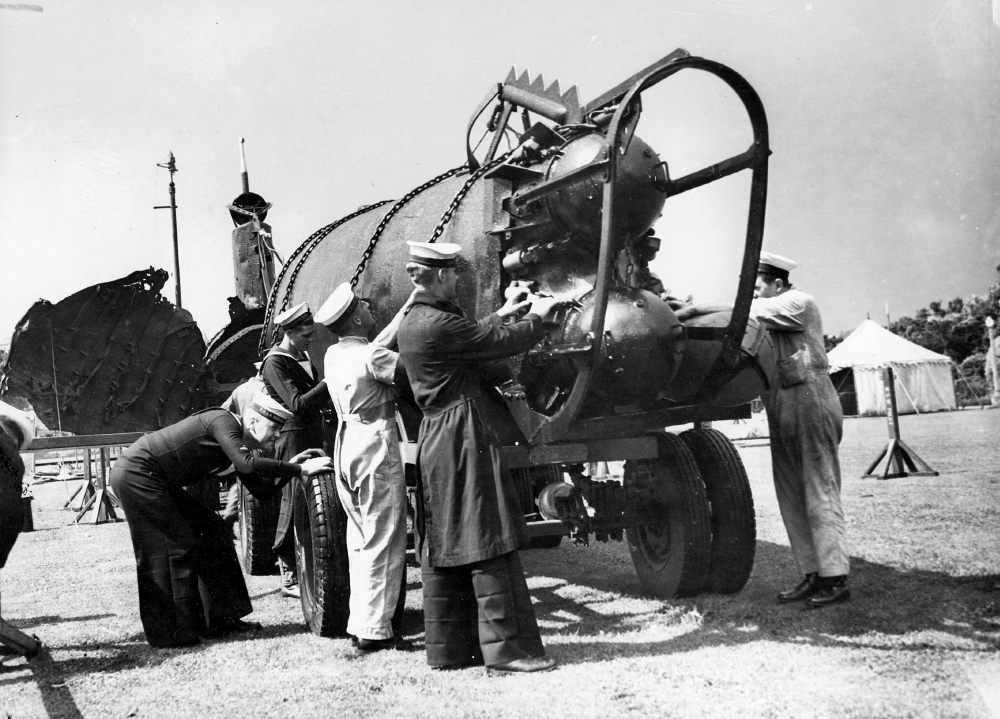
The composite vessel mounted on the trailer that saw it travel through the eastern Australian states to raise war bonds.
- ↑The naming and numbering convention used in this paper to identify each submarine is to use the number of the ‘mother’ submarine preceded by the letter ‘M’ - midget. Thus M-27 is the midget submarine carried and launched by I-27.
- ↑A Very Rude Awakening, Peter Grose, Allen & Unwin, Sydney, 2007.
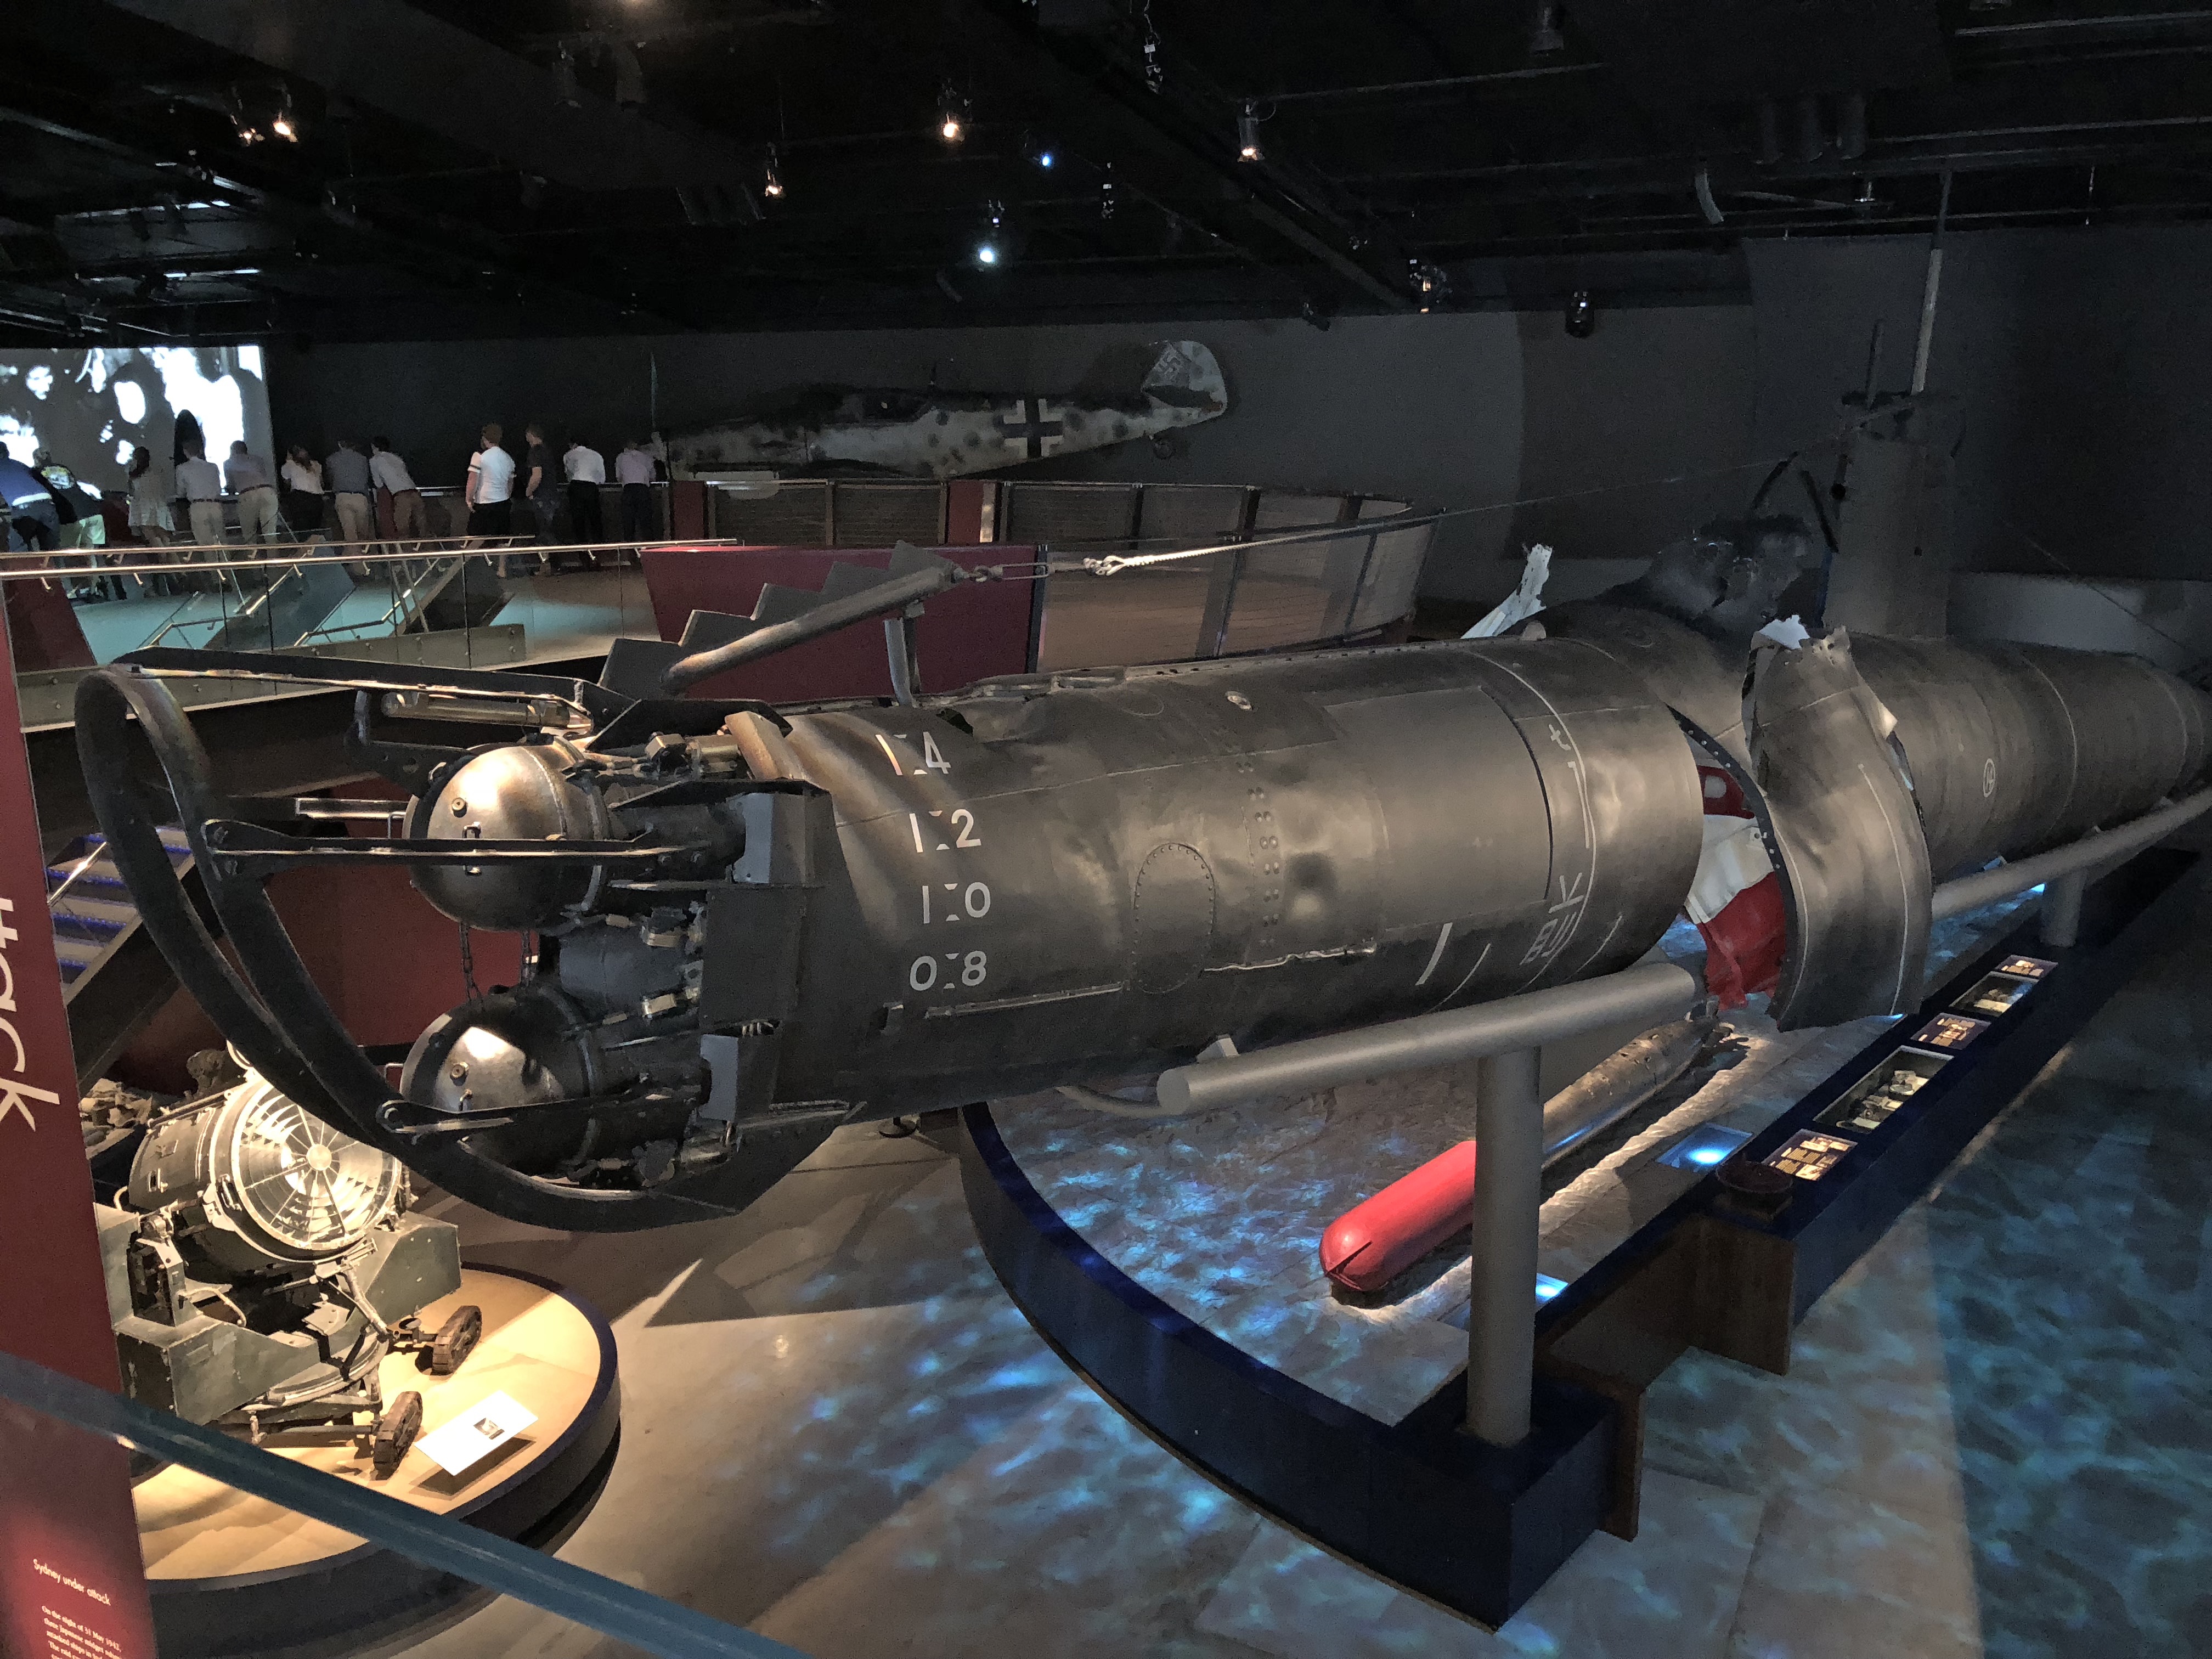
The composite midget submarine now on display in the Australian War Memorial, Canberra.
