HMAS Australia (I)
HMAS
Australia
(I)
 |
| Class |
Indefatigable Class |
|---|---|
| Type |
Cruiser |
| Role |
|
| Pennant |
C6/C09/C81 |
| Motto |
Endeavour |
| Builder |
John Brown & Co Ltd, Clydebank, Glasgow, Scotland |
| Laid Down |
26 June 1910 |
| Launched |
25 October 1911 |
| Launched by |
Lady Reid, wife of Sir George Reid, Australian High Commissioner in London and former Prime Minister |
| Commissioned |
21 June 1913 |
| Decommissioned |
12 December 1921 |
| Fate |
Scuttled on 12 April 1924 |
| Dimensions & Displacement | |
| Displacement | 17,055 tonnes |
| Length | 179.83 metres |
| Beam | 24.38 metres |
| Draught | 9.14 metres |
| Performance | |
| Speed | 25 knots |
| Range | 12,390 kilometres at 10 knots |
| Complement | |
| Crew | 820 |
| Propulsion | |
| Machinery | Four-shaft Parsons direct-drive steam turbines, 31 Babcock & Wilcox boilers, 44,000 shp |
| Horsepower | 80,000 |
| Armament | |
| Guns |
|
| Other Armament | 2 x 18-inch torpedo tubes (broadside, submerged) |
| Awards | |
| Battle Honours | |
The Australian Navy’s first flagship, the battle cruiser HMAS Australia (I) was the centrepiece of the ‘Fleet Unit’, whose acquisition signalled the RAN’s arrival as a credible ocean going force.
Ordered from John Brown and Company in March 1910, construction began three months later with the total cost of the ship and fittings expected to be some £2 million.
The Commonwealth Government decided upon the name Australia, and it proved a popular choice, carefully avoiding any suggestion of favouritism towards any one Australian State. The ship’s badge maintained the national theme by featuring the Federation Star overlaid by a naval crown, while the motto ‘Endeavour’ reflected the ideal of the Australian spirit and recalled Lieutenant James Cook's ship of 1768-71.
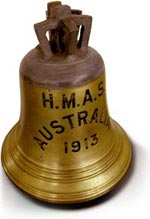
HMAS Australia (I)’s ship’s bell now preserved in the Naval Heritage Collection.
Notwithstanding some construction delays, John Brown delivered Australia (I) £295,000 under budget. Following successful gun, torpedo and machinery trials she commissioned as an Australian unit at Portsmouth, England, on 21 June 1913 under the command of Captain Stephen H Radcliffe, RN. Two days later the ship hoisted the flag of Rear Admiral George Edwin Patey, MVO (later Vice Admiral Sir George Patey, KCMG, KCVO), who had been selected to command the Australian Fleet.
In company with the new light cruiser HMAS Sydney (I), Australia (I) sailed from Portsmouth on 21 July 1913, and their voyage home was seen as a further opportunity to stimulate public awareness and naval sentiment around the British Empire. The appearance of the Australian warships would, the Sydney Morning Herald remarked, provide a practical demonstration of the RAN as a “thoroughly competent, efficient, and considerable force”. Australia (I) called in at Capetown where Patey and his officers were directed to extend every possible courtesy.
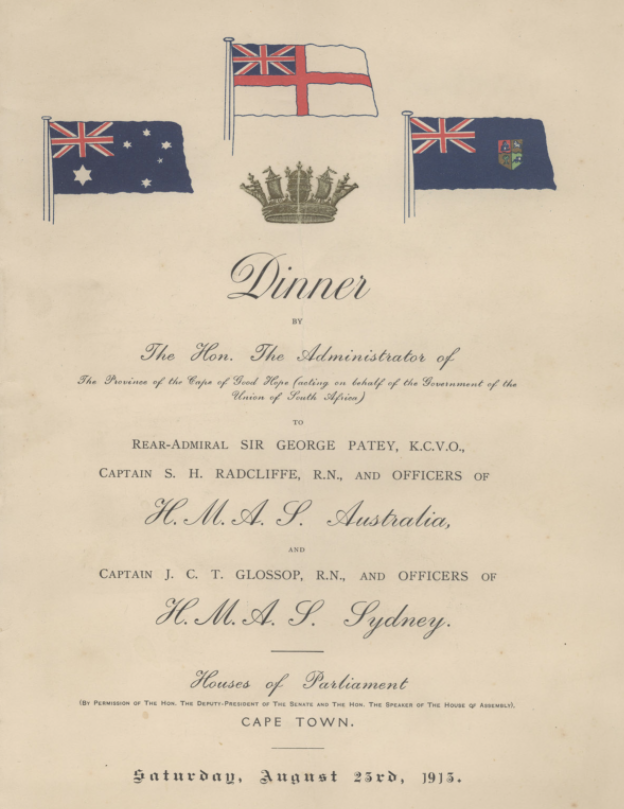
In Cape Town the officers of HMA Ships Australia (I) and Sydney (I) were hosted at the Houses of Parliament.
The visit proved very successful. It might not have altered South African defence plans, but it gave clear evidence that Australian authorities understood the diplomatic leverage they might obtain from the considered use of their new Navy. Charts showing HMAS Australia (I)’s trip to Australia (Midshipman Henry McWilliam Journal).
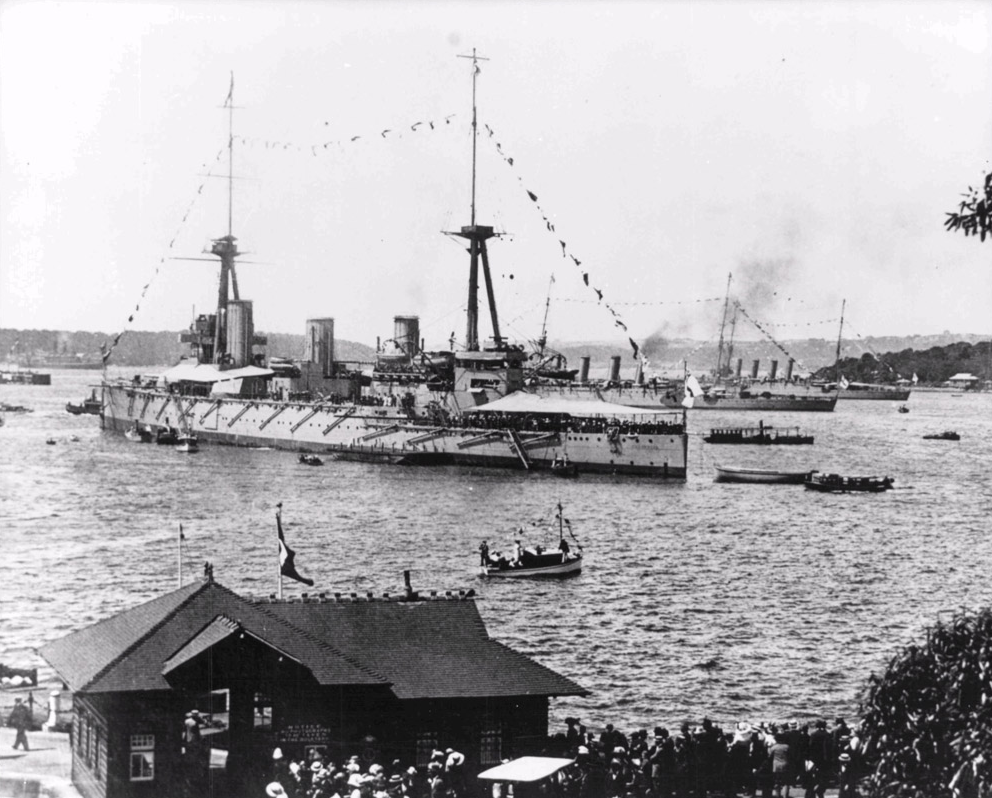
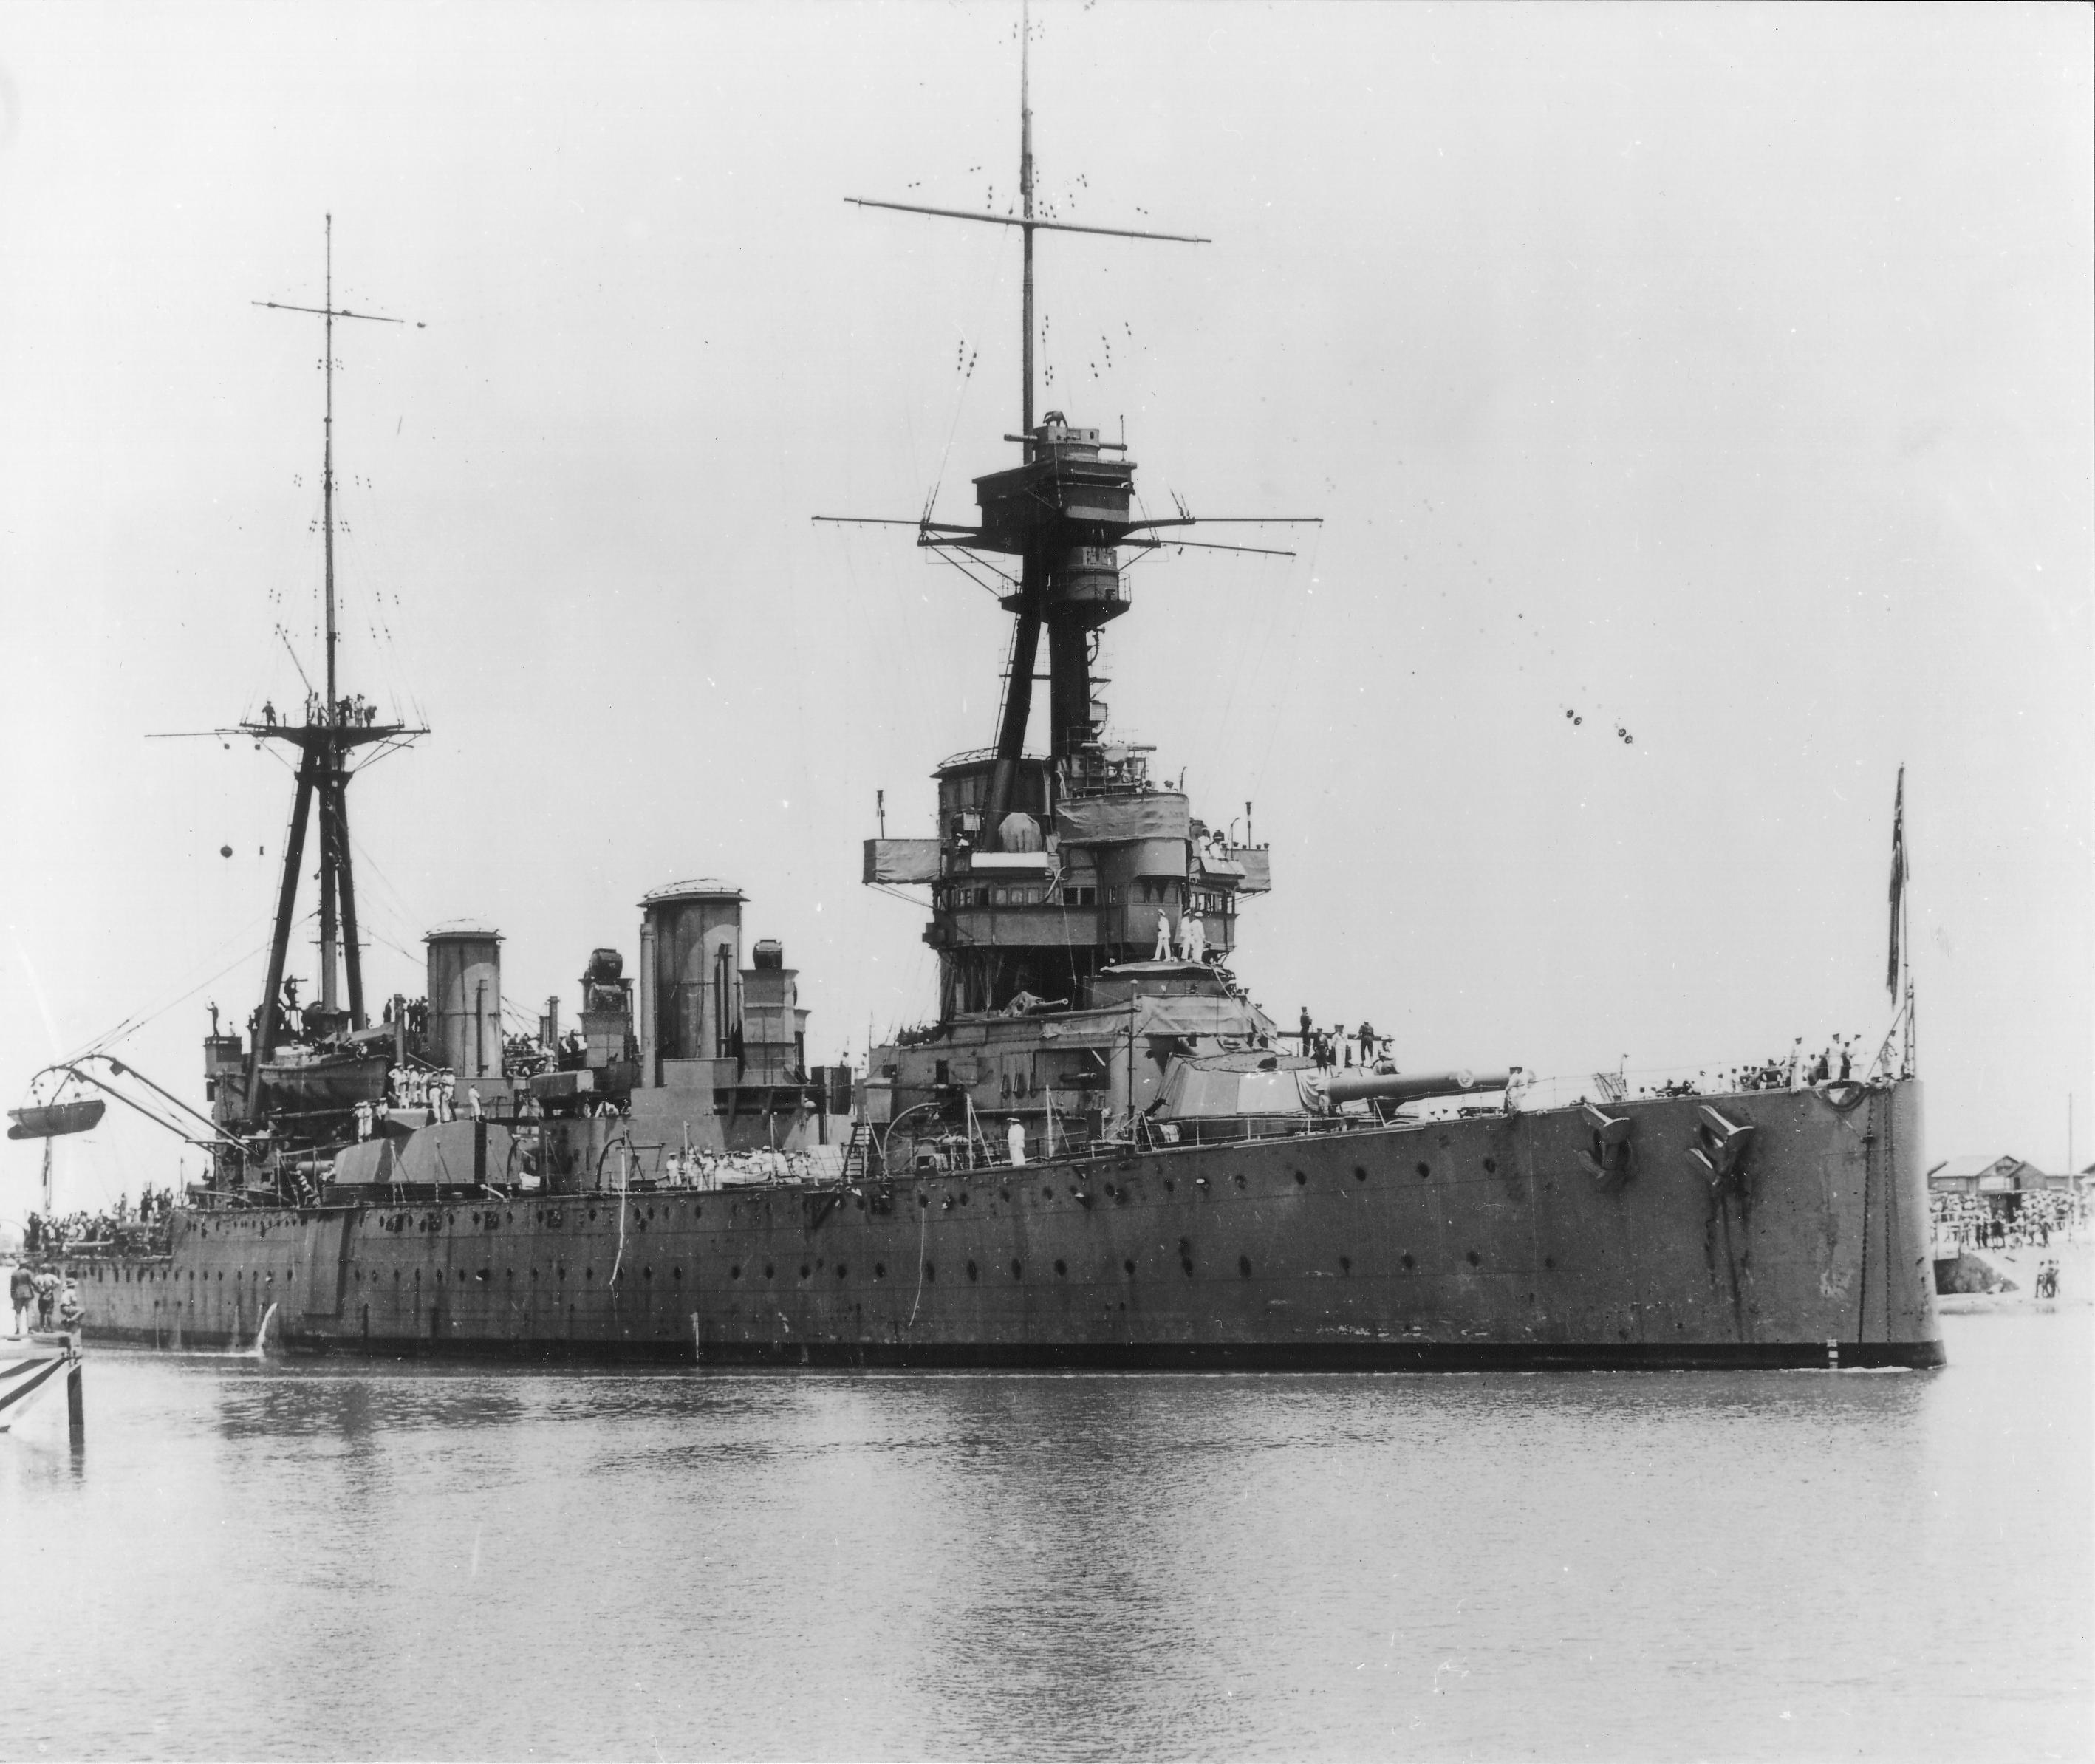
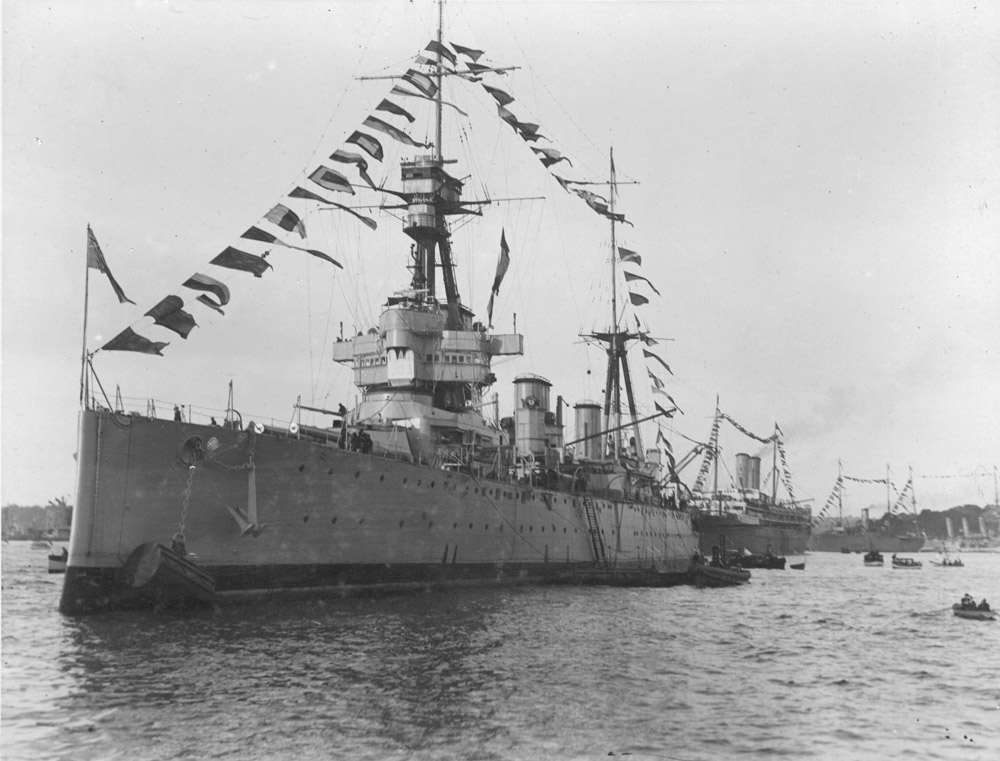
HMAS Australia (I) entering Sydney Harbour for the first time on 4 October 1913.
On the morning of 4 October 1913, Australia (I), leading the remaining ships of the Fleet Unit (the cruisers Melbourne (I), Sydney (I) and Encounter, and the destroyers Warrego (I), Parramatta (I) and Yarra (I)), entered Sydney for the first time. Port Jackson was no stranger to imperial and foreign warships, but the battle cruiser, both majestic and forbidding at the same time, was something different. She was the embodiment of the Commonwealth’s own sea power, and unquestionably superior to every other European warship in the Pacific. Already described as a “living sentient thing”, Australia (I)’s entry at the head of the fleet evoked a nationalistic euphoria never before experienced. “The sight of the Fleet meant more to the Australian people than the visit of any foreign fleet. It was our expression of patriotism, ships of defence bought in love of country and empire...” wrote the Sydney Mail, while the Australian Defence Minister, Senator Edward Millen, remarked:
Since Captain Cook’s arrival, no more memorable event has happened than the advent of the Australian Fleet. As the former marked the birth of Australia, so the latter announces its coming of age, its recognition of the growing responsibilities of nationhood, and its resolve to accept and discharge them as a duty both to itself and to the Empire. The Australian Fleet is not merely the embodiment of force. It is the expression of Australia’s resolve to pursue, in freedom, its national ideals, and to hand down unimpaired and unsullied the heritage it has received, and which it holds and cherishes as an inviolable trust. It is in this spirit that Australia welcomes its Fleet, not as an instrument of war, but as the harbinger of peace.
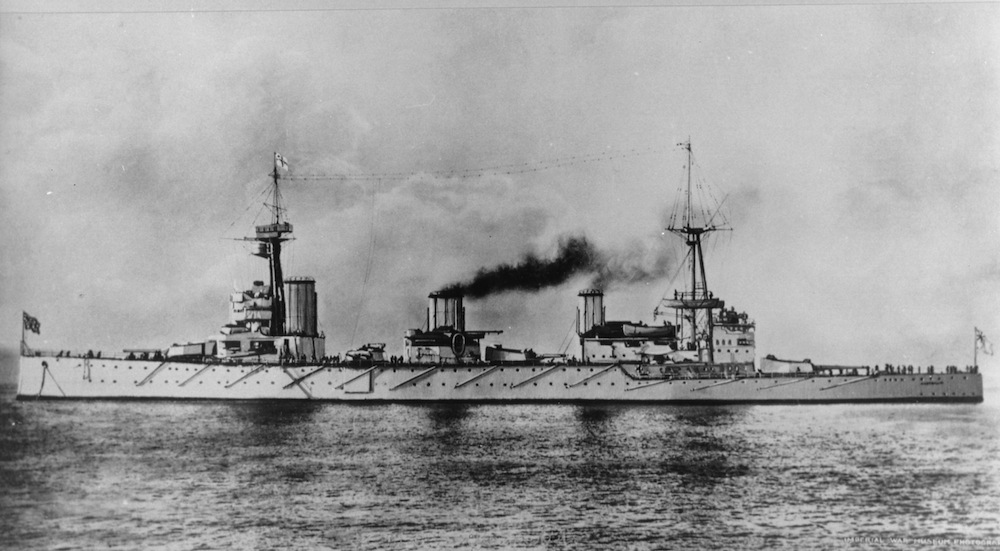
HMAS Australia (I) at sea in 1913.
Arrangements were made at the first opportunity for the flagship to visit many of the principal Australian ports. Within a year she had called at Albany, Port Lincoln, Hobart, Glenelg and Melbourne, and steamed as far north as Townsville in a deliberate attempt to showcase the Navy to the widest national audience. Australia’s popularity extended to mass entertainment and in addition to becoming the subject of several popular songs she played the starring role in the feature film ‘Sea Dogs of Australia’, which opened on 12 August 1914. Charts showing HMAS Australia (I)’s activities from August 1914 to January 1915 (Midshipman Henry McWilliam Journal).
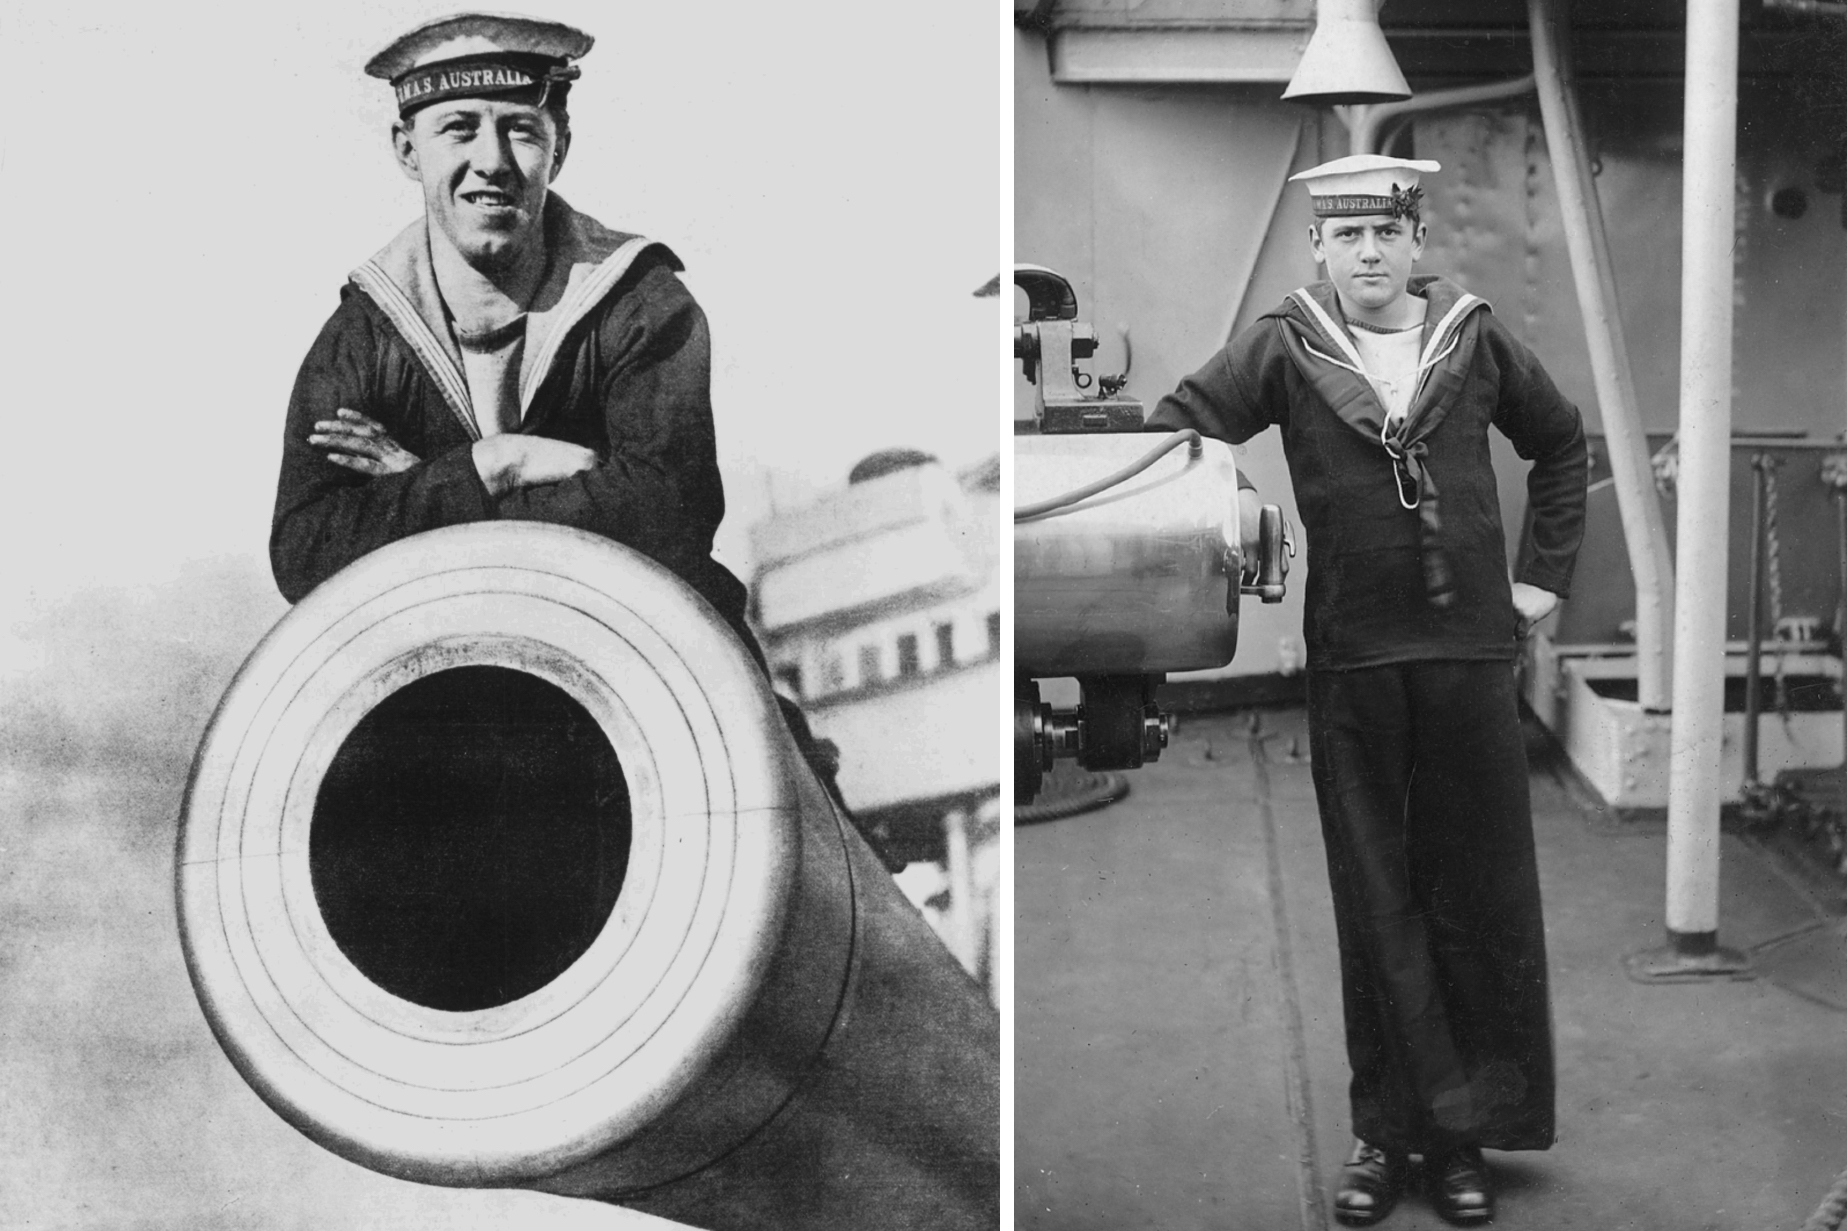
Those serving in HMAS Australia (I) took enormous pride in the RAN’s flagship.
On the outbreak of World War I Australia (I) operated (with other ships of the Australian Fleet) as a counter to the German East Asian Cruiser Squadron under Admiral Graf von Spee. The battle cruiser’s presence deterred von Spee from operating in local waters, and as Prime Minister WM ‘Billy’ Hughes later declared, “but for the Australia (I)...the great cities of Australia would have been reduced to ruins, oversea trade paralysed, coastal shipping sunk, and communications with the outside world cut off”. Australia (I) meanwhile kept busy, taking part in a series of operations to seize German Pacific colonies and destroy the enemy’s radio network. During these operations Australia (I) captured the German ship Sumatra.
For further details see Semaphore, Issue 7, August 2003: Before Gallipoli - Australian Operations in 1914.
In late December 1914 Australia (I) received orders to sail to England via the Pacific and reached Devonport on 28 January 1915. En route she captured and sank von Spee’s supply ship Eleonore Woermann (5000 tons) off South America. From Devonport Australia (I) proceeded to Rosyth in Scotland, where in February 1915 she became flagship of the 2nd Battle Cruiser Squadron, flying the flag of Rear Admiral Sir William Pakenham, KCB, MVO. The squadron as initially formed comprised Australia (I) and her two sister ships, HMS New Zealand and HMS Indefatigable. From then until 22 April 1916, Australia (I) was based at Rosyth accompanying the Battle Cruiser Fleet on a succession of sweeps, patrols, and convoy escort tasks across the length and breadth of the North Sea. The enemy was rarely if ever seen, and a shot at a suspected submarine on 30 December 1917 marked the only occasion when she fired her armament in anger.
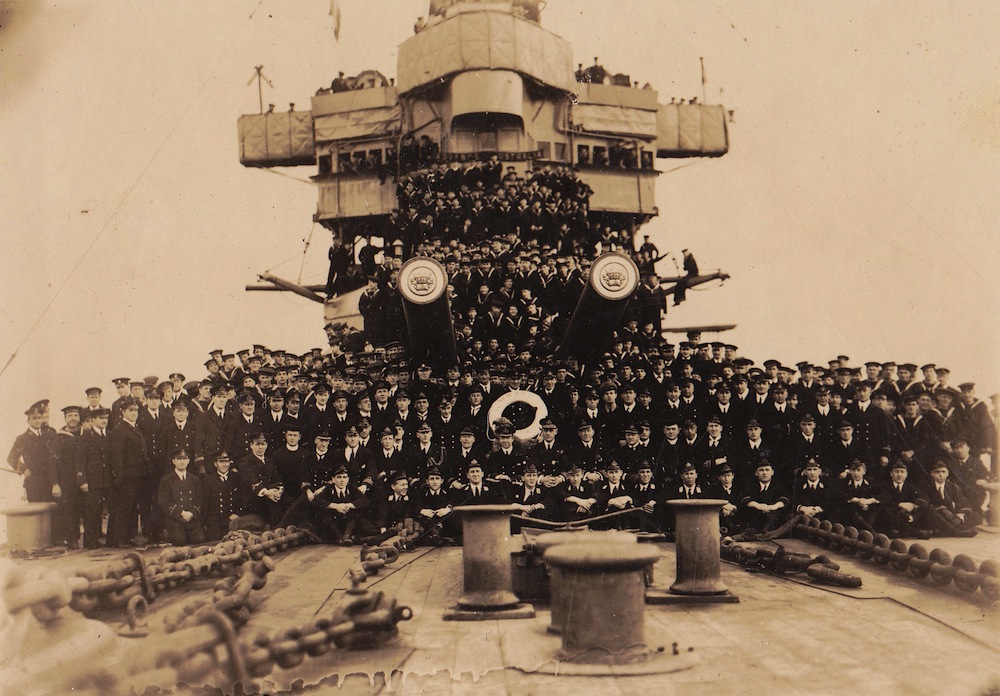
HMAS Australia’s ship’s company in 1918.
On 22 April 1916 Australia (I) collided with New Zealand in heavy fog and the damage kept her in dockyard hands until 9 June 1916. She thus missed the Battle of Jutland, her place as flagship of the 2nd Battle Cruiser Squadron being taken by New Zealand. On her return to service in June 1916, Australia (I) continued North Sea patrols as a unit of the British Grand Fleet until 12 November 1917, when another collision, this time with HMS Repulse, caused her to be docked for three weeks. Repairs completed, she resumed her generally uneventful routine of patrol and fleet exercises in the North Sea.
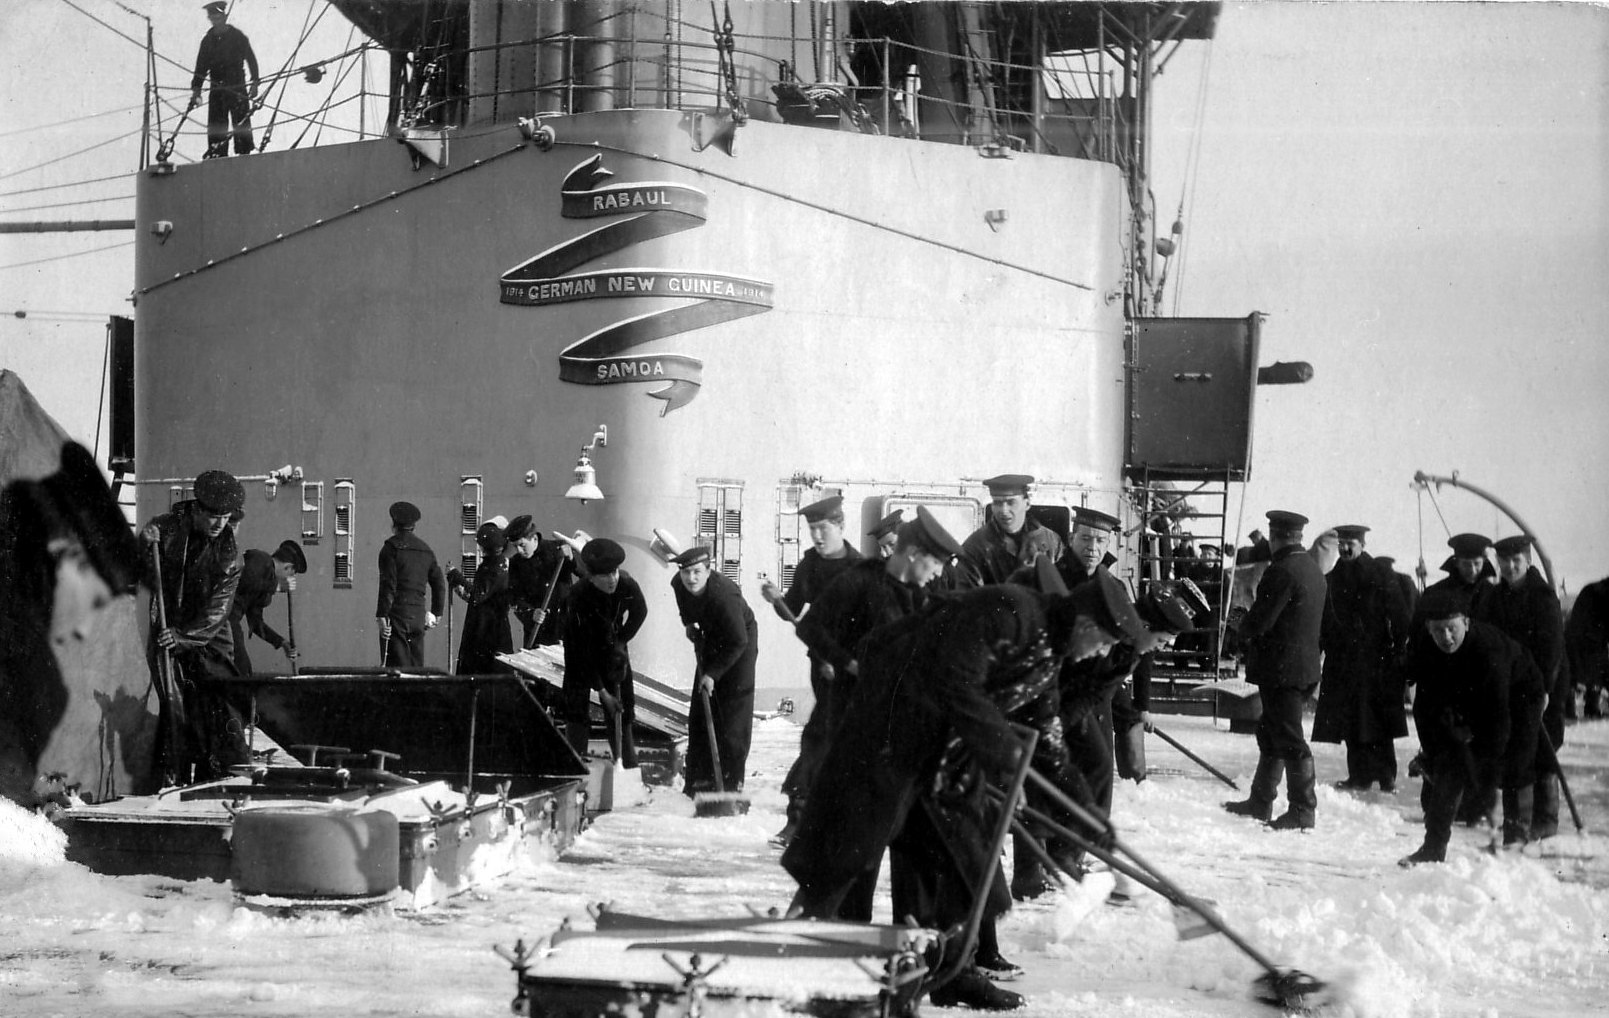
Clearing snow from HMAS Australia’s upper decks during a northern winter.
The routine was briefly broken by a call in February 1918 for volunteers for special service. In April, one officer and ten ratings from Australia (I) found themselves among 1300 other volunteers taking part in a bold commando raid on the occupied Belgian ports of Ostend and Zeebrugge. The Australians acquitted themselves well, with six receiving awards for bravery.
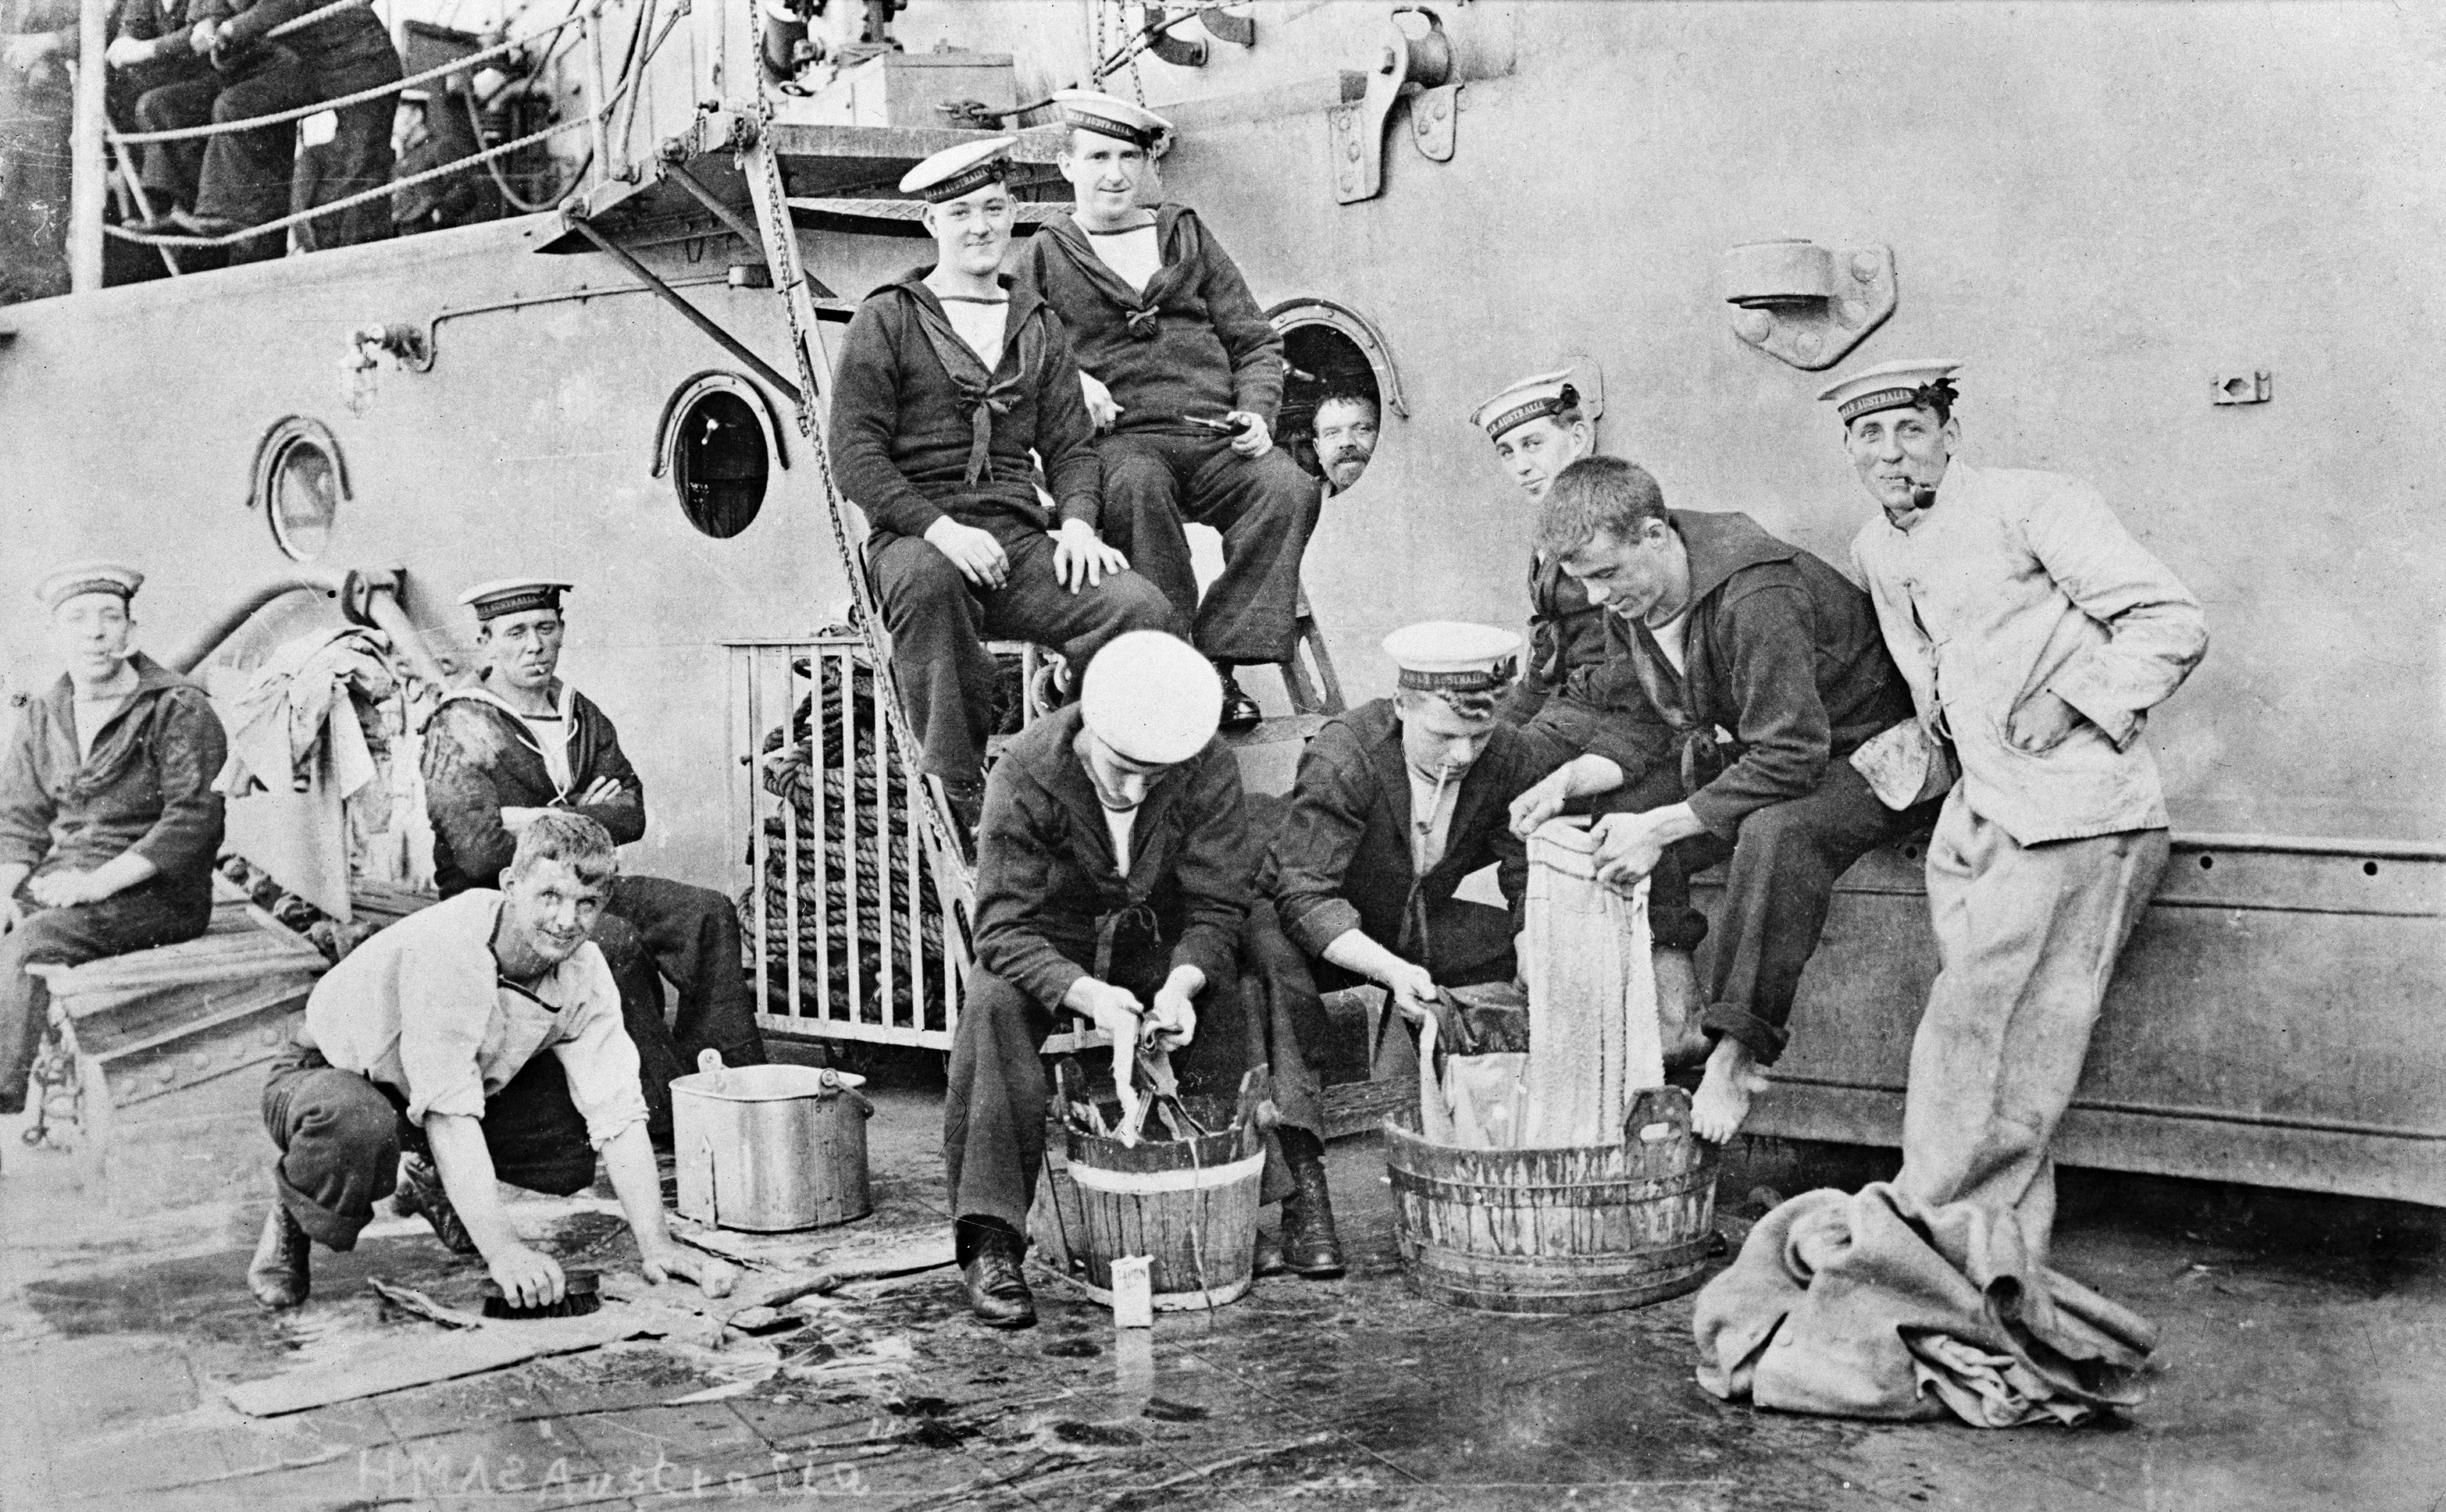
HMAS Australia (I) ratings take time out to wash (dhobey) articles of kit on the upper deck.
The last year of the war also saw Australia (I) used for aircraft experiments, with the ship’s echelon turrets being thought to offer better wind exposure and a safer take-off position than alternative warships. On 7 March 1918 Australia (I) successfully launched a Sopwith 1½ Strutter from a platform erected on one of her 12-inch gun turrets. This was the first ever launching of a two-seater aircraft from a battle cruiser. Australia (I) would go on to achieve the first take-off with a full load on 4 April 1918 and launch several more flights without difficulty, including one at anchor. By the end of the war nearly every British capital ship carried a Strutter for reconnaissance and a Sopwith Pup or Sopwith Camel as a fighter.
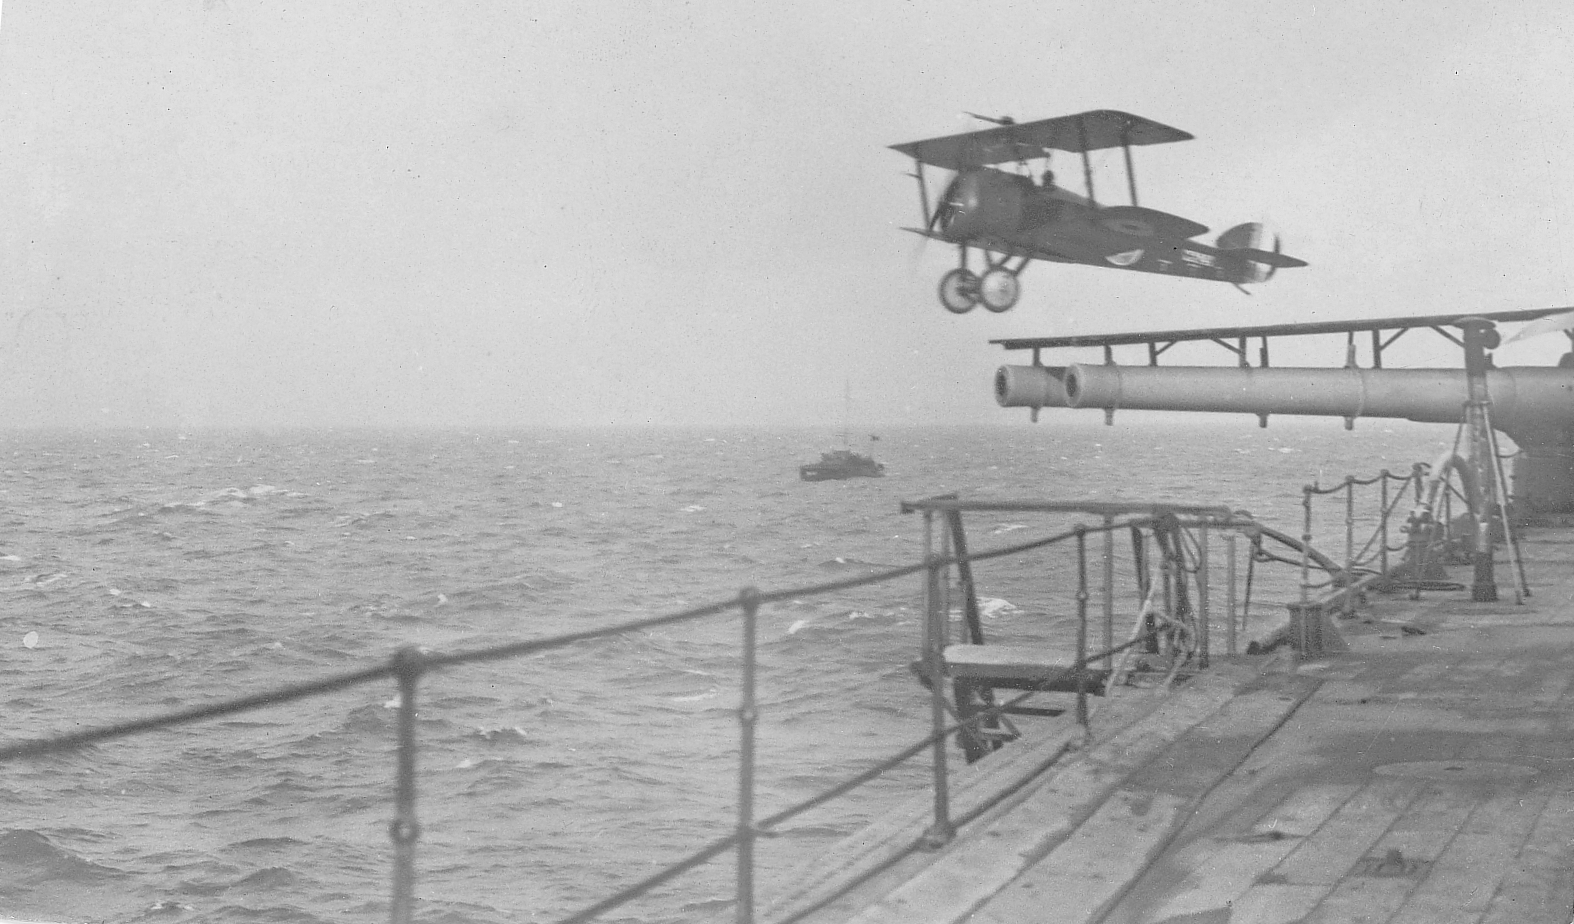
The moment of launch during an early aircraft trial conducted on board HMAS Australia (I).
On 11 November 1918, the signing of the Armistice brought the fighting in Europe to an end. On 21 November, the Grand Fleet came out from the Firth-of-Forth in two divisions to meet the German High Seas Fleet steaming across the North Sea to be interned at Scapa Flow. Australia (I) had the honour of leading the port line at the head of her squadron. Melbourne (I) and Sydney (I) were also there, taking their place among the light cruisers. After anchoring, each enemy ship was allocated a guard-ship. Australia (I) was given charge of the latest German battle cruiser Hindenburg.
HMAS Australia (I) passing through the Suez Canal during her voyage back to Australia in 1919.
On 23 April 1919 Australia (I) sailed from Portsmouth arriving in Fremantle on 28 May for a four day visit. As she prepared to leave, a body of more than 80 ratings assembled on the quarterdeck and requested that the sailing be delayed so that they could entertain civilian friends and repay their generous hospitality. The men’s request was conveyed to the Commanding Officer, Captain Claude Cumberlege, RN, who indicated that delay was impossible; the group dispersed, muttering their displeasure. When Cumberlege gave the order to “let go aft”, a report came to the bridge that the stokers on watch had left the boiler rooms. The incident spread no further, but some time passed before the ship could sail. After an internal investigation, twelve men were arrested and charged with mutiny, although only five were subsequently court-martialed and gaoled. Australia (I) finally reached Sydney on 15 June 1919 after an absence of 1775 days.
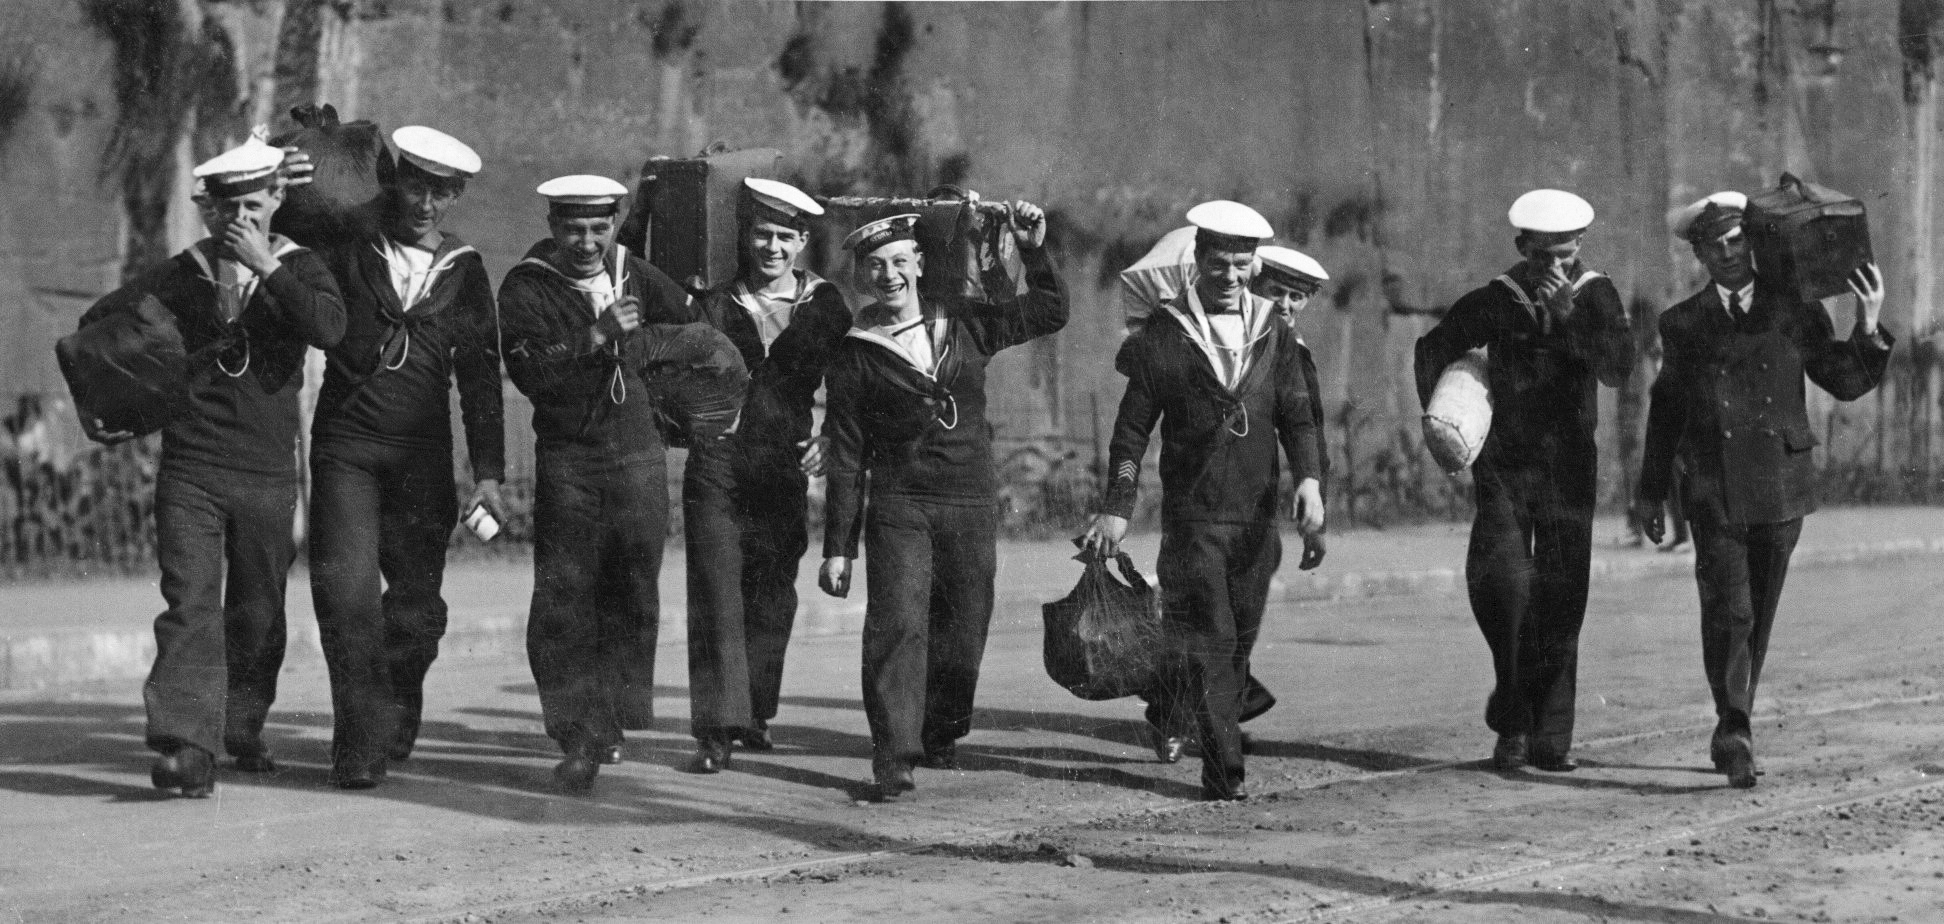
HMAS Australia (I) ratings proceeding on short leave following the cessation of hostilities.
HMAS Australia (I) dressing ship in honour of the Prince of Wales’ visit in 1920.
After returning home Australia (I) resumed the role of RAN flagship. A year later she played the leading part in the naval activities associated with the visit of the Prince of Wales in HMS Renown, but her time was rapidly running out. The battle cruiser had always consumed a large proportion of the Navy’s budget and manpower, and as funding was reduced the Navy decided that resources could be better applied elsewhere. She was given a nucleus crew and her role downgraded to that of a gunnery and torpedo drill ship at Flinders Naval Depot with a secondary role as a fixed defensive battery. In November 1921 she returned to Sydney and the following month was paid off into reserve on 12 December 1921. Less than three years later she was prepared for scuttling to comply with the terms of the Washington Naval Treaty of 1922, which provided for a reduction in naval strengths.
For further discussion see Semaphore, Issue 5, May 2004: A Loss More Symbolic Than Material?
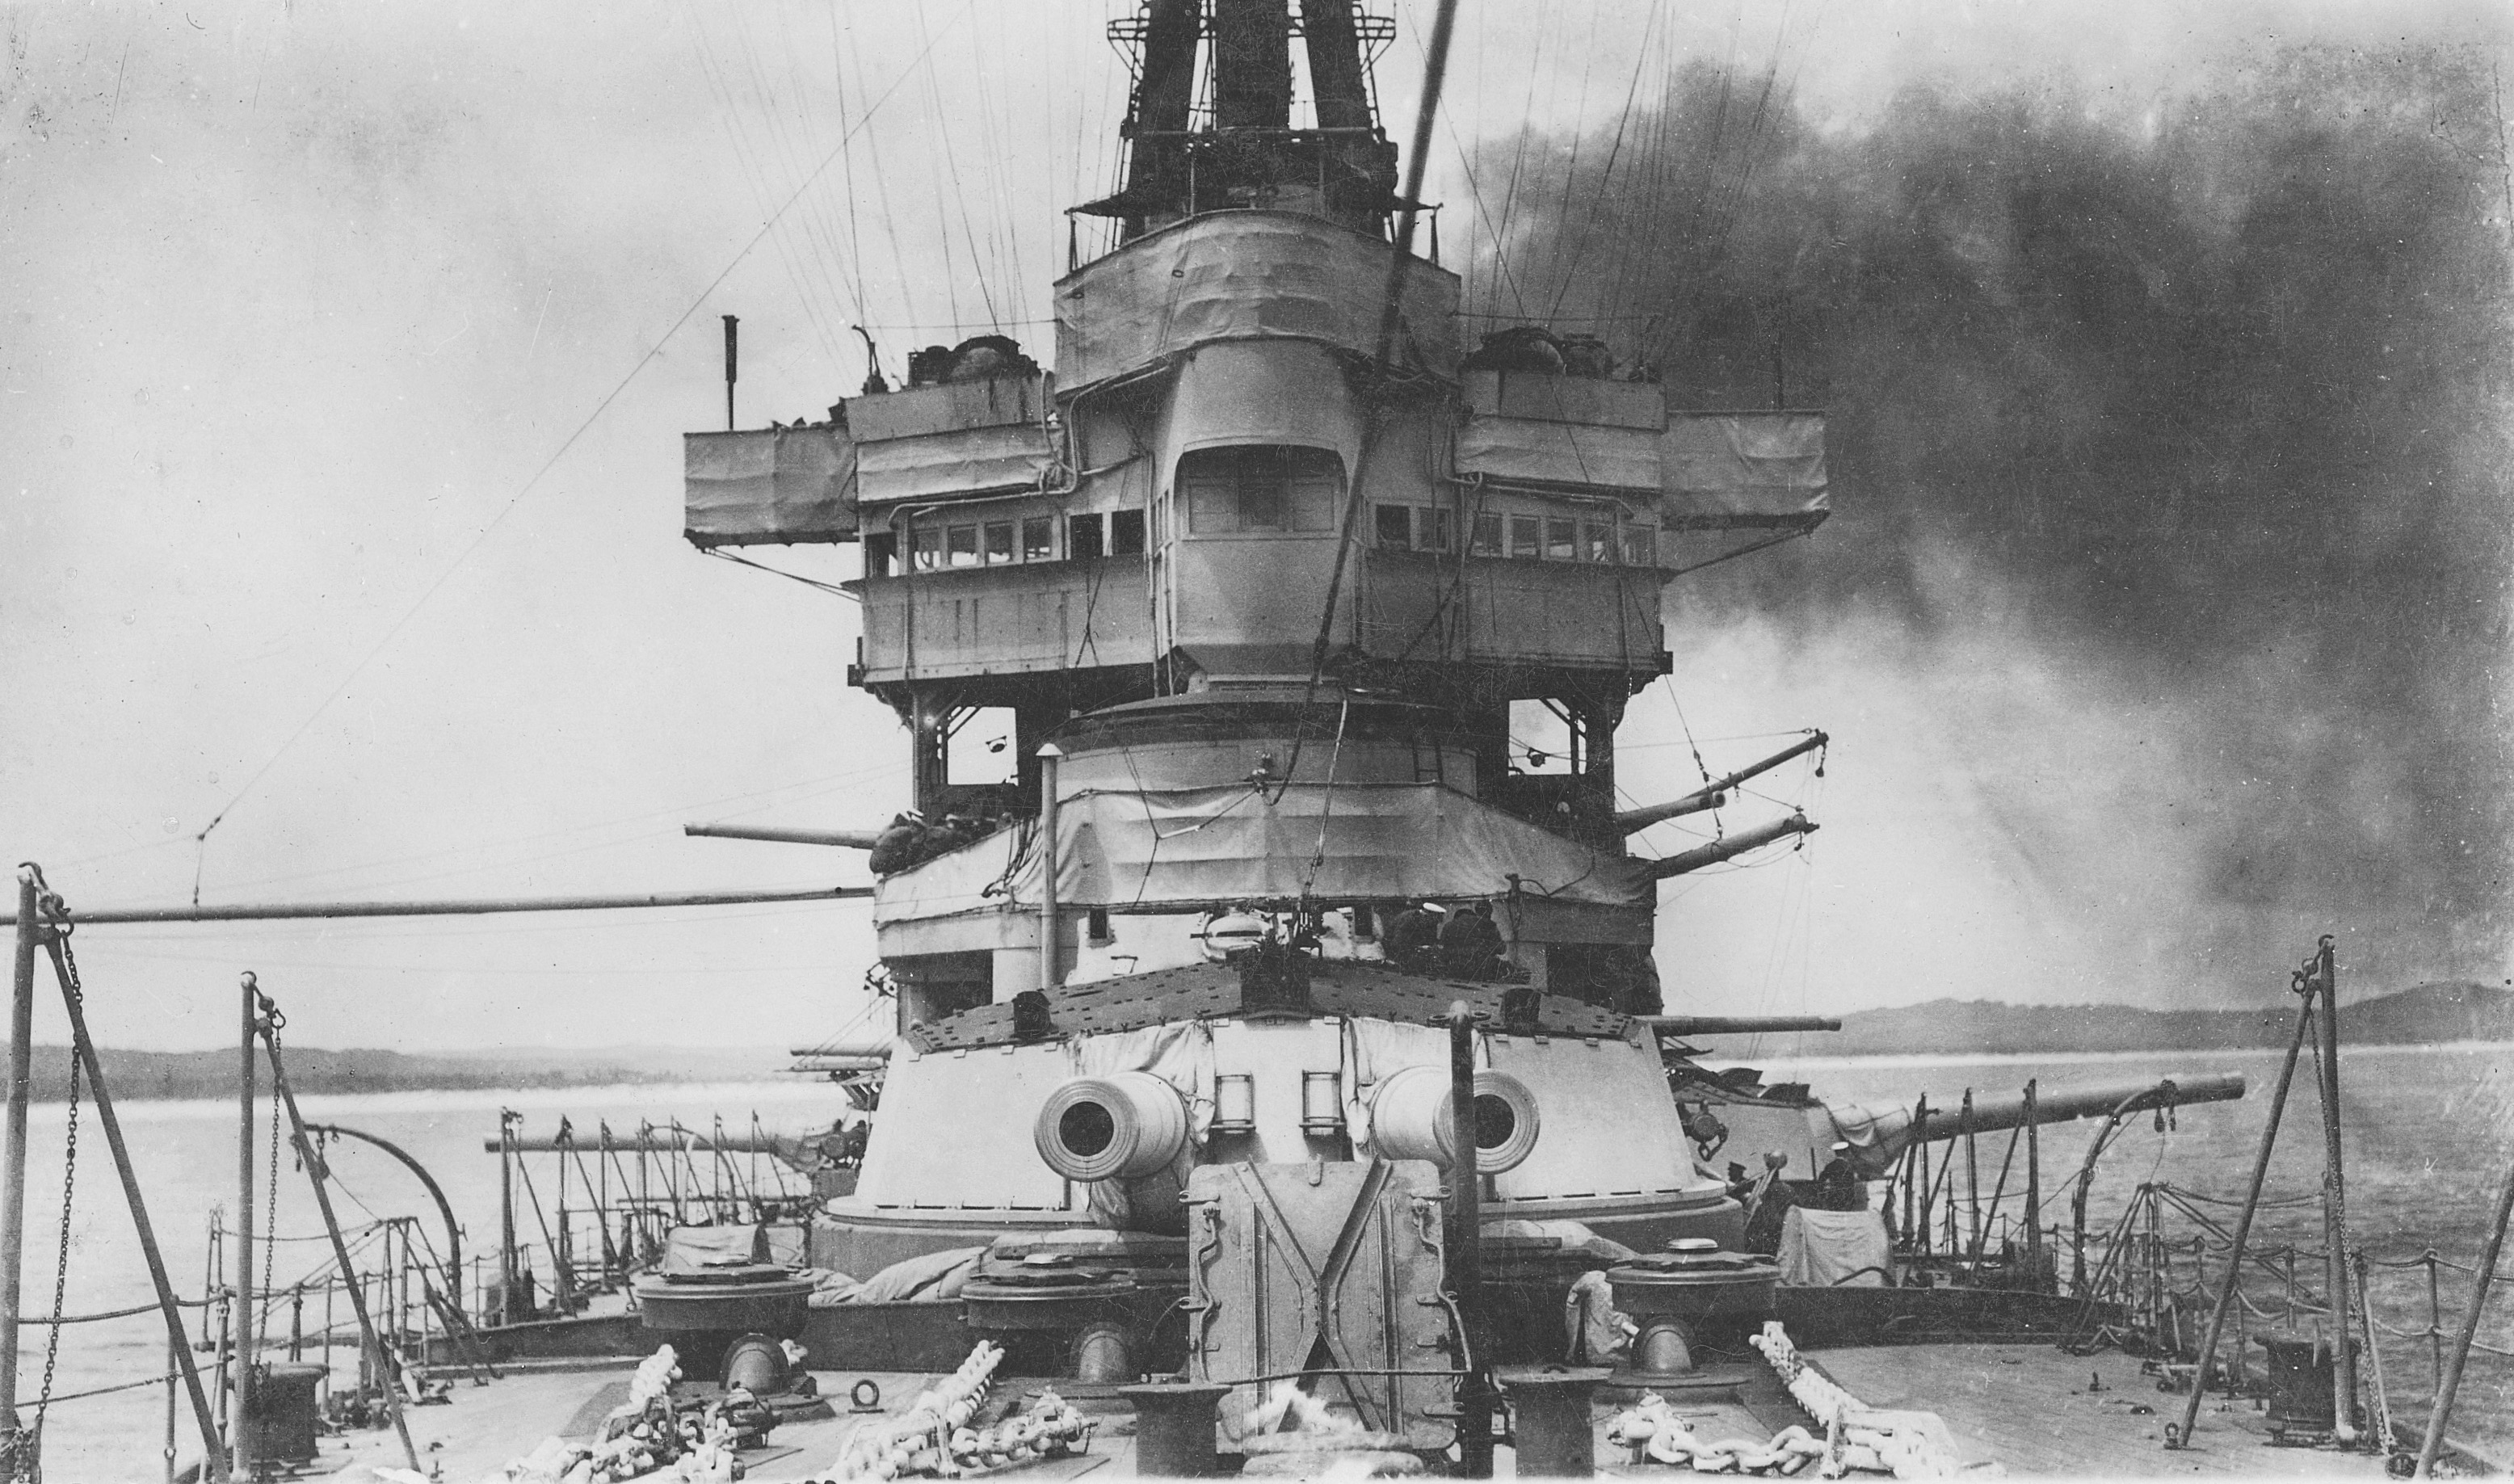
Australia’s foc’sle and forward superstructure. Maintaining the battle cruiser was a full-time job for her seamen.
The RAN had already removed some of the ship’s equipment for use in other warships, and now began the deliberate scrapping of Australia (I) by extracting piping and other small fittings. In all more than £30,000 worth of materiel was retained for future naval use, while a further £35,000 worth of fittings was removed and allocated to the Universities and Technical Colleges of the various states. At least some of these items remained in regular use as teaching aids for over fifty years. On 2 January 1924 the Defence Minister signed a contract with a syndicate which undertook to remove everything else of value for the sum of £3000. The syndicate also secured the rights to sell parts of the vessel to the public as souvenirs. The task remained great, but 359 men in two shifts had by 3 February rendered Australia (I) unfit for warlike service.
She was towed to sea by tugs and sunk along with her main armament in position 095 degrees, 24 miles from Inner South Head, Sydney, on 12 April 1924. Prime Minister Stanley Bruce provided a heartfelt eulogy that was widely reported on the night after her sinking:
In the prime of her service, this the first great ship of the young Australian Navy, was our contribution to the defence of civilisation. In her passing she symbolises our contribution to the cause of peace. We sacrifice her with a regret rendered poignant by the memory of her great service, but tempered with the hope that the world will see the magnitude of our offering, and the manner in which we make it, a measure of our practical belief in the principles enunciated at the Washington Conference, which constitute the only hope of a permanent international peace. The passing of Australia (I) closes a glorious chapter in the history of the Australian Navy. We shall never forget that in the eventful days of 1914, when the fate of civilisation hung in the balance, it was the presence of Australia (I), manned by Australian seamen, that saved our shores and our shipping from the fate which overtook less fortunate nations.
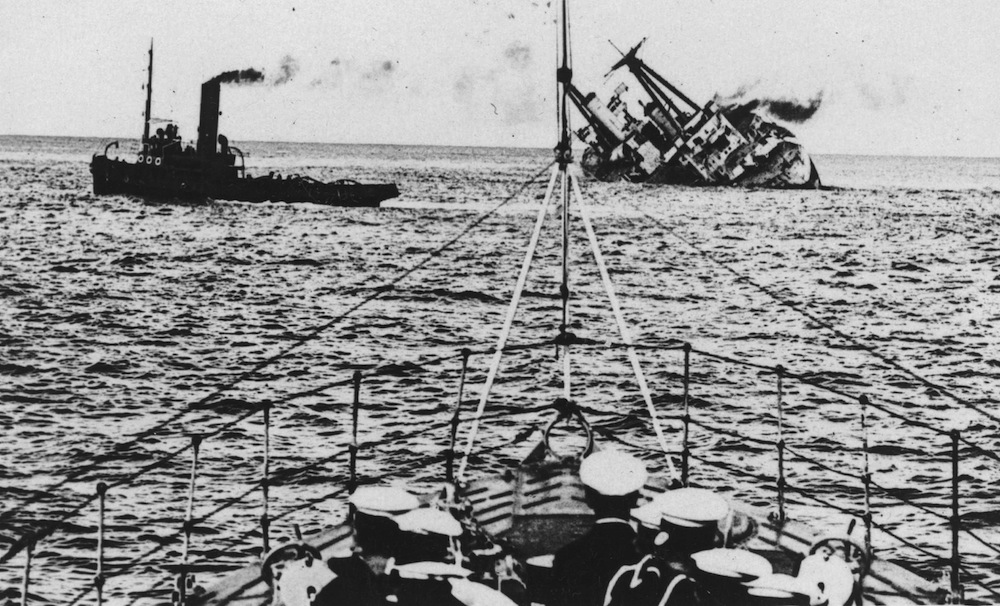
HMAS Australia (I) being scuttled off the coast of Sydney on 12 April 1924.
The following officers flew their flags in HMAS Australia (I):
- Vice Admiral Sir George Edwin Patey, KCMG, KCVO
- Rear Admiral Sir William Christopher Pakenham, KCB, MVO
- Rear Admiral Arthur Cavenagh Leveson, CB
- Rear Admiral Sir Lionel Halsey, KCMG, CB
- Rear Admiral John Saumarez Dumaresq, CB, CVO
Memorials
Australia (I)’s fame ensured that relics were retained widely around Australia. For example, her steam siren remained in use for many years on top of the Powerhouse in Canberra, while the table from the Admiral’s cabin is now on display in the Senate Opposition Party Room at Parliament House, Canberra. Several Australian streets are also named after the first flagship including one in St Marys, NSW, where in 1919 the new streets in the Oxley Park subdivision were all named after Australian warships.
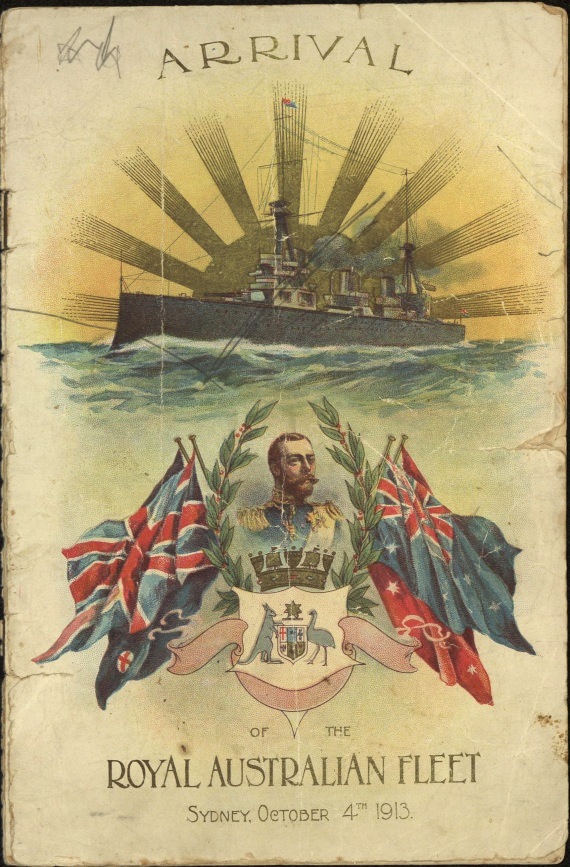
Arrival of the Royal Australian Fleet Programme.
Commanding Officers of HMAS Australia (I)
| 21 Jun 1913-23 Dec 1916 | Captain Stephen Herbert Radcliffe, RN |
| 24 Dec 1916-30 Aug 1918 | Captain Oliver Backhouse, CB, RN |
| 01 Sep 1918-07 Apr 1919 | Captain Thomas Norman James, RN |
| 08 Apr 1919-20 Sep 1920 | Captain Claude Lionel Cumberlege, RN |
| 21 Sep 1920-31 Mar 1921 | Captain Stanley Ray Miller, RN |
| 01 Apr 1921-14 May 1921 | Commander Francis Henry Brabant, RN |
| 15 May 1921-20 Jul 1921 | Commander Owen Christopher Hare, RN |
| 21 Jul 1921-10 Oct 1921 | Acting Commander Charles Everard Hughes White, DSO,RN |
| 10 Oct 1921-12 Nov 1921 | Commander Maurice Baldwin Raymond Blackwood, DSO, RN |
| 12 Nov 1921-17 Nov 1921 | Captain Stanley Ray Miller, RN |
| 17 Nov 1921-12 Dec 1921 | Commander Maurice Baldwin Raymond Blackwood, DSO, RN |
