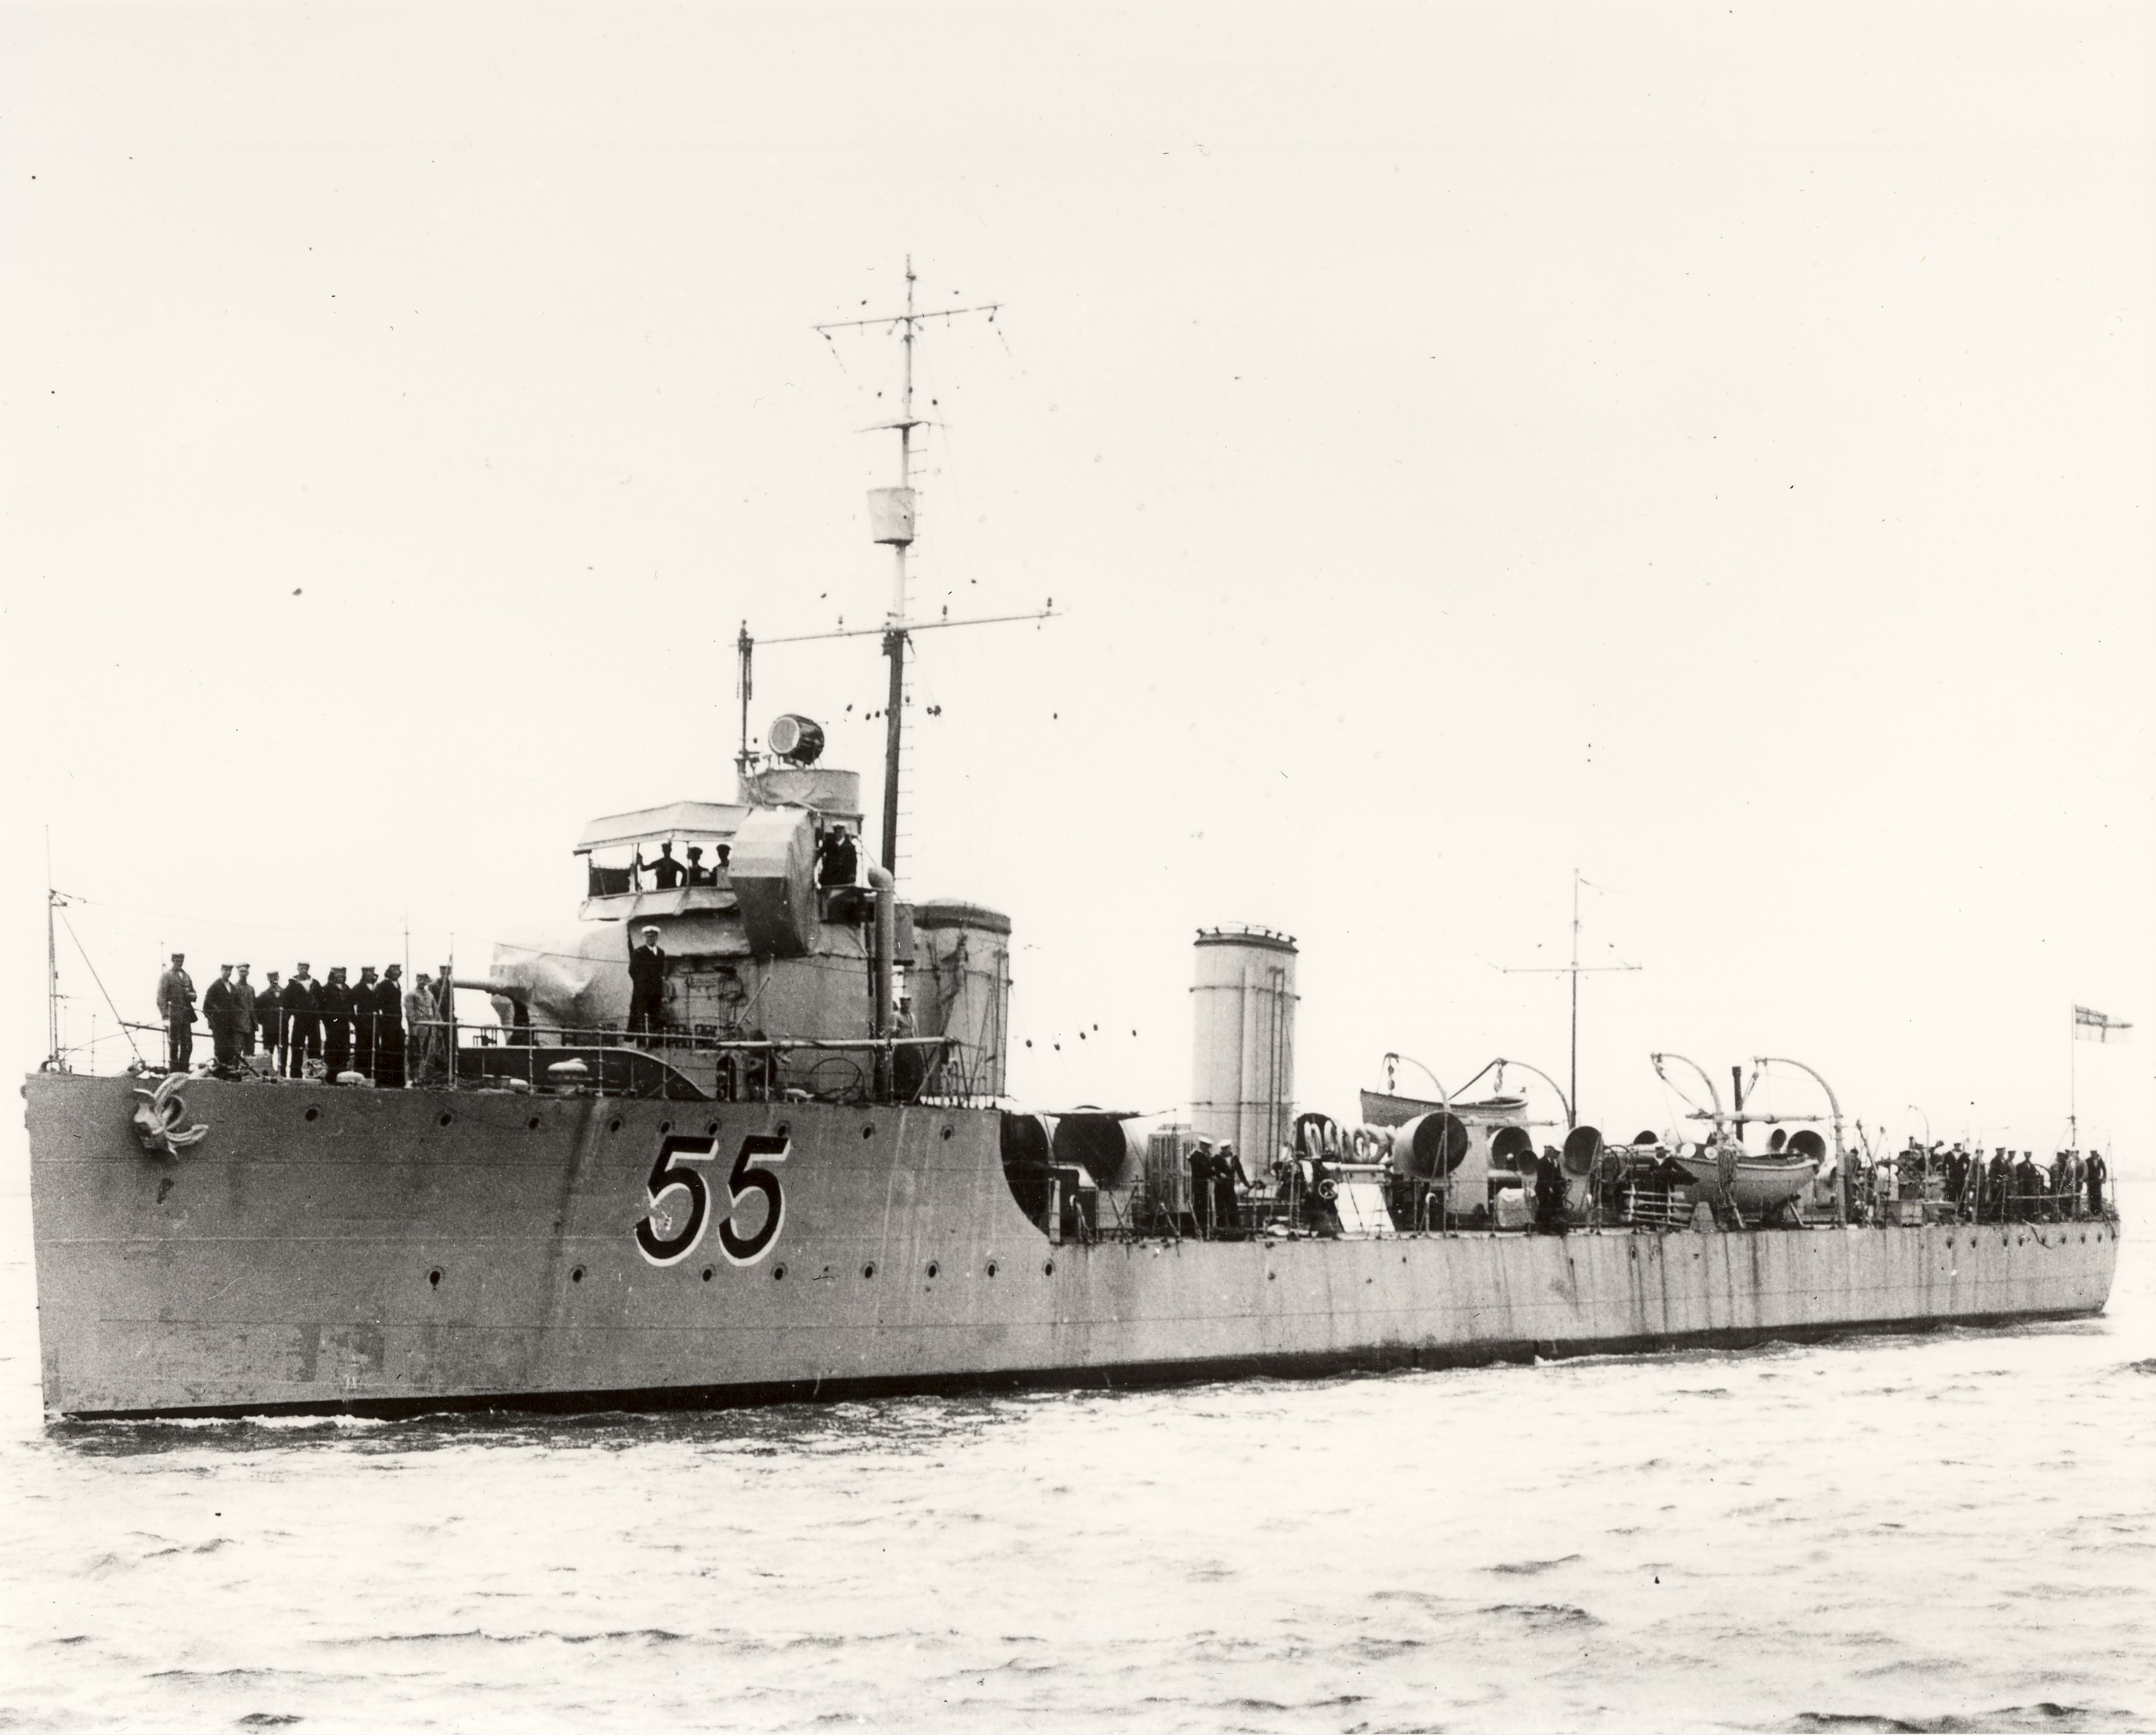
HMAS Parramatta (I)
HMAS
Parramatta
(I)
 |
| Class |
River Class |
|---|---|
| Type |
Torpedo Boat Destroyer |
| Pennant |
D55 |
| Builder |
Fairfield Shipbuilding & Engineering Co Ltd, Govan, Glasgow |
| Launched |
9 February 1910 |
| Launched by |
Mrs Asquith, wife of the British Prime Minister |
| Commissioned |
10 September 1910 |
| Decommissioned |
22 July 1919 |
| Dimensions & Displacement | |
| Displacement | 700 tons |
| Length | 245 feet |
| Beam | 24 feet 3 inches |
| Draught | 8 feet 6 inches |
| Performance | |
| Speed | 26 knots |
| Propulsion | |
| Machinery | Parsons turbines |
| Horsepower | 10,000 |
| Armament | |
| Guns |
|
| Torpedoes | 3 x 18-inch torpedo tubes |
| Awards | |
| Battle Honours | |
HMAS Parramatta (I) was one of six River Class torpedo boat destroyers built for the Royal Australian Navy during the period 1909-16. During World War I they formed the Australian Destroyer Flotilla. Sister ships were HMA Ships Huon (I), Swan (I), Torrens (I), Warrego (I) and Yarra (I).
HMAS Parramatta (I) was laid down by Fairfield Shipbuilding and Engineering Company Limited, at their shipyard in Govan, Scotland on 17 March 1909. She was launched on 9 February 1910 by Mrs Margot Asquith, wife of British Prime Minister Herbert Asquith. Parramatta (I) was the first new ship launched for the Australian Navy followed by her sister ship HMAS Yarra (I).
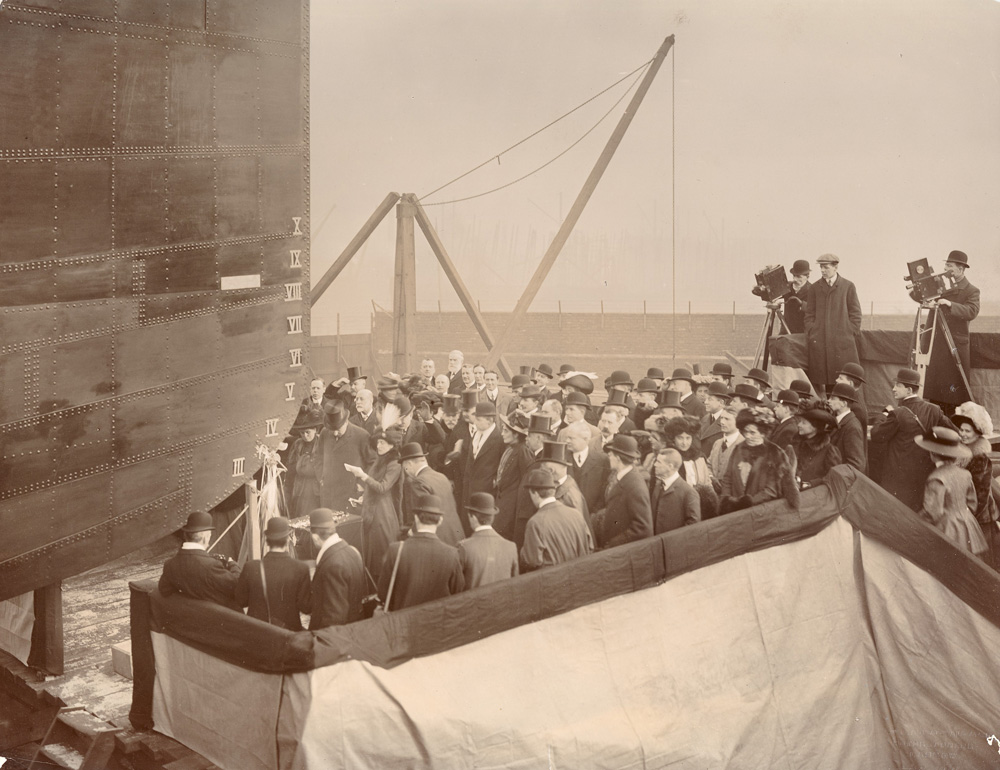
Launching of HMAS Parramatta (I) on 9 February 1910 by Mrs Asquith, wife of British Prime Minister Herbert Asquith.
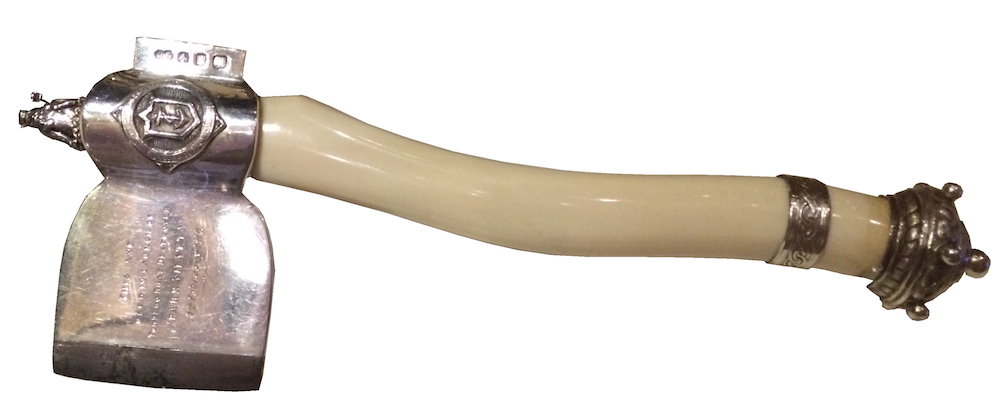
The ceremonial axe used to launch HMAS Parramatta (I), now in the collection of the Australian War Memorial.
She was commissioned as HMS Parramatta at Greenock on 10 September 1910 under the command of Captain Frederick Tickell CMG CNF and departed Portsmouth on 19 September 1910 as a Royal Navy ship for the voyage to Australia, and proceeding via Suez in company with her sister ship Yarra and escorted by HMS Gibraltar, arrived at Broome, Western Australia, on 15 November, where the two destroyers passed to the control of the Australian Government.
At the outbreak of World War I, Parramatta (I), with her sister ships Warrego (I) and Yarra (I), formed the destroyer component of the Australian Fleet commanded by Vice Admiral Sir George E Patey, RAN.
The captain and crew of the Australian Destroyer HMAS Parramatta (I) are greeted on her arrival in Fremantle, November 1910.
During the opening phases of the war she operated with the fleet in the search for Von Spee's Pacific Squadron. Later she took part in the capture of the German Colonies in the South West Pacific, and a number of her sailors were landed at Kabakaul (New Britain), under the command of Lieutenant Gerald Hill RNR, of HMAS Yarra (I) to take part in the operations ashore against the Germans. Parramatta (I) was present at the surrender of German New Guinea at Rabaul on 13 September 1914.
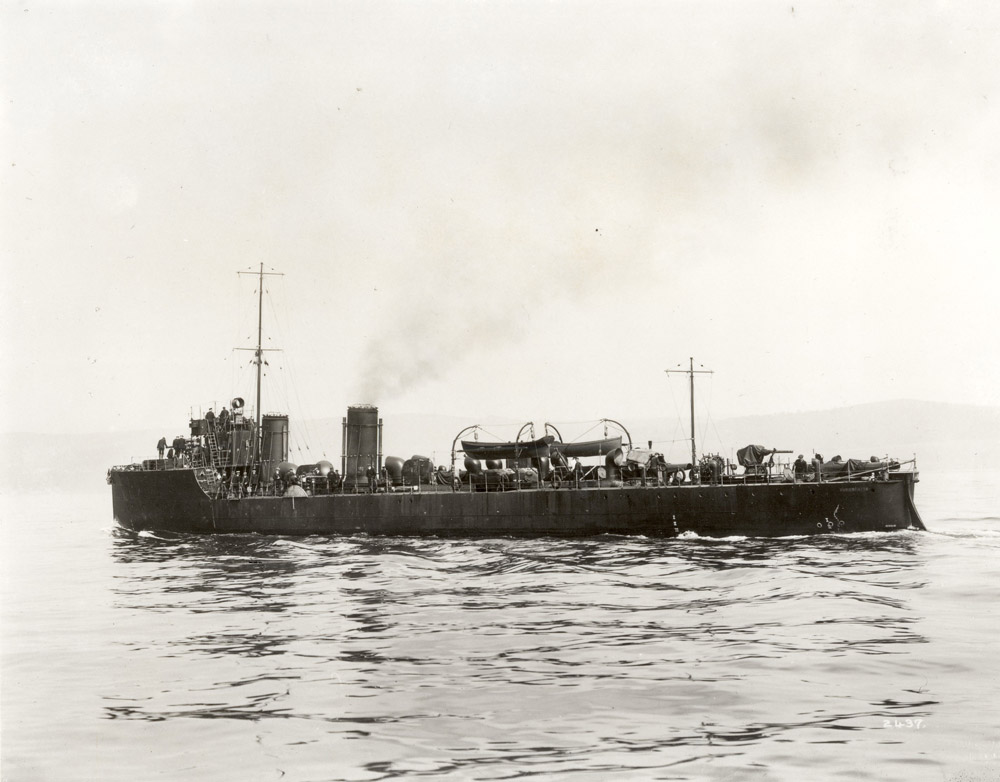
HMAS Parramatta (I) leaving harbour, circa 1913-14.
HMAS Parramatta (I) remained in New Guinea waters after the departure of the fleet (HMA Ships Australia (I), Melbourne (I) and Sydney (I) on 17 September 1914, and in company of Yarra (I) and Warrego (I) assisted in the consolidation of the Australian occupation of New Guinea and New Britain.
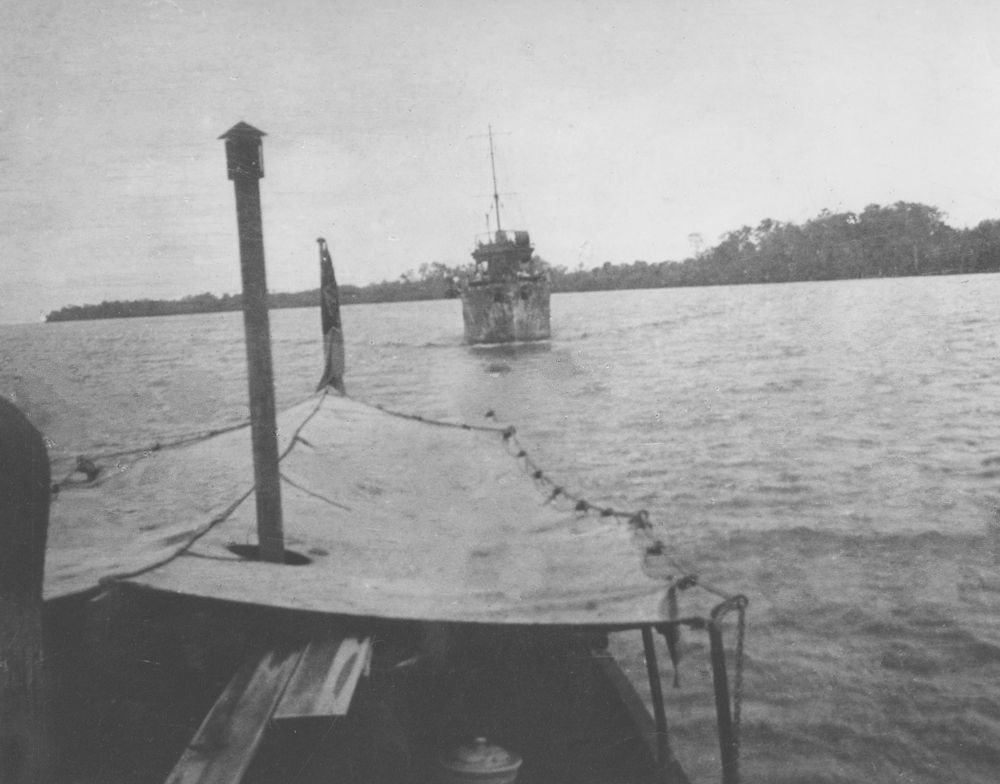
HMA Ships Parramatta (I) and Warrego (I) navigate the Sepik River New Guinea, December 1914.
In December all three ships proceeded up the Sepik River, and in January 1915 visited Morobe, Finschhafen and other points on the coast, cruising also to neighbouring island groups including the Admiralty Islands. On 5 February 1915 the three destroyers finally left Rabaul to return to Australia.
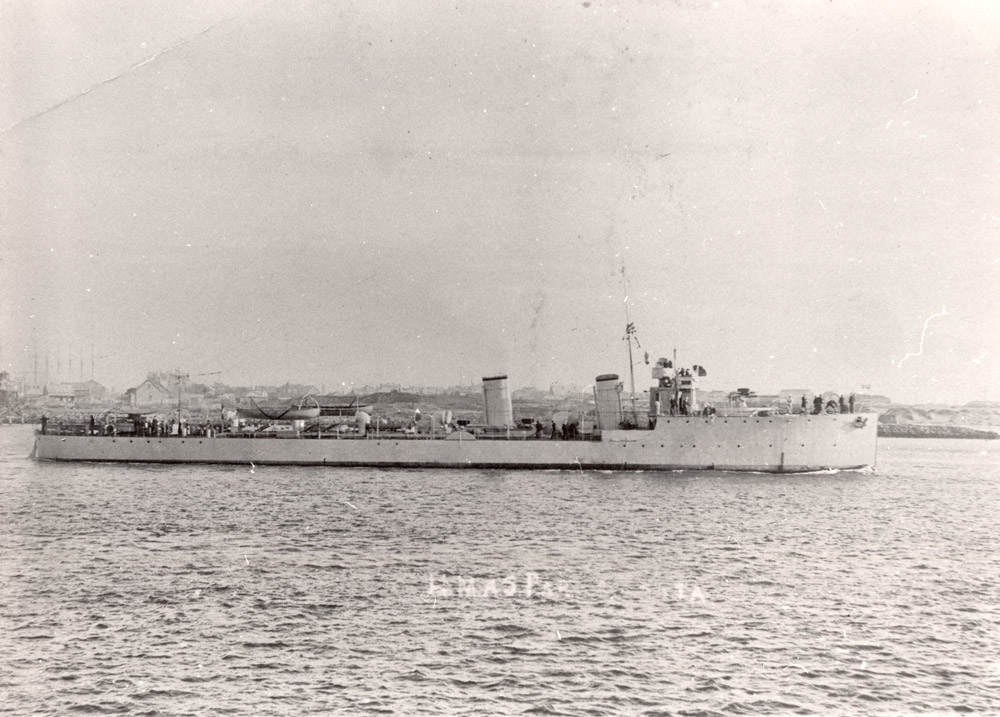
HMAS Parramatta (I) wearing her early wartime paint scheme.
For several months after her return to Sydney, Parramatta (I) remained on the Australian coast. On 27 April the Flotilla left Port Phillip on a cruise which included visits to Jervis Bay, Port Jackson, Port Stephens and points along the Barrier Reef. By mid-June 1915 the three destroyers reached Cairns and thereon began the return south patrolling and exercising en route. On 23 August they returned to Sydney for refit.
In November 1915 Parramatta (I), Yarra (I) and Warrego (I) proceeded to Sandakan in Borneo and based there, the Flotilla spent the next six months patrolling Malayan, East Indies and Philippine waters. On 17 July 1916 Parramatta (I) returned to Sydney.
HMAS Parramatta (I) spent the period of September 1916 to May 1917 on patrol in Australian waters. On 10 May 1917 she sailed from Sydney in company of Yarra (I) and Warrego (I) for the Mediterranean, being joined en route by Swan, Huon and Torrens to form an Australian Flotilla of six destroyers. Following a period of training the ships were based on Brindisi on the heel of Italy for Adriatic anti-submarine patrols. On this work the destroyers were responsible for blocking the southward passage of submarines through the Adriatic Narrows into the Mediterranean and also the safe transit of Italian transports to and from Albania.
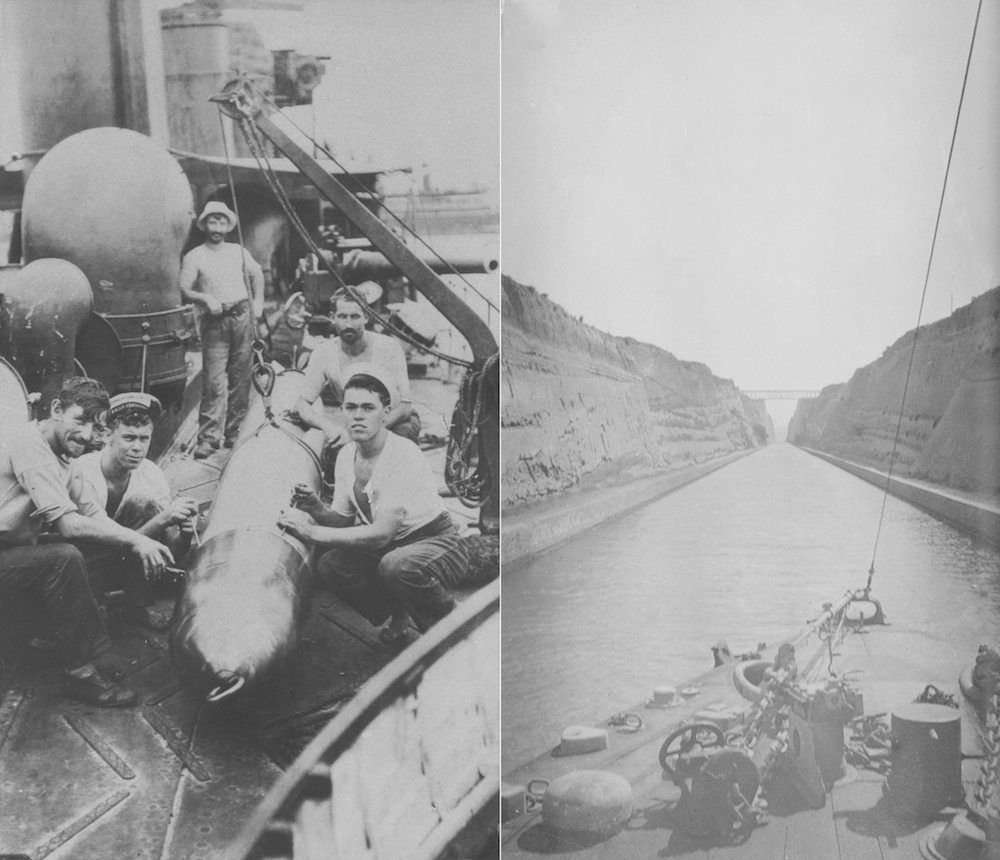
Left: Crew members fitting a warhead to a torpedo in the Mediterranean, 1917. Right: HMAS Parramatta (I) passing through the Corinth Canal, Greece, 1918.
During the early months of these operations a patrol seldom passed without an enemy submarine being discovered and hunted, but as time went on the enemy was more rarely sighted until the patrol became routinely uneventful steaming. Enemy attacks on the strongly escorted troop transports moving in the danger areas were few and far between, but there were some by a few of the more audacious enemy submarine commanders.
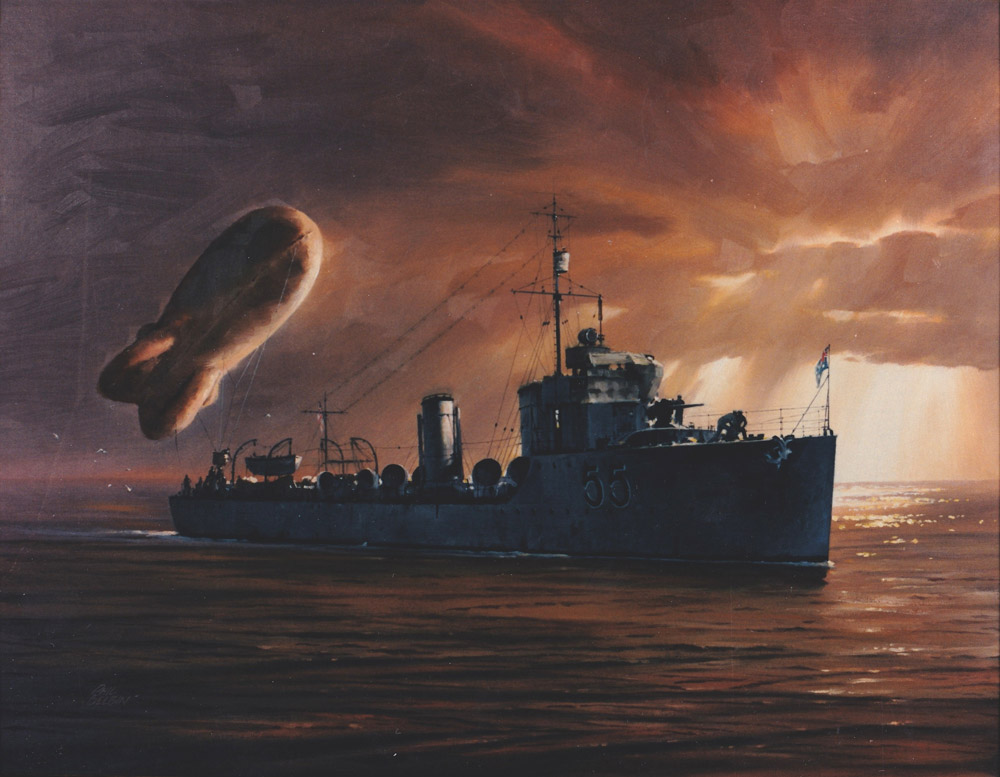
HMAS Parramatta (I). Painting by Phil Belbin
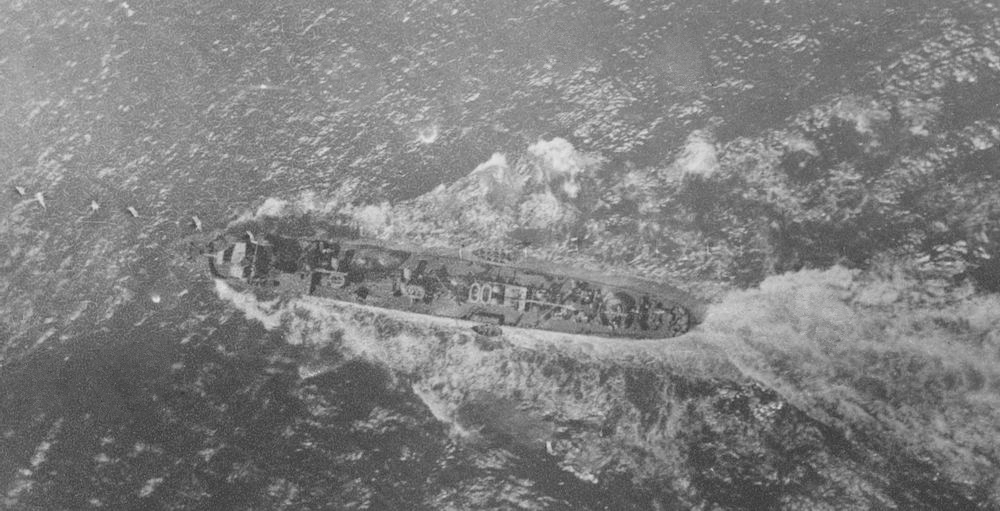
A photograph taken from the observation balloon being towed by HMAS Parramatta (I), in the Adriatic Sea on 5 August 1918.
During one such attack, 16 November 1917, the Italian transport Orione had her stern blown off by an enemy torpedo. Parramatta (I) and Yarra (I) stood by to salvage after Warrego (I) and Huon (I) had rescued the survivors. Parramatta (I) took her in tow but the enemy was still lurking beneath the surface and fired a second torpedo while the tow line was being secured. She then broke surface and dived again passing directly under Parramatta (I). Yarra (I) set out to hunt the enemy down but after a long and fruitless search returned to help in towing operations until the damaged ship was handed over to an Italian tug later that day.
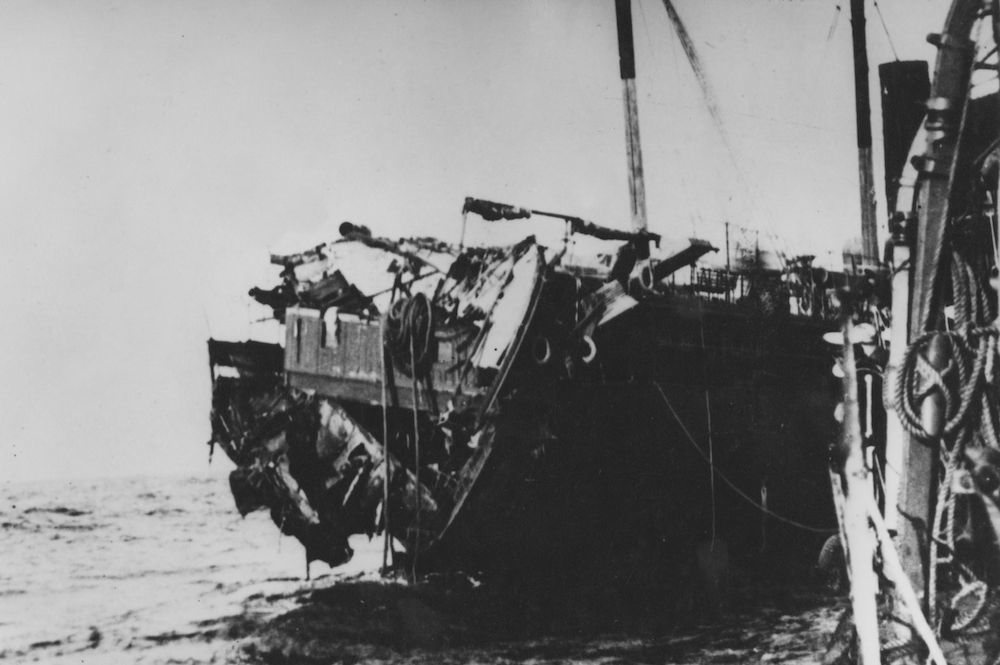
HMAS Parramatta (I) alongside the torpedoed transport, Orione.
Adriatic operations ended for Parramatta (I) on 28 September 1918 when she proceeded to Piraeus for refitting. She returned to duty on 21 October, spending a brief period on patrol off Suvla Bay (Gallipoli) and Imbros before passing through the Dardanelles with the fleet to Ismid in the eastern corner of the Sea of Marmora.
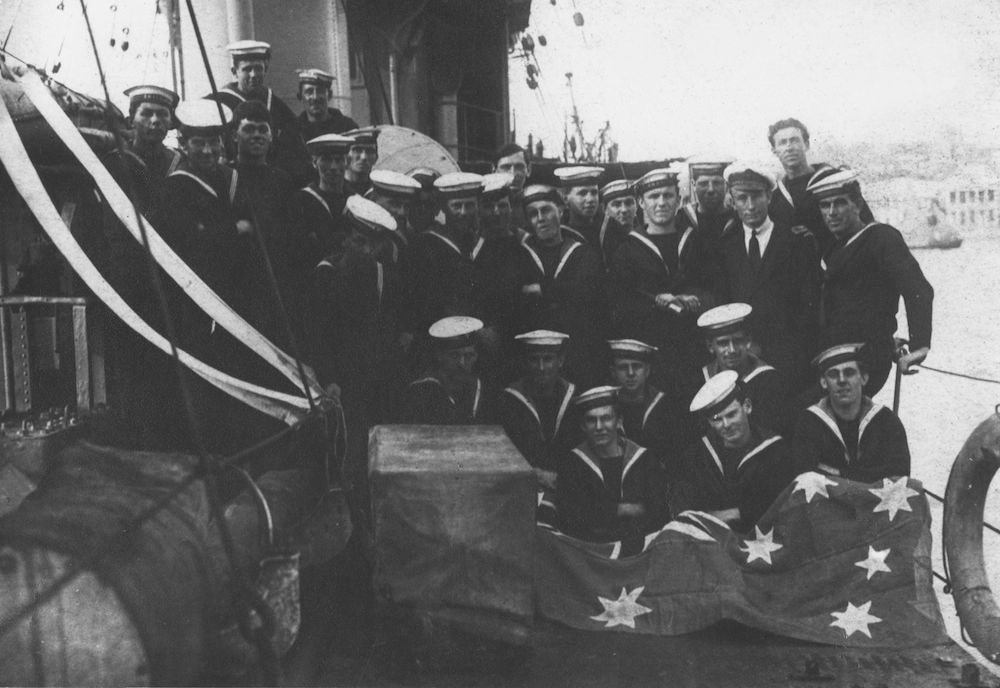
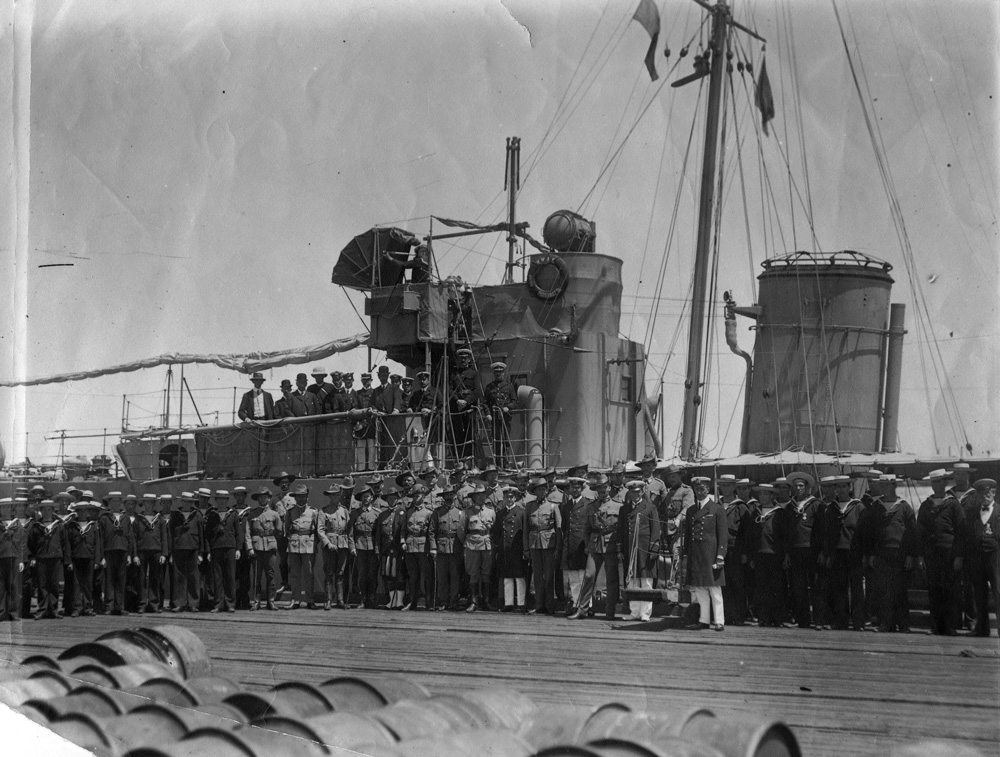
HMAS Parramatta (I) crew members with the Australian Flag in Brindisi Harbour, 1918.
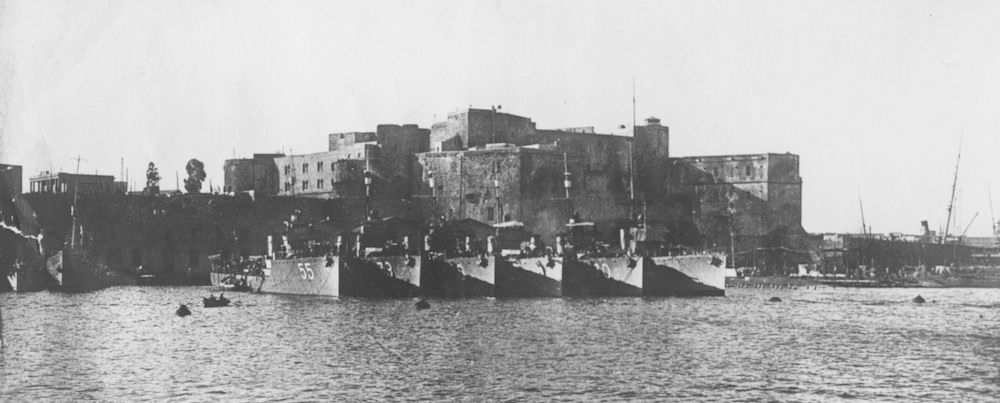
The Australian Torpedo Boat Destroyer Flotilla at Brindisi, 1918.
In November she joined an Allied Squadron at Constantinople and on 25 November passed the Bosporus en route to Sebastapol where the Allied group took over some Russian ships on behalf of the anti-Bolshevik forces. Thenceforth Parramatta (I) was used to carry despatches and mails between Sebastapol and Constantinople.

The Australian Flag flying from the bow of HMAS Parramatta (I) on her arrival at Constantinople. The domed building in the background is the Dolmabahce Mosque.
At the end of December 1918 her service in the Black Sea and Sea of Marmora ended. Proceeding via Malta and Gibraltar she reached Devonport on 14 January 1919. En route, in company of other destroyers of the Australian Flotilla, Parramatta (I) was forced by gale force winds to put into Ferrol after sustaining considerable damage from heavy seas off Cape Finisterre.
On 6 March 1919, in company of HMA Ships Melbourne, Huon, Yarra and Warrego, she sailed for Australia, joined by Swan and Torrens at Malta. The flotilla reached Aden on 25 March, Colombo on 2 April, Singapore on 15 April and Darwin on 26 April. On the last day of the voyage Parramatta (I) and Yarra ran out of fuel and had to be towed into Darwin by Warrego.
The remainder of Parramatta's seagoing life was spent in Australian waters. She paid off at Sydney on 22 July 1919, recommissioned for a month (17 May 1920-13 June 1920) on the occasion of the visit of the Prince of Wales in HMS Renown, and thereafter remained in Reserve at Sydney until October 1924. From October 1924 until November 1925 she was based at Westernport as a training ship. On 16 November 1925 she returned to Sydney and remained in port until May 1926, when she proceeded to Adelaide where she was placed in Reserve with a Care and Maintenance Party for Naval Reserve Training. Except for a visit to Melbourne in May 1927, she remained in South Australian waters until April 1928, when she returned to Sydney, finally paying off on 20 April 1928.
On 17 October 1929 she was handed over to Cockatoo Dockyard for dismantling. Her hull was subsequently used as an accommodation vessel, on the Hawkesbury River, NSW, by the New South Wales Department of Prisons before being sold to Mr George Rhodes of Cowan as scrap. The vessel was moored in the river but broke adrift during a storm and ran aground and her wreck remains there to this day.
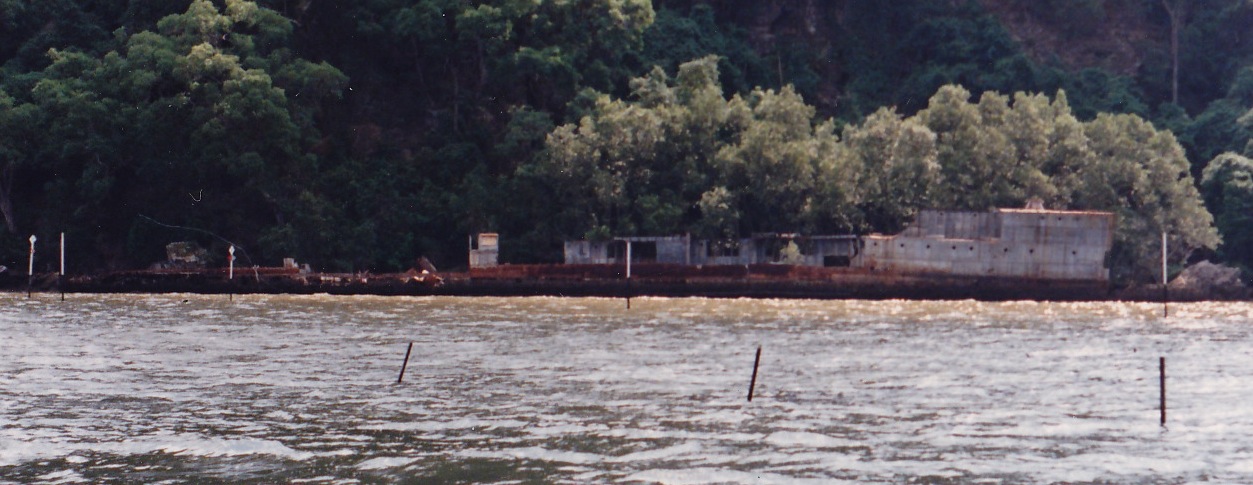
The wreck of HMAS Parramatta (I) in the Hawkesbury River.
What remained of Parramatta (I) lay derelict on a mud bank north of Milson Island in the Hawkesbury River until 7 July 1973. On that and the following day the bow and stern sections were salvaged and later transported to a site on the north bank of the Parramatta River, upstream from the Silverwater Bridge. The stern of the ship was later established as a naval memorial at Queens Wharf Reserve. The bow section is mounted at the north end of Garden Island, Sydney, within the grounds of the Naval Cultural and Heritage Centre.
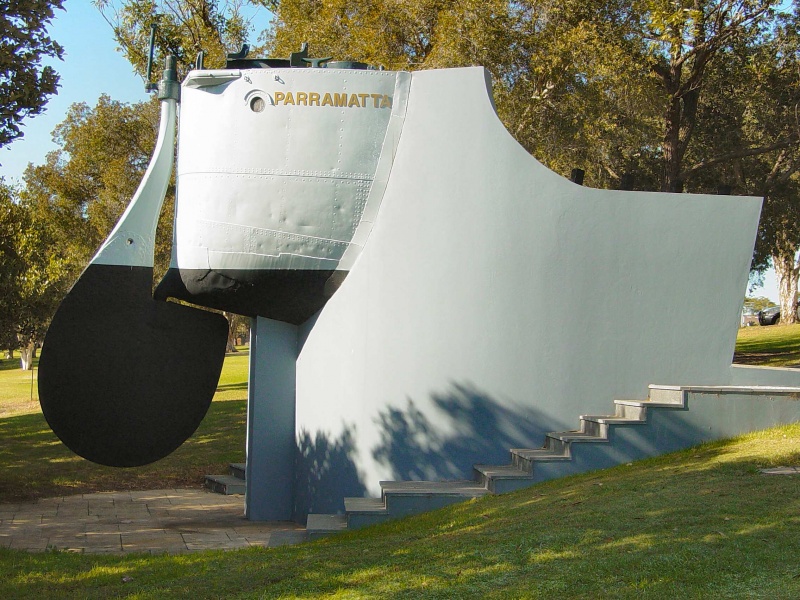
The stern section of Parramatta (I) mounted at Queens Wharf Reserve as a permanent tribute to the ship.
Further reading
'HMAS Parramatta 1910-1928: Torpedo Boat Destroyer' by LJ Lind, published by The Naval Historical Society of Australia, Garden Island, 1974.
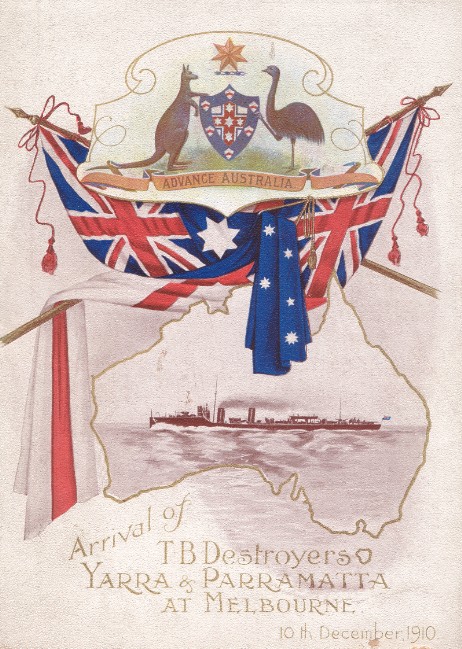
Front page of a booklet advertising the Arrival of HMAS Yarra (I) and Parramatta (I) to Melbourne.
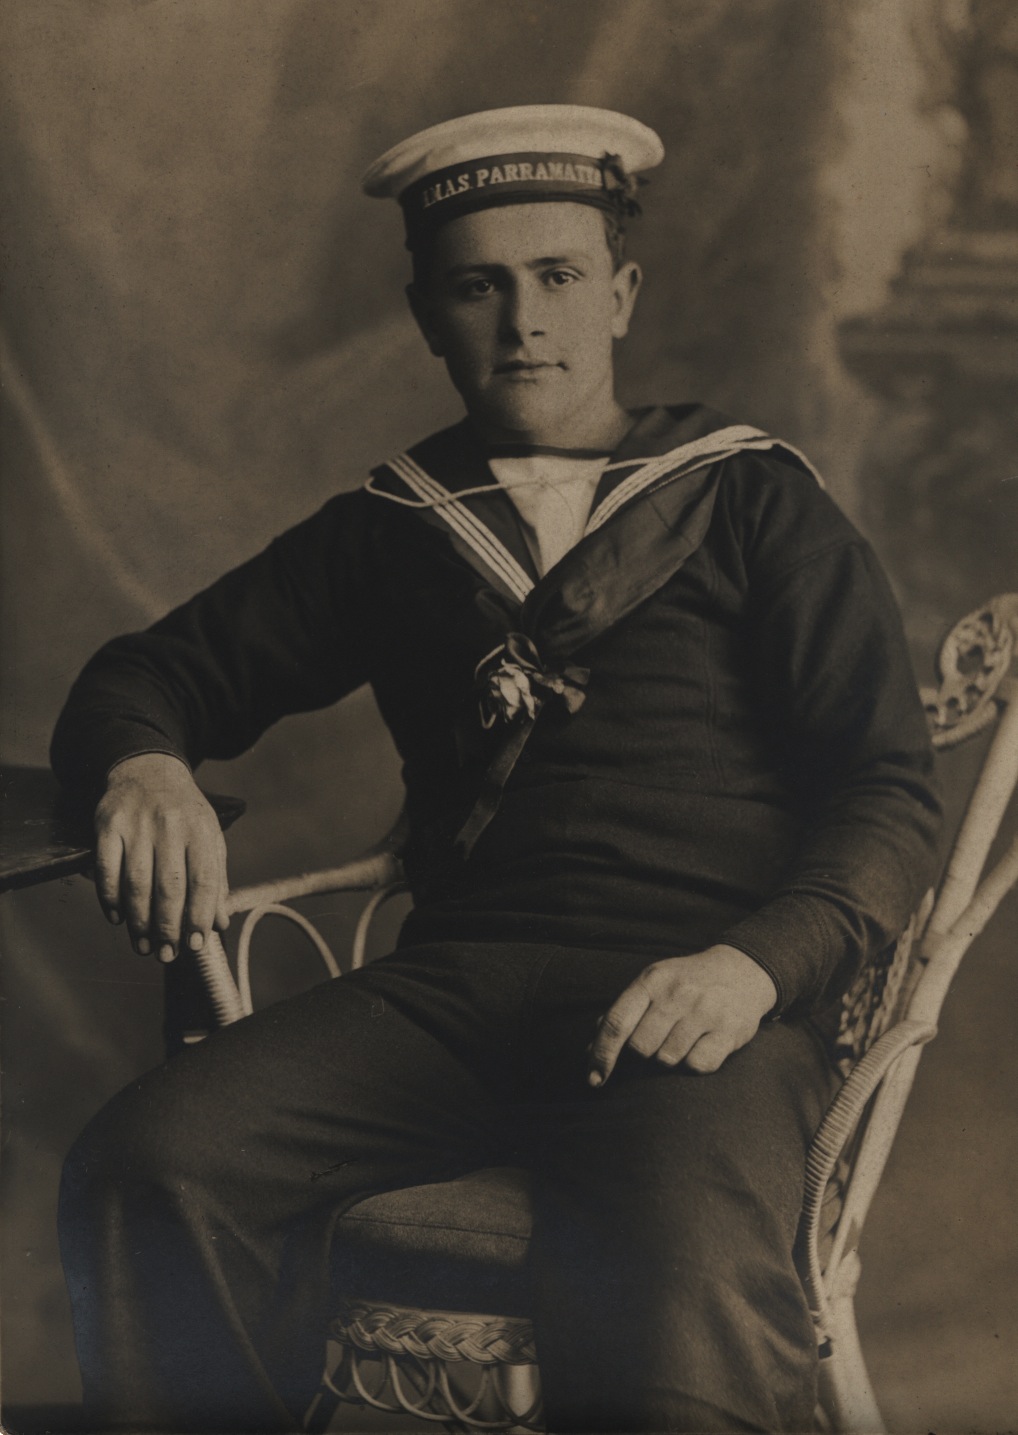
A seaman of HMAS Parramatta (I) poses proudly in his uniform with cap ribbon clearly visible.
