HMAS Parramatta (II)
HMAS
Parramatta
(II)
 |
| Class |
Grimsby Class |
|---|---|
| Type |
Sloop |
| Pennant |
U44 |
| Builder |
Cockatoo Docks and Engineering Co Ltd, Sydney |
| Laid Down |
9 November 1938 |
| Launched |
10 June 1939 |
| Launched by |
Mrs Evora Francis Street, wife of the Minister for Defence |
| Commissioned |
8 April 1940 |
| Decommissioned |
27 November 1941 |
| Fate |
Lost in action on 27 November 1941 |
| Dimensions & Displacement | |
| Displacement | 1060 tons |
| Length | 266 feet |
| Beam | 36 feet |
| Performance | |
| Speed | 16.5 knots |
| Armament | |
| Guns |
|
| Awards | |
| Inherited Battle Honours | |
| Battle Honours | LIBYA 1940-41 |

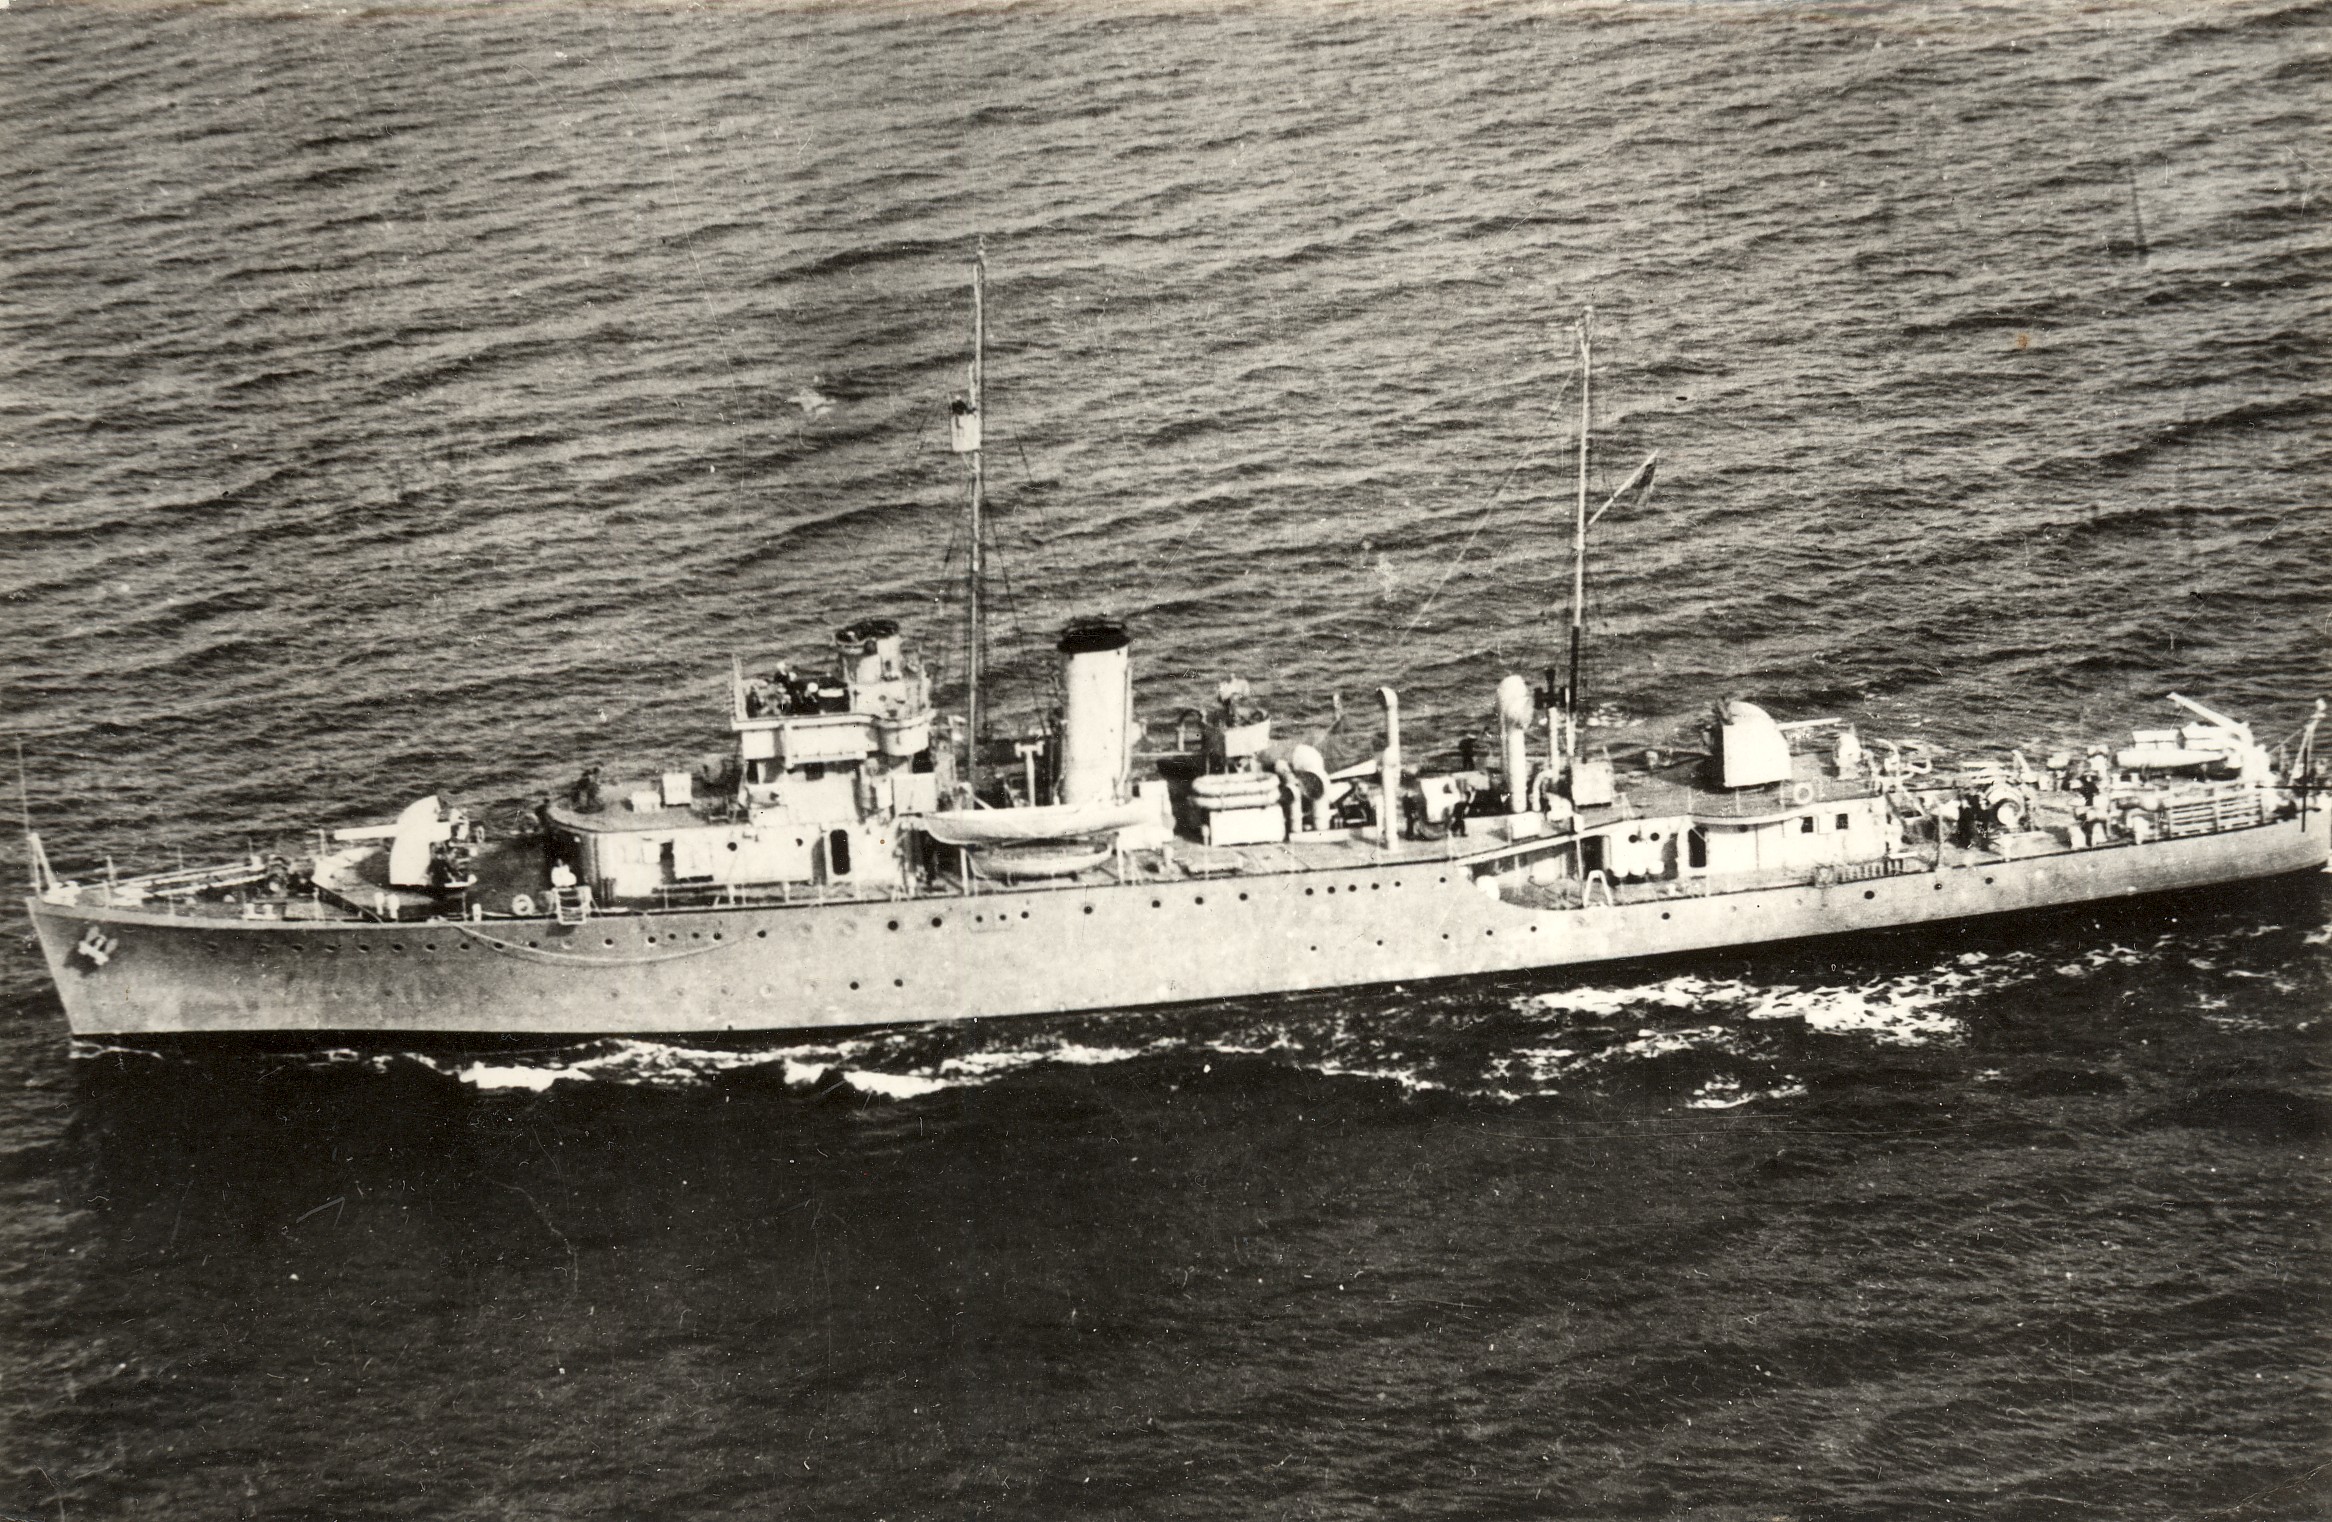
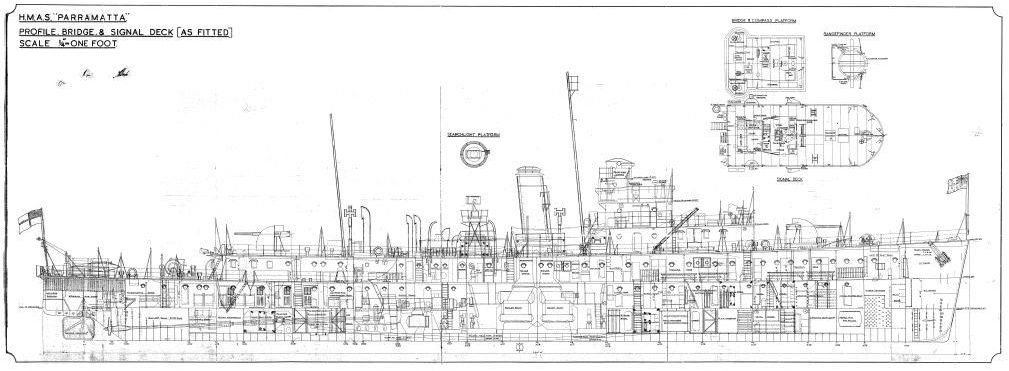
The RAN’s second Parramatta was laid down at Cockatoo Island Dockyard, Sydney on 9 November 1938. The Grimsby Class sloop was launched by Mrs Evora Francis Street, the wife of the Federal Minister for Defence on 10 June, 1939. As the slip was required by another hull, Parramatta was unusually launched prior to her engines being installed.
HMAS Parramatta commissioned at Sydney on 8 April 1940 under the command of Lieutenant Commander Jefferson H Walker MVO, RAN, a 39 year old officer who had entered the Royal Australian Naval College in 1915 at the age of 13½ years. She was his first command.
Following a brief period exercising with the 20th Minesweeping Flotilla, Parramatta sailed from Fremantle on 29 June 1940 en route to the Red Sea where she reported for duty to the Senior Officer, Red Sea Force, at the end of July. Except for a visit to Bombay in December 1940, Parramatta spent the next nine months in one of the world’s most torrid zones escorting, patrolling and minesweeping. It was monotonous work in the worst possible conditions relieved only by occasional futile Italian air attacks against the convoys under escort.

HMAS Parramatta was launched on 10 June 1939.
In April 1941 she took part in the British operations against Italian Eritrea, East Africa. One of her last tasks as a unit of the Red Sea Force was towing the cruiser HMS Capetown from Eritrea to Port Sudan after she had been torpedoed by an Italian ‘E’ Boat during the night of 7/8 April 1941.
In May 1941 Parramatta transferred to the control of the Commander-in-Chief, Mediterranean Station, beginning with three weeks based on Port Tewfik at the head of the Gulf of Suez. On 3 June she reached Alexandria where Walker commented that at last after “months of monotony in the Red Sea” he was pleased that his “rather young and developing Ship’s company” would be stimulated by contact with the battle scarred Mediterranean Fleet. Soon afterwards Parramatta was assigned to duty on escort in support of the campaign in Libya (Western Desert). She sailed from Alexandria on her first run to the battle area on 15 June carrying a Naval Port Party to Mersa Matruh.
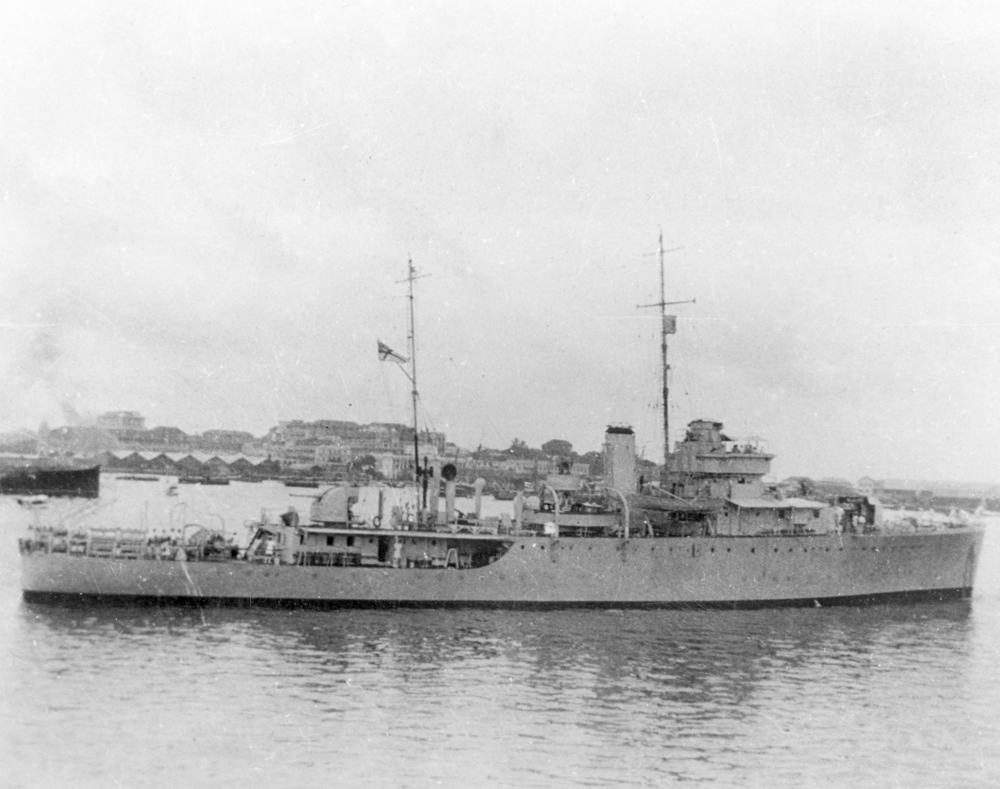
HMAS Parramatta in Colombo, July 1940.

Left: Parramatta’s captain Commander Jefferson H Walker, MVO, RAN. Centre: Parramatta’s Executive Officer Lieutenant Commander Percy W Forwood, RANR. Right: Parramatta’s First Lieutenant, Lieutenant George WA Langford.
After dark on 22 June 1941 Parramatta left Alexandria on her first run to beleaguered Tobruk, escorting in company with the sloop HMS Auckland, the small steamer Pass Of Balmaha carrying a cargo of badly need petrol. The warships were to leave her off Tobruk and wait to seaward while she discharged her cargo and then escort her back to Alexandria.
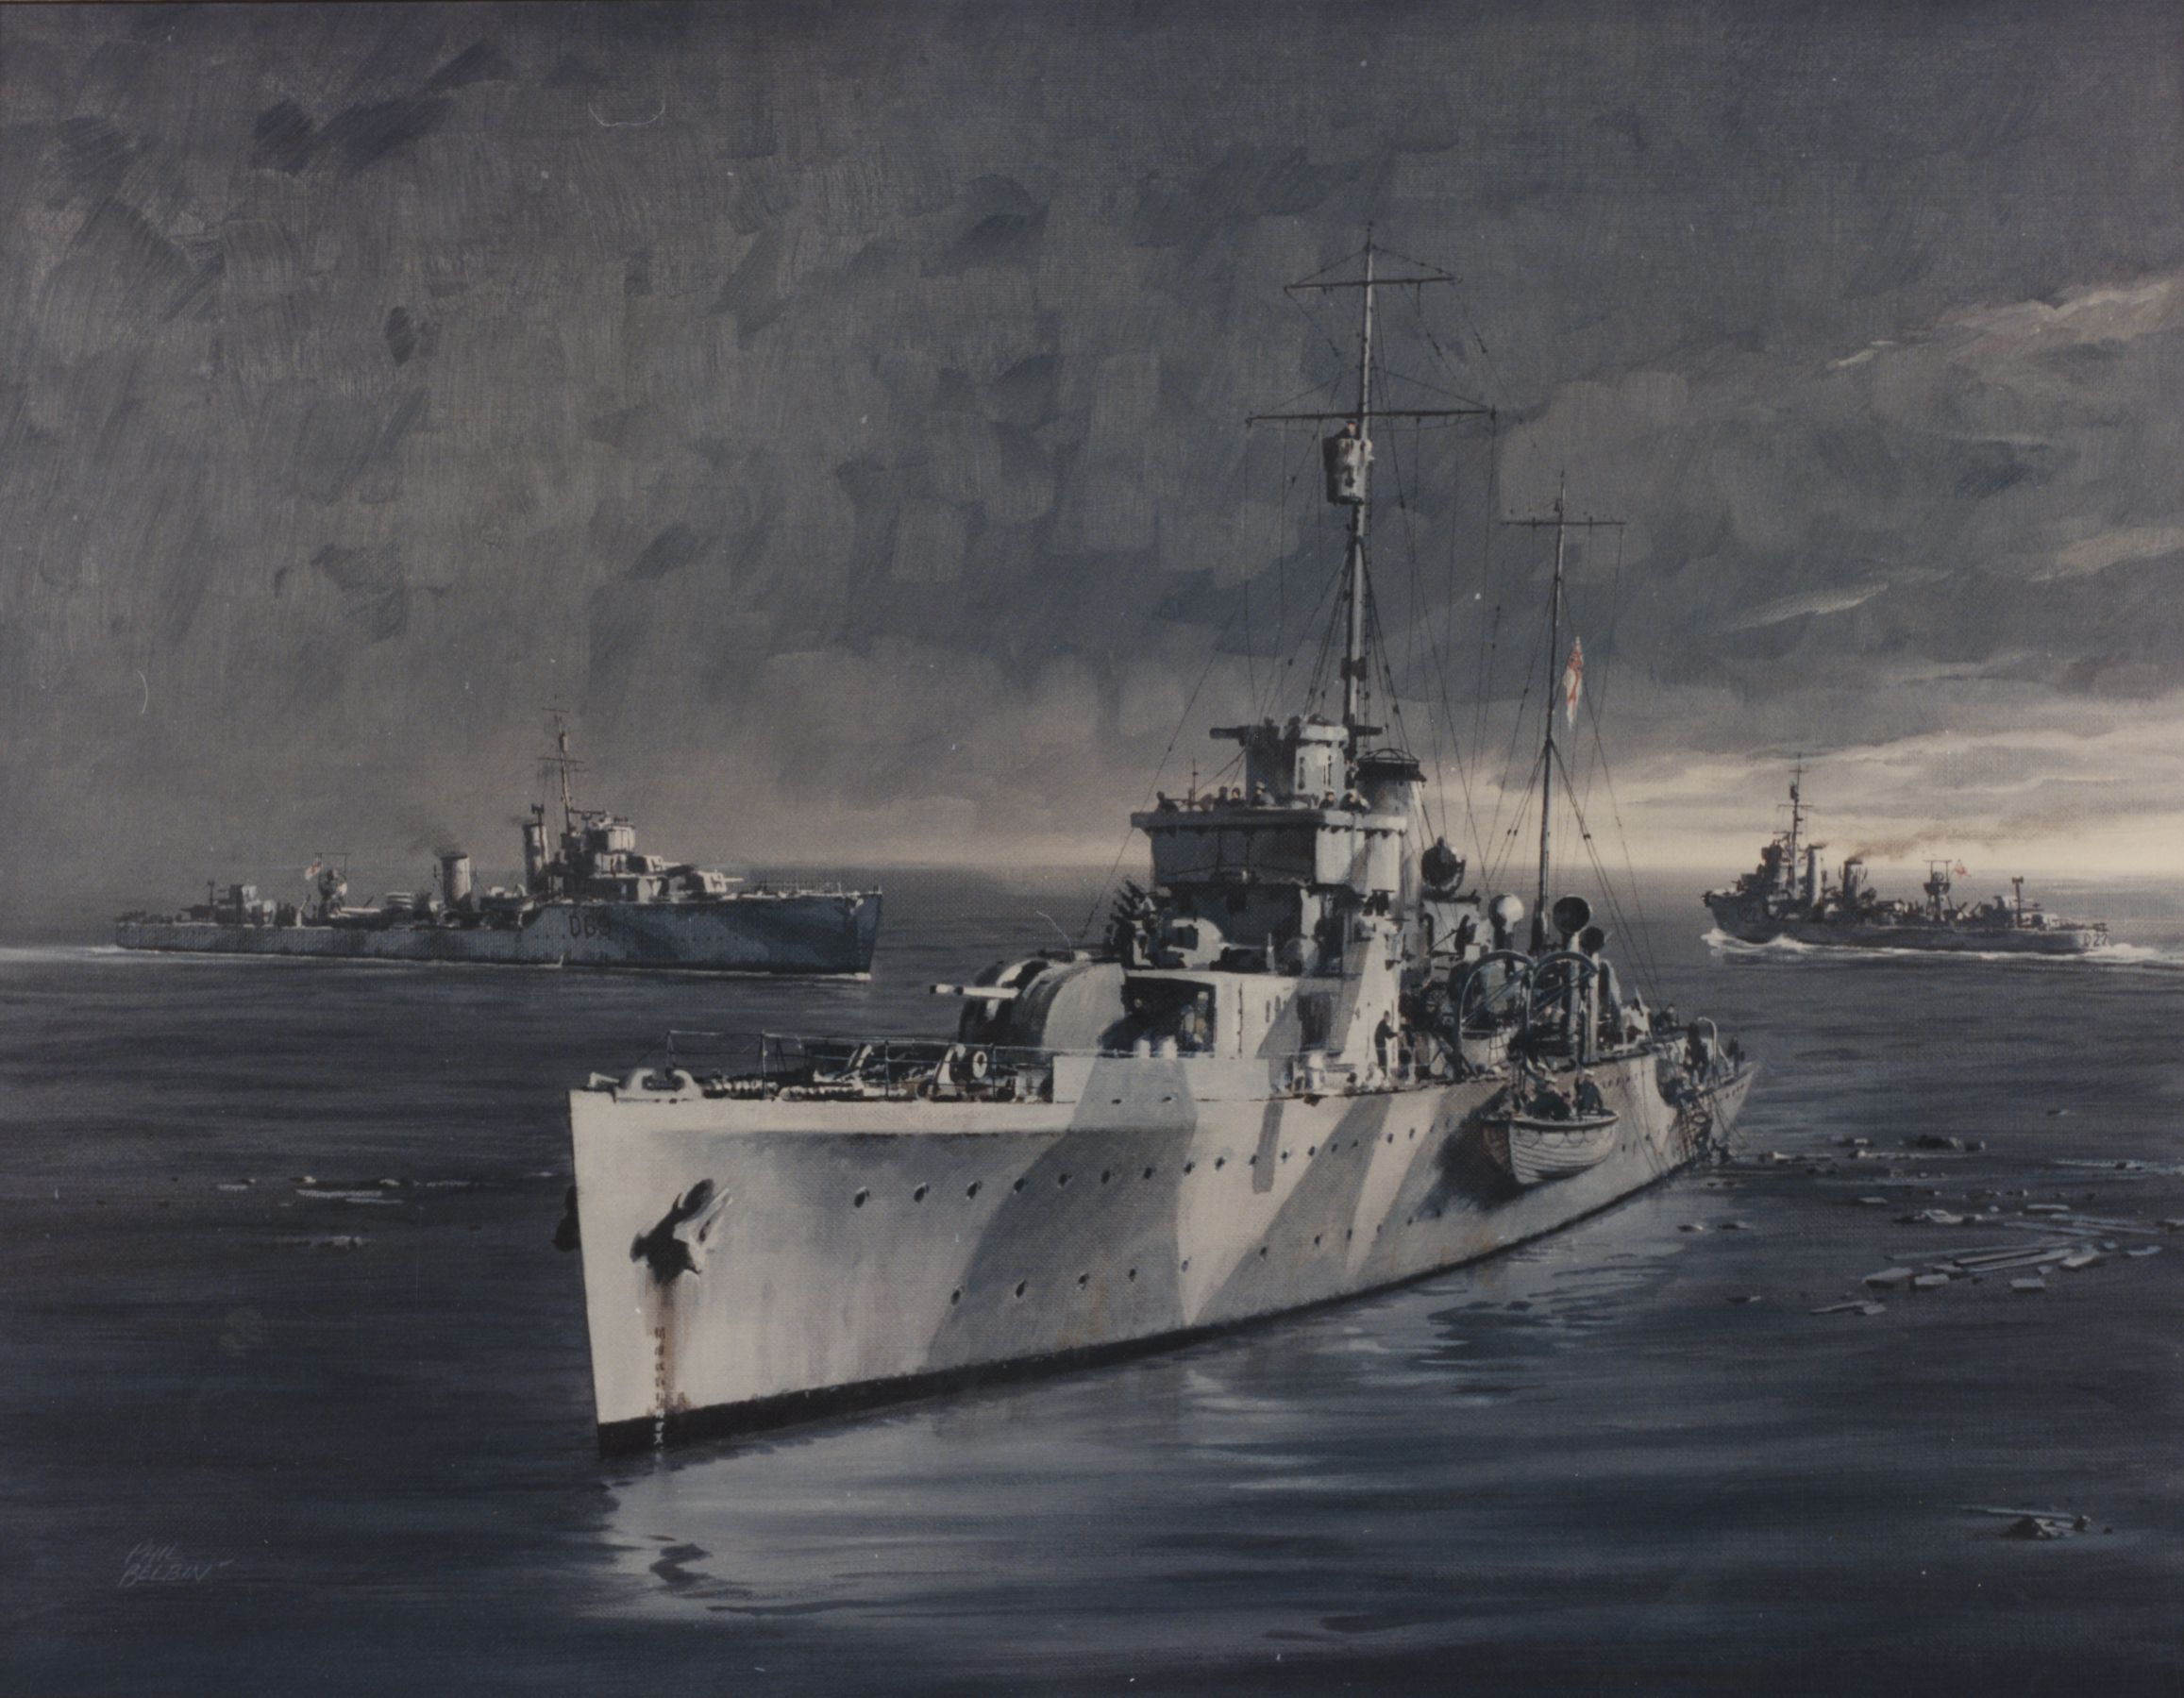
The Tobruk Ferry, HMA Ships Parramatta, Waterhen and Vendetta, June 1941. Painting by Phil Belbin courtesy of the Naval Heritage Collection.
Steaming close inshore to gain the benefit of fighter protection from the land, the ships made slow but steady progress. For 36 hours there was no sign of the enemy but at 8:40am on the second day out a single reconnaissance plane was sighted high up a few miles westward. Half an hour later the first of three fruitless attacks developed, the last from a single aircraft at 1:45pm. Then at 5:30pm Parramatta received a warning from Auckland and Walker, scanning the sky, sighted three formations each of 16 dive bombers manoeuvring to attack.
As they worked round in order to dive straight out of the blazing westerly sun both ships opened the heaviest barrage they could muster. Then they came in, diving in twos and threes. Tall fountains of water rising from the sea marked near miss after near miss. Auckland was hit in the stern and disappeared from view in a cloud of thick brown smoke. She emerged out of control, guns still firing, and heading straight for Parramatta who had to swing away to avoid a collision. “As she passed”, wrote Walker, “I saw that she was an utter wreck abaft the mainmast, with no stern visible.” After fifteen minutes the last of the bombers was droning eastwards. Miraculously both Parramatta and the petrol carrier had escaped damage. Auckland, stopped and listing heavily to port, began to abandon ship and Walker closed her to begin the work of rescuing her crew. She was barely cleared when a heavy internal explosion lifted the stricken ship “slowly and steadily about six or seven feet into the air. Her back broke with a pronounced fold down the starboard side.” Slowly, as if reluctant to go, she rolled quietly over and sank.
At 6:30pm the enemy returned, machine gunning Auckland’s survivors as they drifted in boats and skiffs, on rafts and some still afloat in their lifebelts. Parramatta was forced to withdraw to gain sea room until darkness fell. For two hours the bombers kept coming so that according to Walker “there seemed always one formation falling about like leaves in the zenith and then diving in succession, one moving forward into position and one splitting off and coming in at 45 degrees.” But at last after the enemy had done his futile worst and failed to sink either Parramatta or her charge the attacks ceased “as the sun’s lower limb touched the horizon at 8:25pm.” In the deepening dusk of the Mediterranean night Walker turned his ship towards the scene of Auckland’s loss. There she was joined by the Australian destroyers HMA Ships Waterhen (I) and Vendetta (I). While the destroyers circled her she picked up 164 survivors before setting out for Alexandria. Pass Of Balmaha, damaged in the bunkers, was taken in tow by Waterhen (I) to Tobruk with Vendetta (I) as escort.
After cleaning ship and making good minor damage, Parramatta resumed escort duty to Tobruk. En route to Mersa Matruh on 27 June she was attacked by a submarine. Fortunately, however, although the enemy’s aim was good his torpedo ran too deep and passed harmlessly underneath the ship. From Mersa Matruh the Australian sloop picked up the Pass Of Balmaha off Tobruk and on 30 June again entered Alexandria Harbour where she remained making good defects until 18 July. Thereafter until the end of the month she operated as one of the escort vessels covering the reinforcement of the British forces in Cyprus.
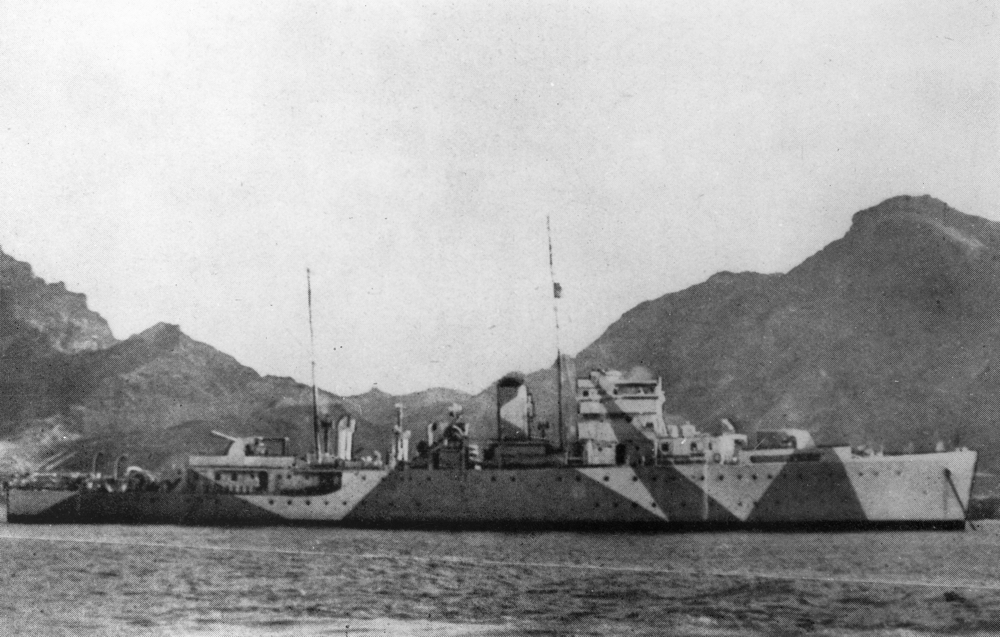
HMAS Parramatta wearing her wartime disruptive camouflage pattern paint.
In September Parramatta operated as Duty Sloop at Attaka in the Suez Canal zone where, said Walker, “it was intended that my presence should inspire confidence in the crews of American merchant ships loaded with military stores.” October was spent in the Gulf of Suez on survey work with which Walker was well acquainted, having served in the survey ship HMAS Geranium as a young lieutenant in 1923/24.
At dawn on 18 November 1941 the British Eighth Army under General Auckinleck launched its long planned offensive in Libya. The value of the toehold held in Tobruk and maintained entirely by the Navy was immediately demonstrated. It was an invaluable feeder port for reinforcements and supplies for the Army advance. A few hours after the British Army began to move HMA Ships Yarra (II) and Parramatta left Alexandria escorting a slow convoy to Tobruk. It arrived without loss in spite of enemy attacks from the air and undersea. Their charges delivered safely the two Australian sloops were back in Alexandria on 23 November. Meanwhile, fierce assaults by the Tobruk garrison against the besieging enemy had reduced their ammunition to a dangerously low level. To relieve the situation Parramatta and the destroyer HMS Avon Vale sailed from Alexandria on 25 November escorting the deeply laden ammunition ship Hanne to Tobruk.
About midnight on 26 November the three ships were about 25 miles north of Bardia off the Libyan coast. It was pitch dark and raining with a heavy surging sea running. Hanne was confused as to her route into Tobruk and Walker closed to hail by megaphone. Half an hour later the two ships lay close alongside one another steaming slowly at about three knots. Avon Vale was lost in the encircling blackness, a blanket which had not prevented the Commanding Officer of U559 sighting the convoy nearly two hours earlier as lit by a flash of lightning it stood silhouetted to the north east of his prowling submarine.
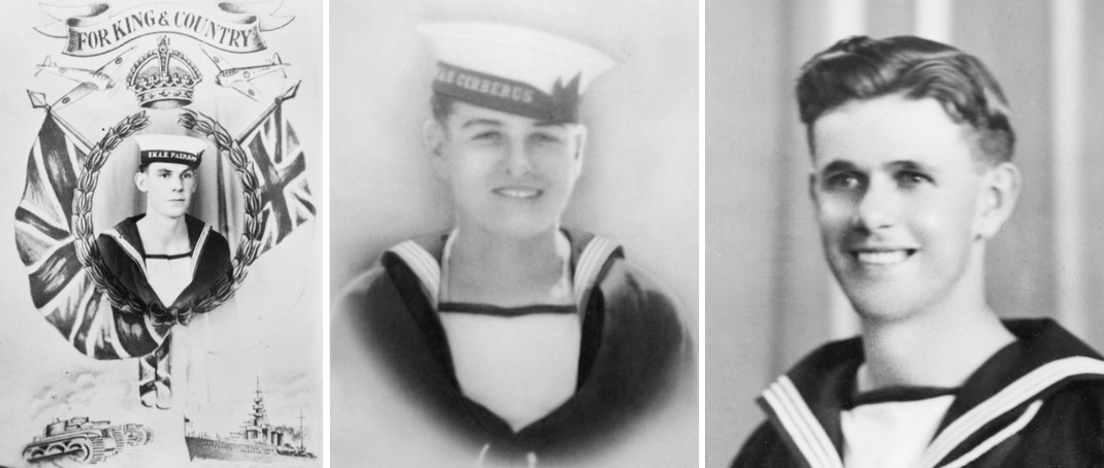
Left: AB William George Barron. Centre: AB William George Blaydon. Right: AB John Richard Streeter. Each was lost when Parramatta was torpedoed and sunk by U-559 in the Mediterranean.
Biding his time the German quietly stalked his prey, manoeuvring for a favourable position. At 12 minutes past midnight at a range of 2200 yards, he fired a spread of three torpedoes at a “merchant ship behind which a small vessel was visible.” All three torpedoes missed. Disappointed and puzzled by his failure the German submarine closed in. “I cannot wait”, he wrote, “because the convoy is just off the Tobruk approach route.” Then, at 12:45am on 27 November “I fired a single torpedo at a range of 1500 metres using the same estimations. The target is a destroyer with one funnel. Hit! Two explosions one after the other. The destroyer breaks up and sinks. Shortly afterwards another heavy explosion. Probably her depth charges. I make off towards the south east.” U559’s torpedo hit Parramatta amidships. There were two almost simultaneous explosions, the second probably in the magazine. She was torn apart, all lighting failed and Walker standing on the bridge had only time to issue the order “abandon ship” before she rolled rapidly to starboard and sank.

Other ratings listed as "missing" included, left, Ordinary Seaman Lyall James Smith; centre, Cook Michael Sofoulis; right, Stoker Henry Arthur Apps.
Only those on deck had a chance to escape. About 30 including two officers clung to an Oropesa float among a mass of debris. They could hear shouts close by in the darkness. Suddenly as if she were reluctant to take the final plunge, Parramatta’s stern broke the surface. Some distance off a vague black shape was visible. Two seamen decided to take a chance and swim towards it. After three quarters of a mile and near exhaustion they were picked up by Avon Vale at 3:05am. The destroyer had by then already plucked nineteen survivors from the wreckage strewn sea. No others were found and although she searched a wide area the destroyer could find no trace of the Oropesa float nor any of its human cargo. Three more, however, reached the Libyan coast unaided, to be rescued by advancing British troops, making in all twenty four survivors. One hundred and thirty eight lost their lives, including all officers.
Ordinary Seaman, Harold Moss, the last surviving veteran of the sinking, recalled later in life the moment his ship was torpedoed:
When the ship was hit, it blew me over the [mess deck] table into the ship’s side. I some how knew it was a torpedo and had to get out. Near that mess was a ladder going up behind the funnel and I was up there like a flash, right opposite me, as I got on the deck was the whaler and I thought I will get into that and as the ship wet down I would float of, silly me forgot that it was all tied down and as the ship turned over I was washed out. I was not a strong swimmer, but a good dog paddler and luck again was with me, there was a Carley raft right next to me, I got in and helped the other guys in. I was sitting on top of the raft on the rope handles and it was mighty uncomfortable, also, I had my hands gripped around that rope because it was a bit rough and cold too. When the Avon Vale came alongside they yelled out “you have two minutes to get up the net!” Everybody went except me. I couldn't get my hands off the rope, they were clenched tight around it, so I yelled out “I need help” and someone came down the net, undid my hands and threw me over his shoulder and took me up on the deck. I was covered in fuel oil and had a couple of scratches on me. The Doc cleaned me up, gave me a tot of something and they wrapped a blanket around me and took me away.
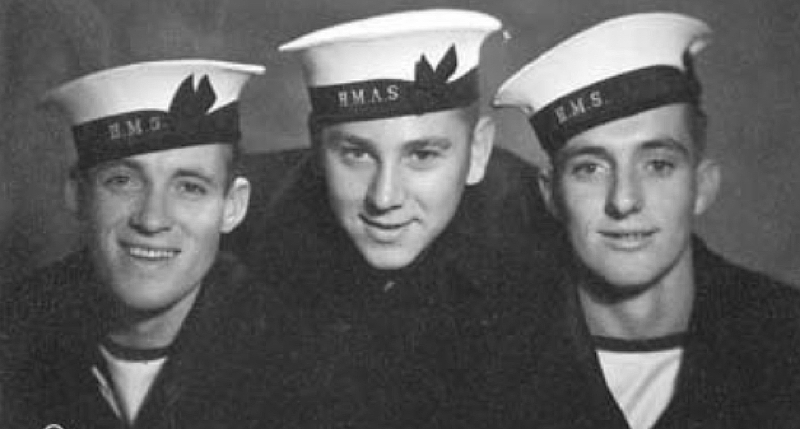
Former shipmates Bill Wood, Harold Moss and Ted Fryer, circa 1940.
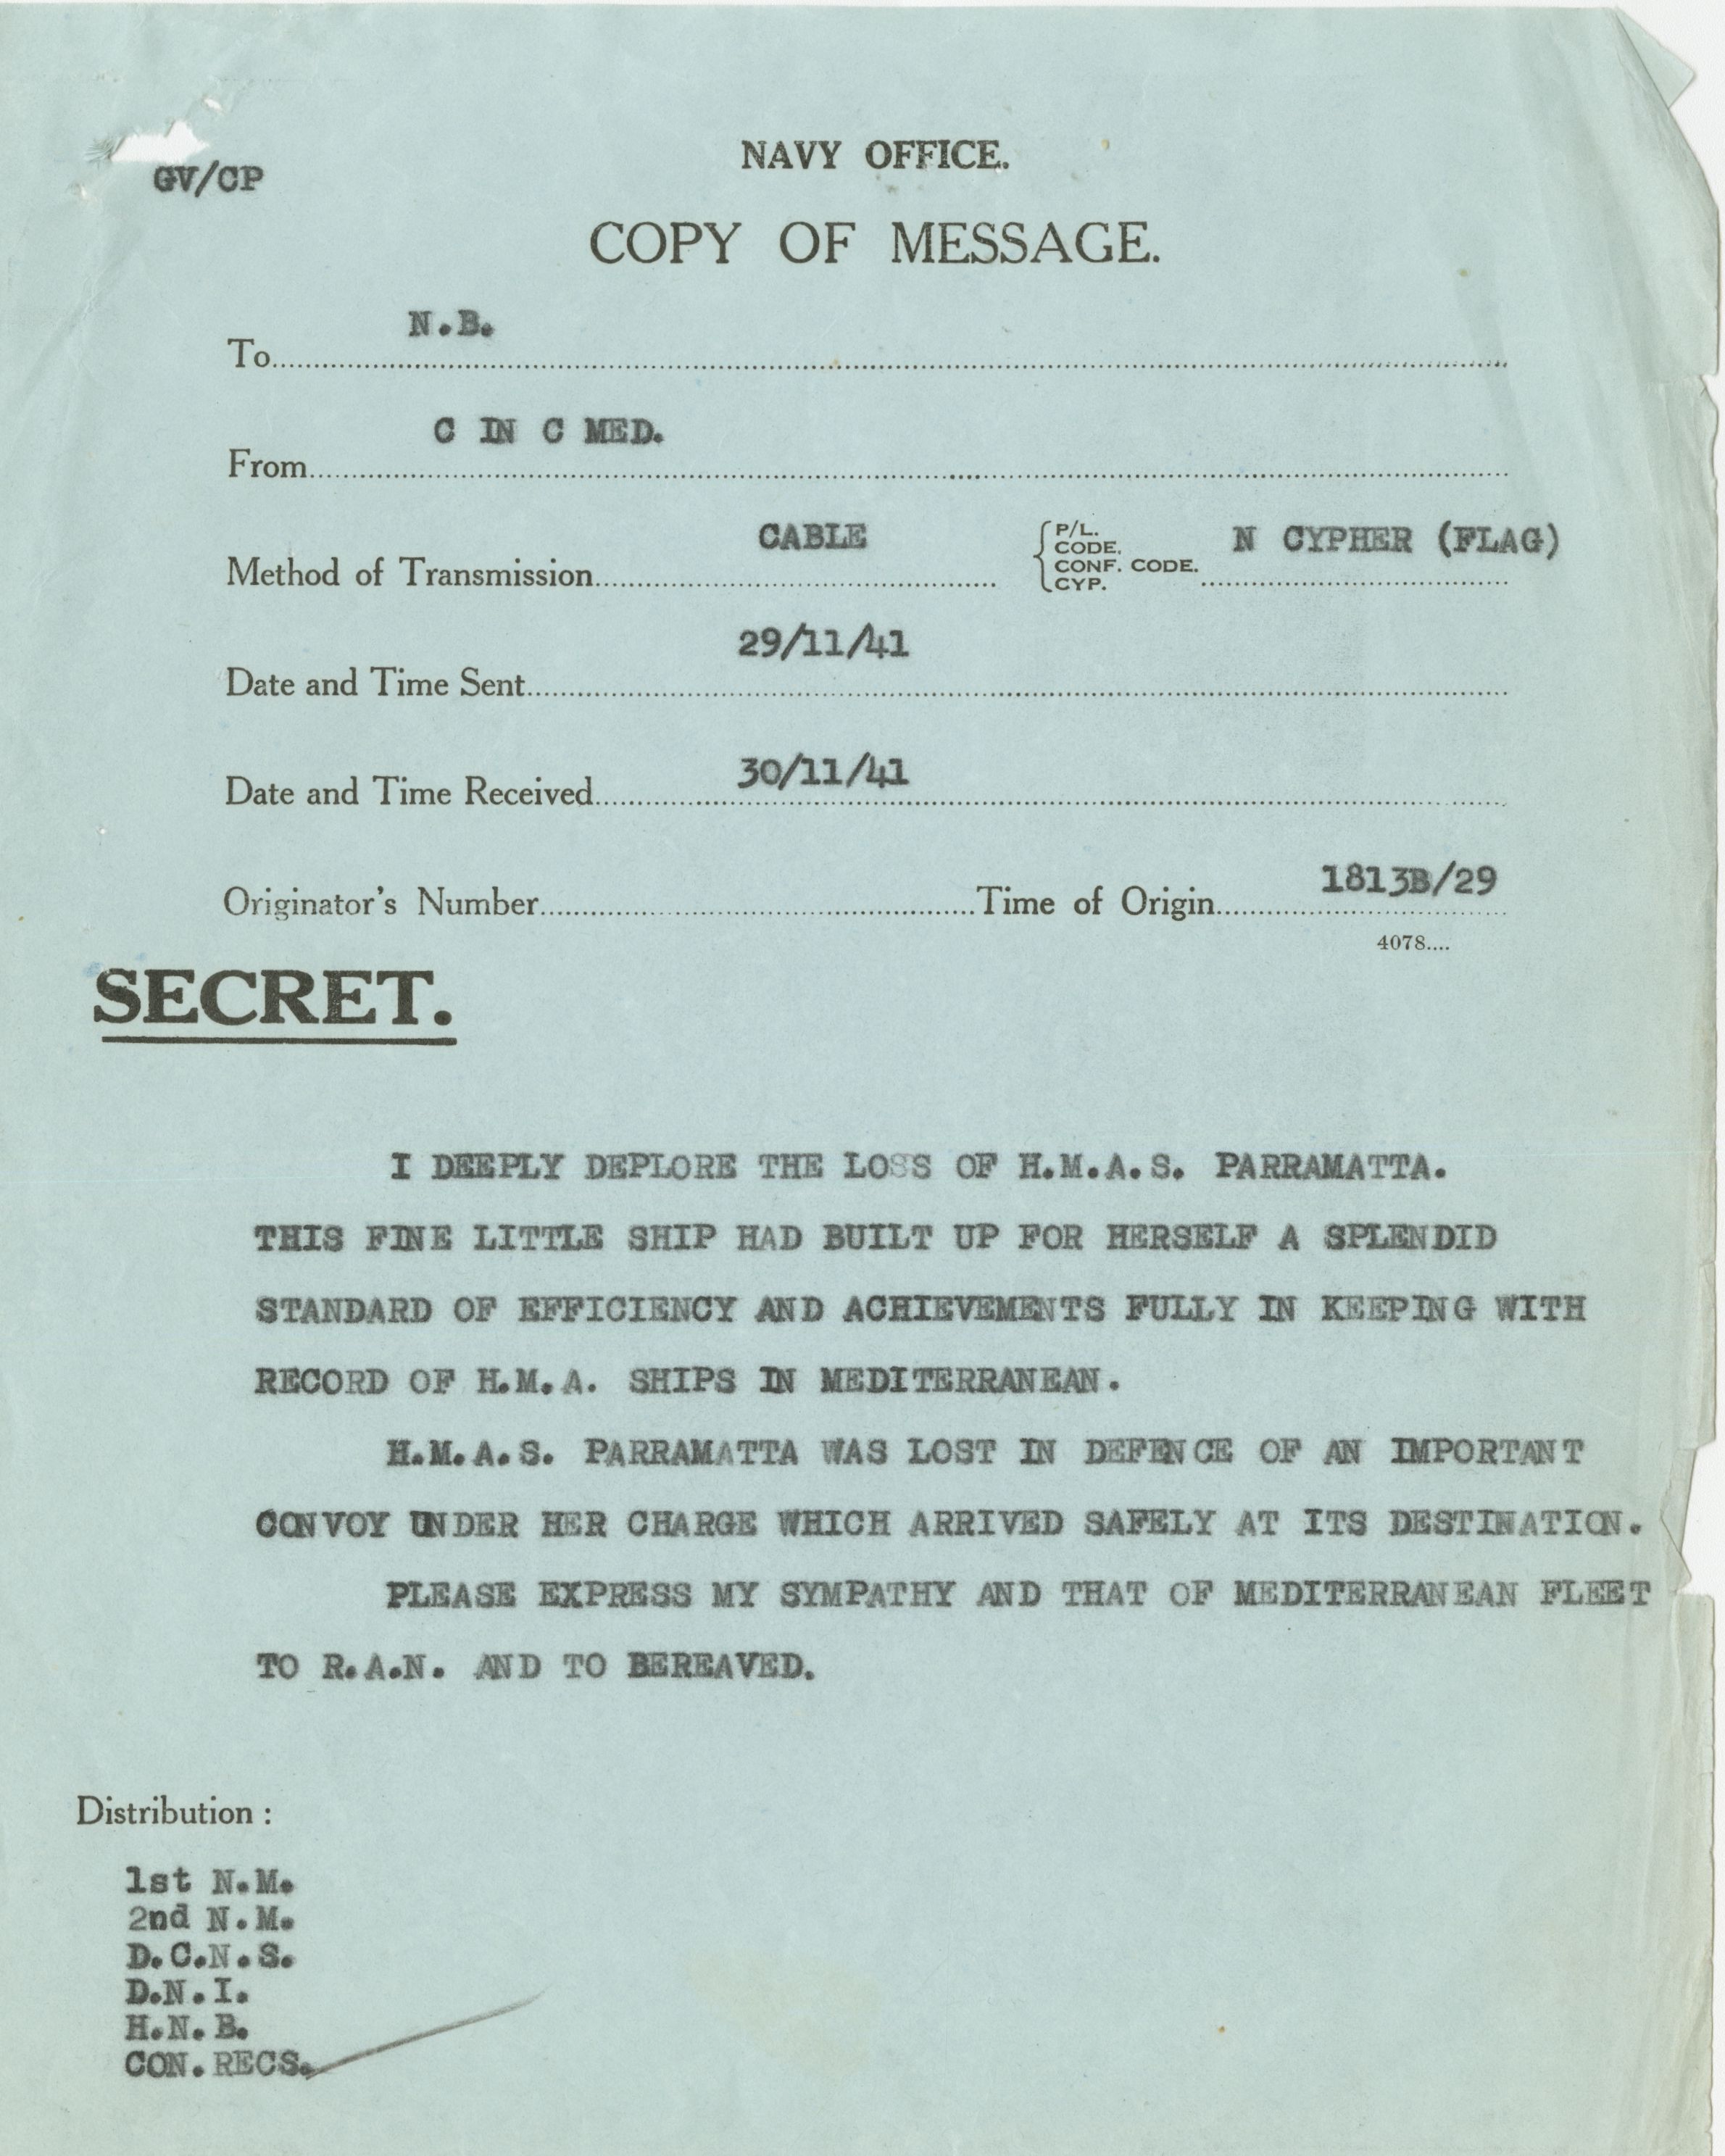
An expression of sympathy and admiration for the gallant sloop from the Commander-in-Chief Mediterranean to the Australian Naval Board. Parramatta's loss closely followed that of the cruiser HMAS Sydney (II) with all hands, etching November 1941 into the annals of the RAN as its darkest time.
In a twist to this story, the U-boat responsible for sinking Parramatta, U-559, was itself sunk on 30 October 1942 by ships of the Royal Navy. After being depth charged for 16 hours, and with a cracked pressure hull, it surfaced and her crew abandoned her. Three British seaman then boarded the sinking vessel seizing its Enigma coding machine and code books. Two of the seaman were lost when the submarine sunk, but their sacrifice enabled the Allies to break and read the German naval signal traffic, saving the lives of countless other Allied seaman.
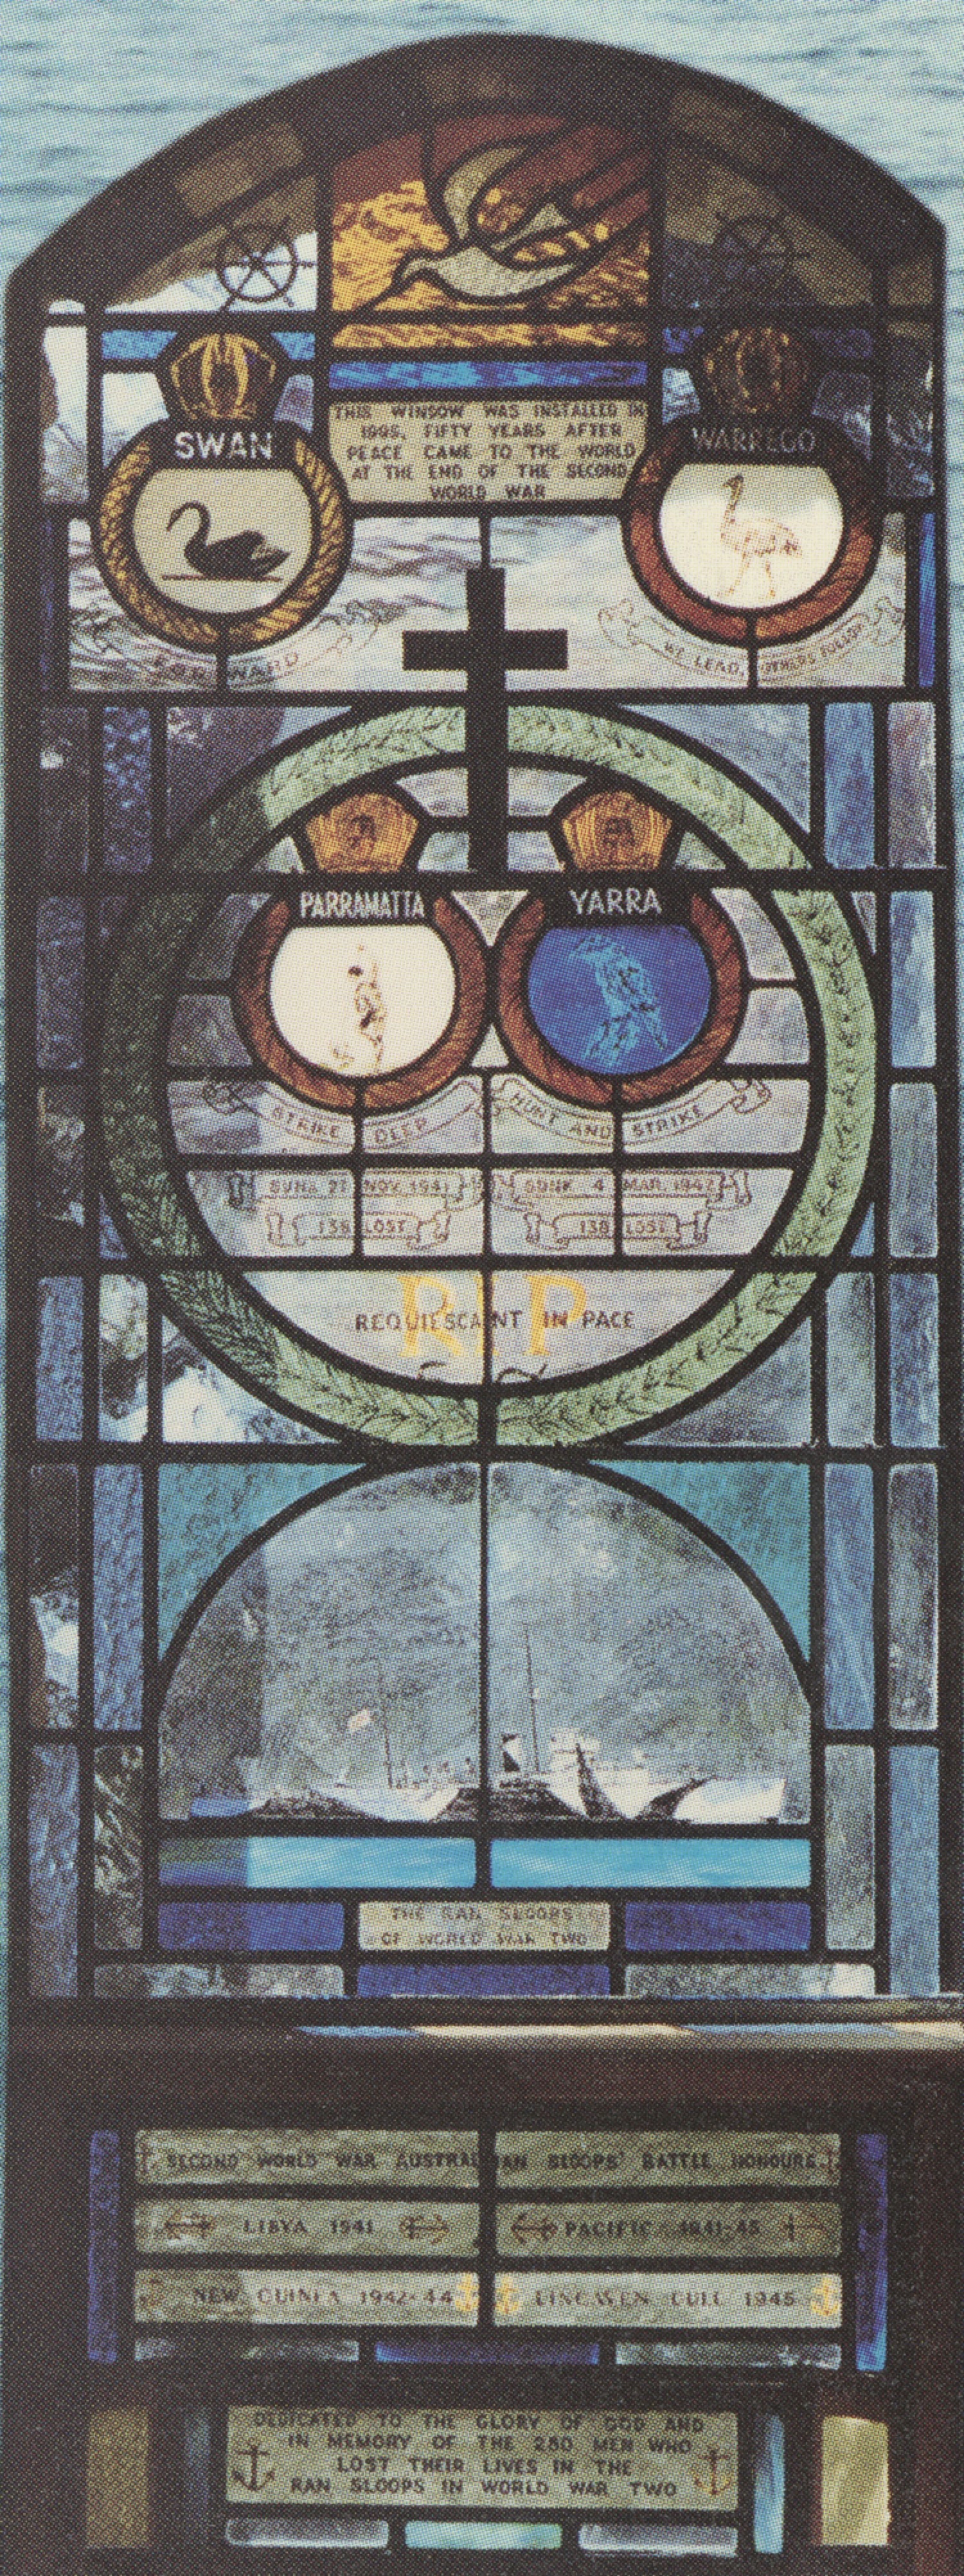
This National Memorial stained glass window was dedicated to the greater glory of God on 24 September 1995 in St Mark's Chapel HMAS Cerberus. The window was designed and crafted by Commodore Dacre Smyth, AO RAN (rtd)
