HMAS Warrego (I)
HMAS
Warrego
(I)
 |
| Class |
River Class |
|---|---|
| Type |
Torpedo Boat Destroyer |
| Pennant |
D70 |
| Builder |
Fairfield Shipbuilding & Engineering Co Ltd, Govan, Glasgow; and Cockatoo Dockyard, Sydney |
| Launched |
4 April 1911 |
| Launched by |
Mrs Pearce, wife of the Minister for Defence |
| Commissioned |
1 June 1912 |
| Decommissioned |
22 July 1919 |
| Dimensions & Displacement | |
| Displacement | 700 tons |
| Length | 246 feet |
| Beam | 24 feet 6 inches |
| Draught | 8 feet |
| Performance | |
| Speed | 26 knots |
| Complement | |
| Crew | 66 |
| Propulsion | |
| Machinery | Parsons turbines |
| Horsepower | 10,600 |
| Armament | |
| Guns |
|
| Torpedoes | 3 x 18-inch torpedo tubes |
| Awards | |
| Battle Honours | |
HMAS Warrego (I) was one of six River Class Torpedo Boat Destroyers built for the Royal Australian Navy between 1909 and 1916. During the First World War they formed the Australian Destroyer Flotilla. Her sister ships were HMA Ships Huon, Parramatta, Swan, Torrens and Yarra.
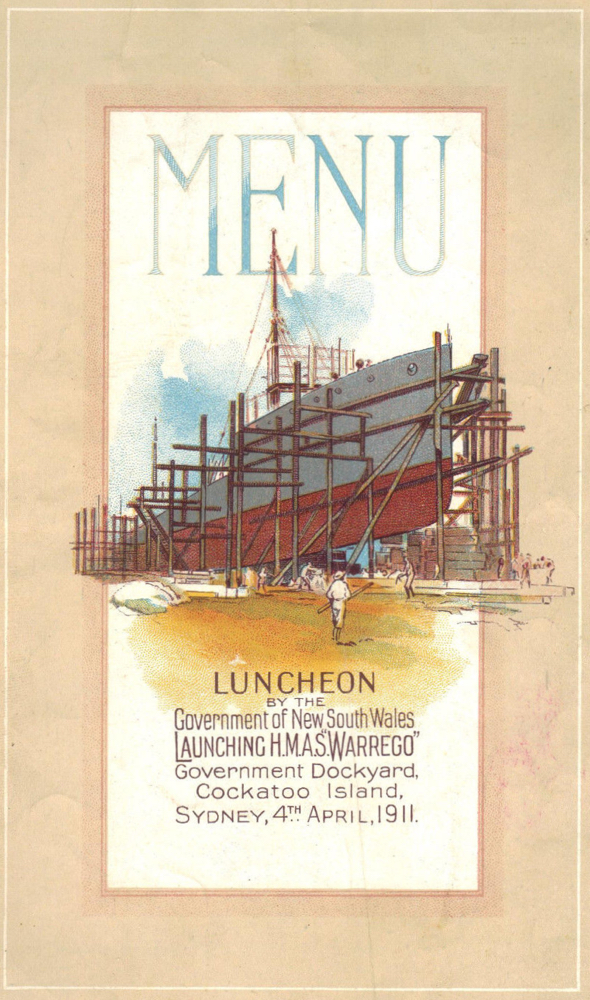
The menu from HMAS Warrego (I)’s launching luncheon.
Warrego (I) was built in the United Kingdom, dismantled, and the parts shipped to Cockatoo Island Dockyard, Sydney, where the ship was reassembled by Australian workers to give them experience in ship construction. On 16 March 1912 Commander George F Hyde was appointed in command prior to the ship’s commissioning at Sydney on 1 June 1912. On 4 October 1913 Warrego formed part of the Australian Fleet Unit’s historic entry into Sydney Harbour.
On 13 December 1913 Commander Claude L Cumberlege assumed command of Warrego which spent the following eight months exercising in Australian waters and conducting port visits to Adelaide, Port Lincoln, Hobart, Glenelg, Melbourne, Sydney, Brisbane and Townsville. When news of the outbreak of war was received on 5 August 1914 Warrego was at sea, on a war footing, in company with HMA Ships Sydney and Yarra proceeding from Townsville to Thursday Island. All three ships were subsequently ordered to rendezvous with the rest of the Australian Fleet which at that time had orders to assemble in waters south of New Guinea in a bid to seek out and destroy the German Navy’s Pacific Squadron.
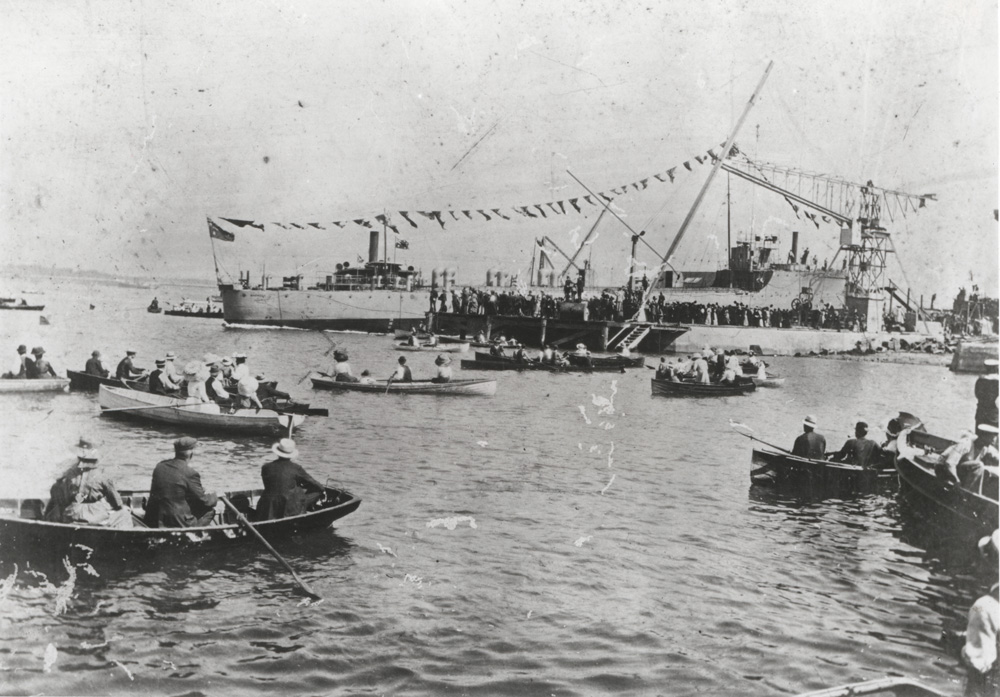
HMAS Warrego’s launching on 4 April 1911.

HMAS Warrego during the Fleet Entry on 4 October 1913.
Intelligence reports suggested that the German fleet might be operating from Simpson harbour in New Britain. Accordingly, while Sydney (I) and Australia (I) stood out to sea and Yarra (I) searched Matupi Harbour, Warrego (I) and Parramatta (I), now painted black to avoid detection, swept into Simpson Harbour on the night of 11 August, decks cleared for action and with instructions to engage any German warships that might be encountered.
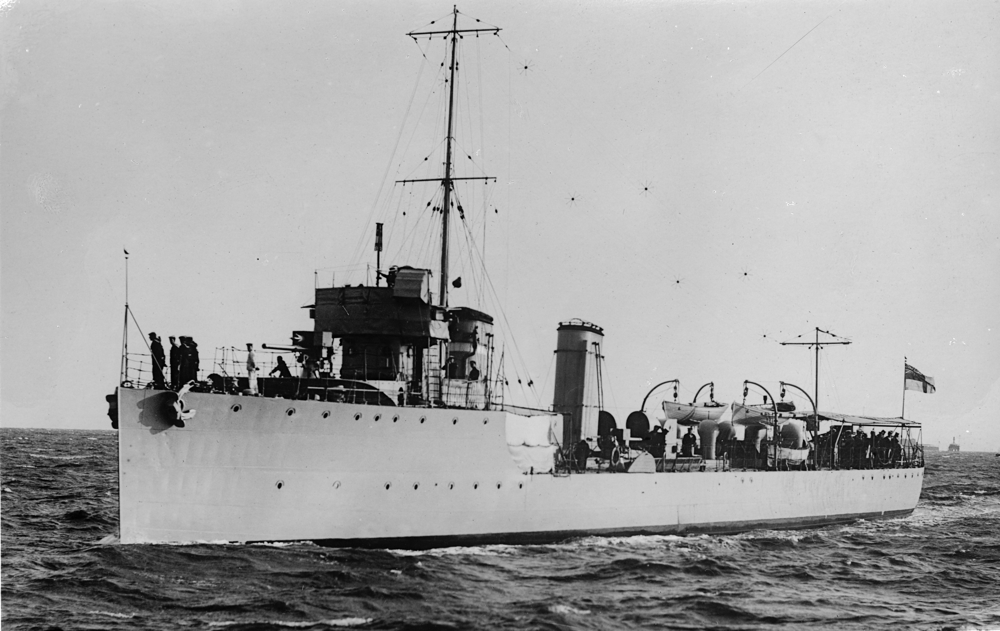
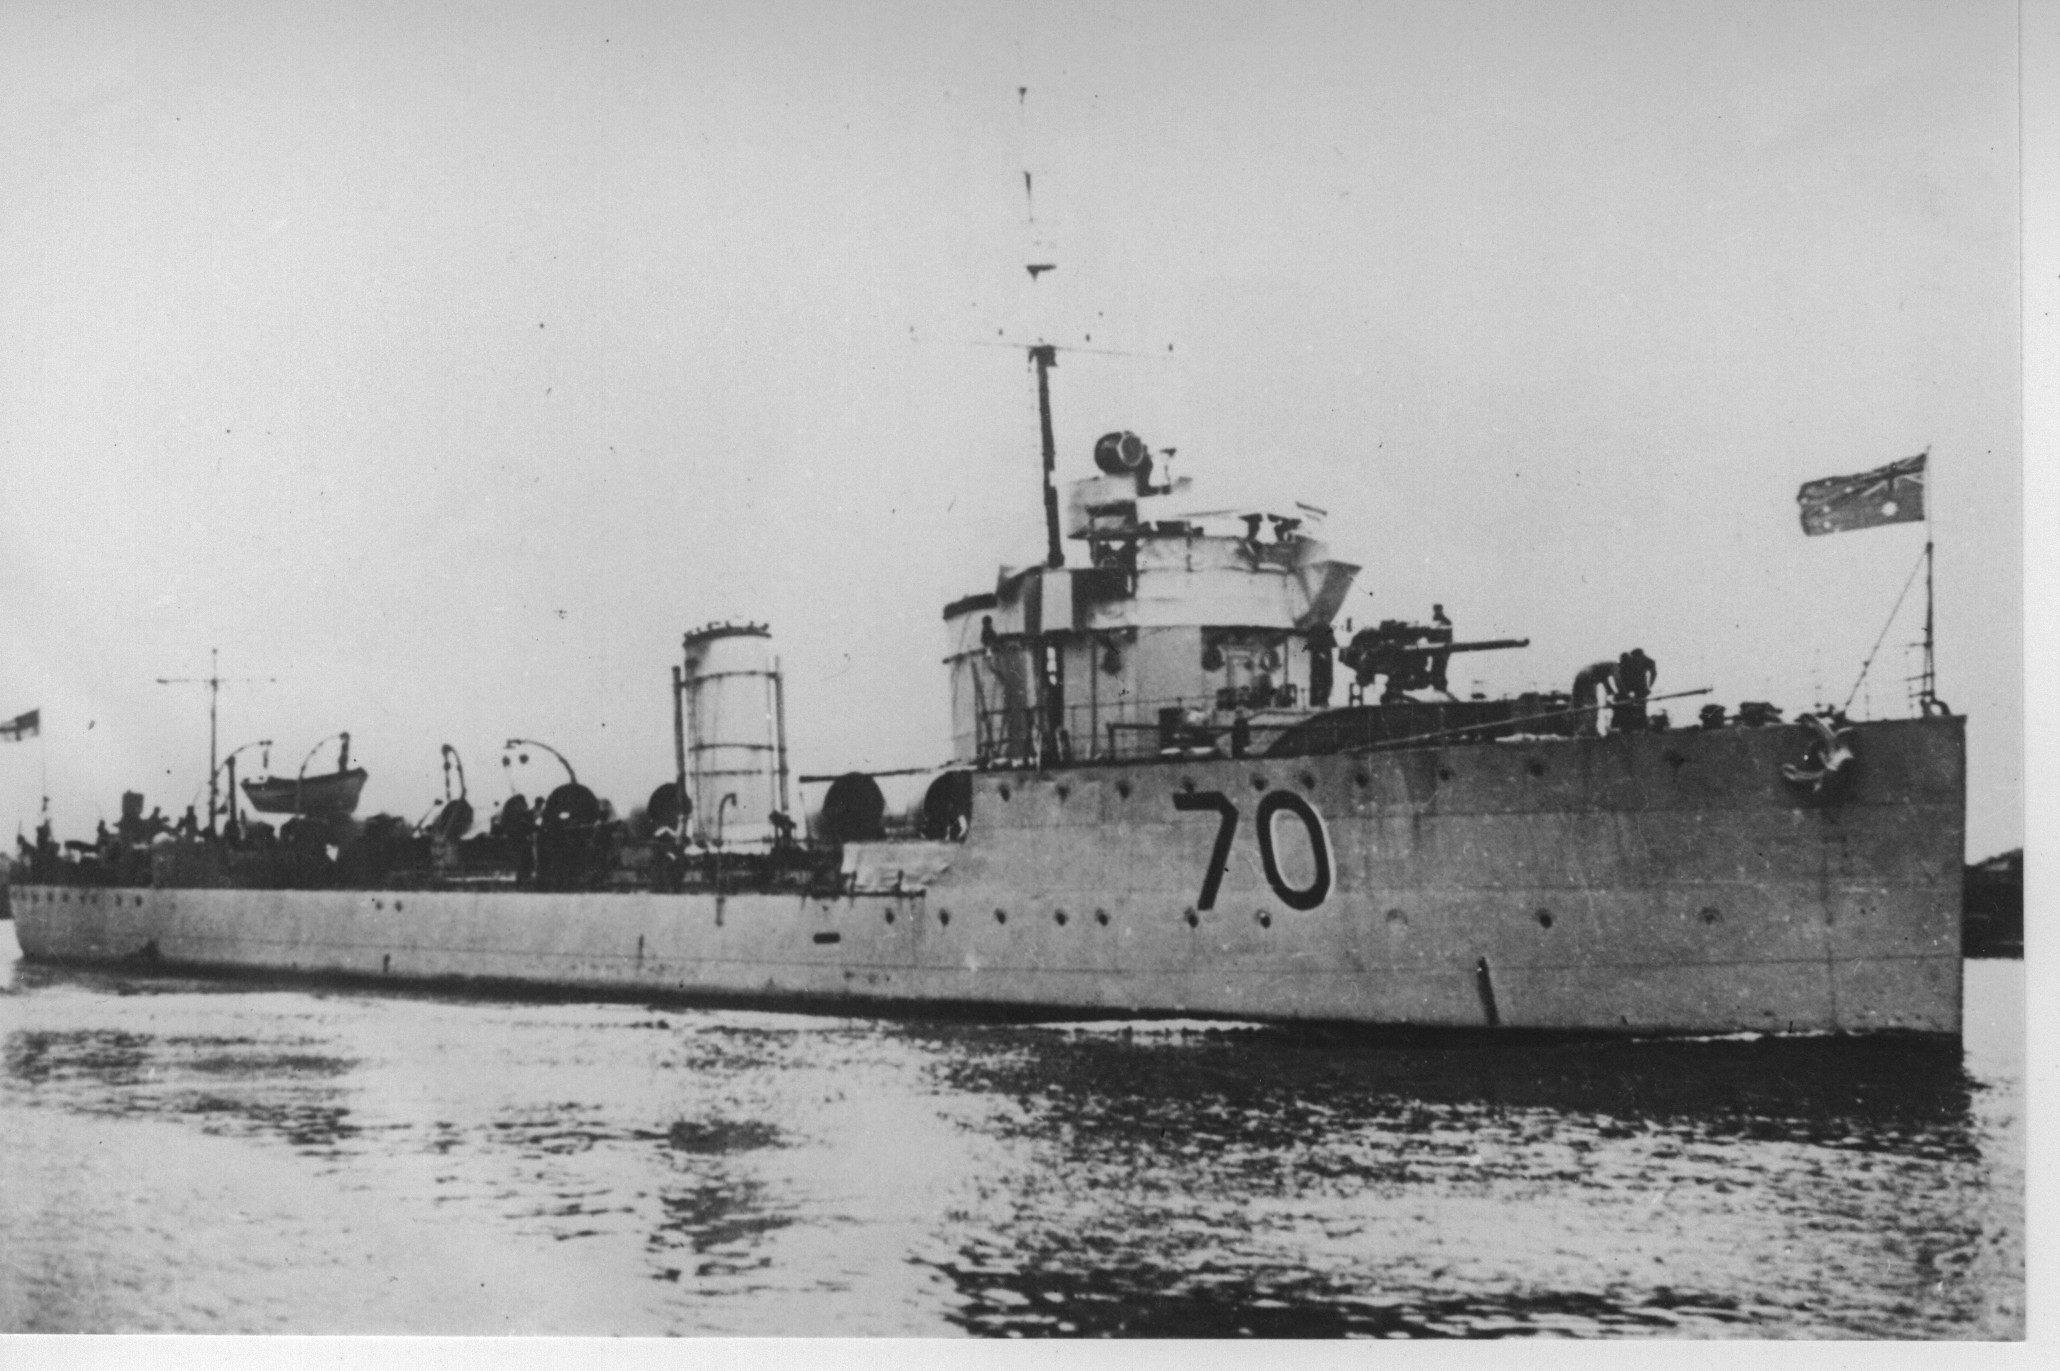
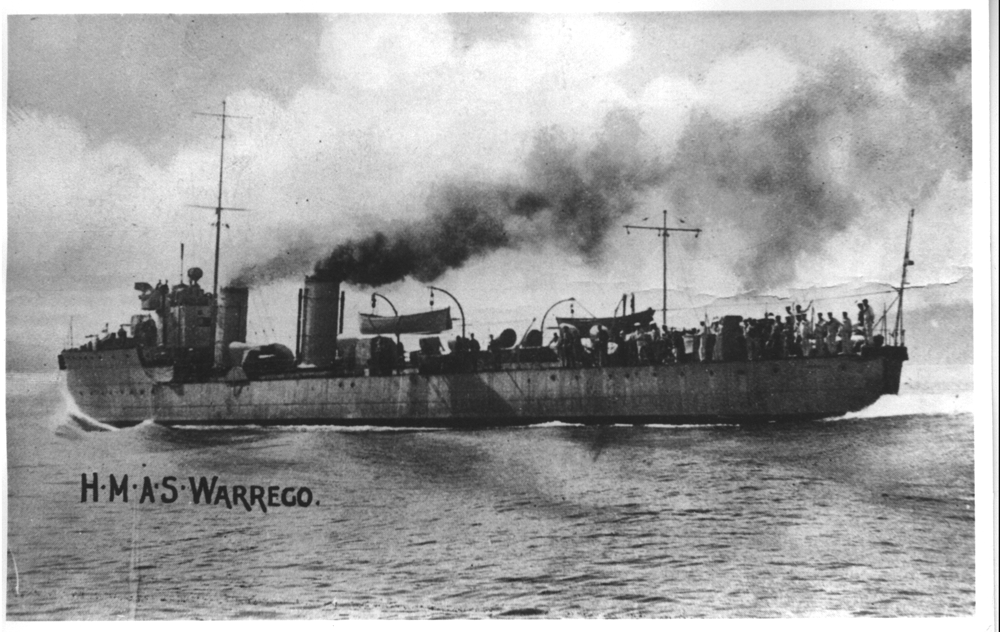
HMAS Warrego at sea soon after commissioning in the RAN.
Their search proved fruitless with no enemy vessels found in the harbour. In fact the German cruisers under Von Spee that Patey hoped to bring to action were nowhere in the New Britain area. They had made good their escape across the Pacific to South America where they successfully engaged a weaker British squadron off Coronel on 1 November 1914. The squadron then proceeded south, rounded Cape Horn where all but one of the ships were sunk off the Falkland Islands on 8 December.
On failing to locate the enemy cruisers, Warrego (I) and the other destroyers remained in northern waters, first at Rossel Island and then in Port Moresby. From there they escorted a section of the convoy carrying the Naval and Military Expeditionary Force raised to capture the German colony of New Britain. The initial landings by the naval contingent were made from Warrego (I) and Yarra (I) on the morning of 11 September 1914. A few hours later, reinforcements from the two destroyers’ crews were sent ashore to counteract anticipated enemy resistance. This, however, proved to be negligible and on 17 September the Germans formally surrendered.
By that date the major units of the Australian Squadron were on their way back to Australia. It consequently fell to the three destroyers to support the military occupation of all the German colonies in the New Guinea area.
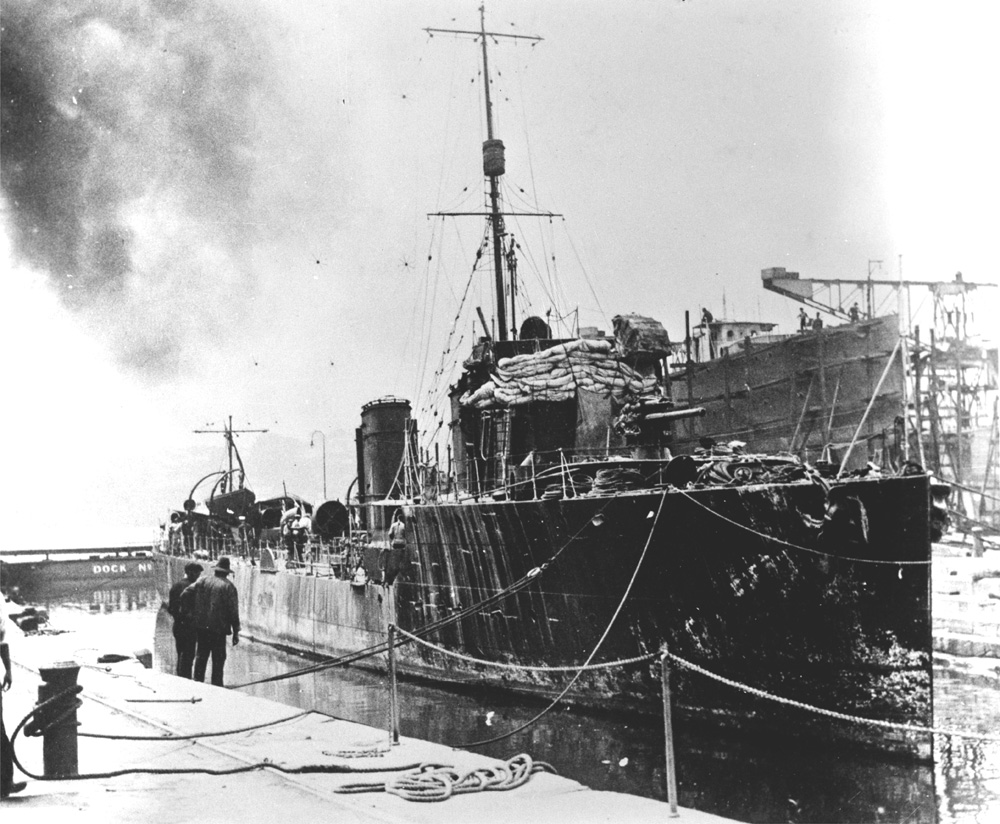
Painted black and with splinter mats fixed to her forward superstructure, HMAS Warrego (I) docks at Cockatoo Island on her return from the successful operation to seize German territorial possessions in New Guinea.
Warrego (I) returned to Sydney on 16 November 1914 for docking, departing again for New Guinea on 27 November. There she joined Parramatta (I) and Yarra (I) in December and all three ships proceeded up the Sepik River to search for a German armed merchant cruiser rumoured to have been in hiding sixty miles inland from the sea. When this rumour was proved to be false, the destroyers remained in the New Guinea and Kavieng areas until they finally departed from Rabaul for Australia on 5 February 1915.
For the next six months Warrego (I) was engaged in patrols off the east coast of Australia before returning to Sydney for a brief docking on 23 August 1915.
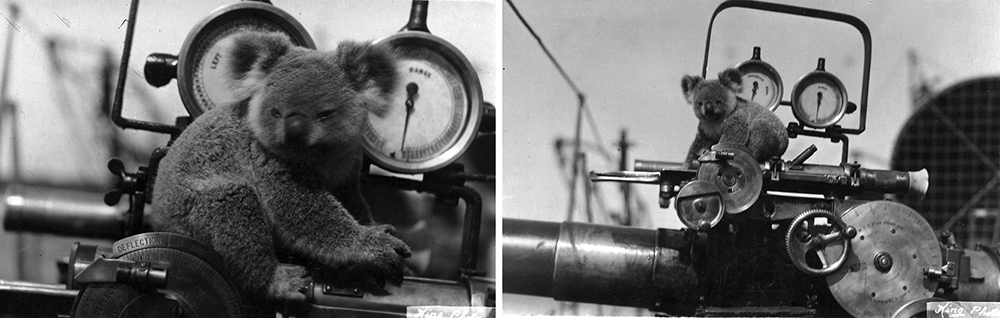
This koala was an unusual but popular visitor to HMAS Warrego.
On 19 October Warrego (I) sailed from Sydney in company with Parramatta (I) and Yarra (I) for Thursday Island where, joined by HMAS Una (I), the four ships proceeded to Timor and then on to Borneo. Based mainly at Sandakan, but occasionally at Saigon, Warrego (I) patrolled the Borneo, Celebes and Malay areas from November 1915 to August 1916. It was during this period, on 24 January 1916, that Commander Cumberlege was appointed as captain of the cruiser Encounter (I) and command of Warrego passed to Lieutenant Herbert Goodchild, RAN. On 11 March 1916 Commander Arthur Bond, RN, assumed command, a position he held until 14 September 1916 when he in turn was relieved by Lieutenant Commander Edward Mortimer, RN.
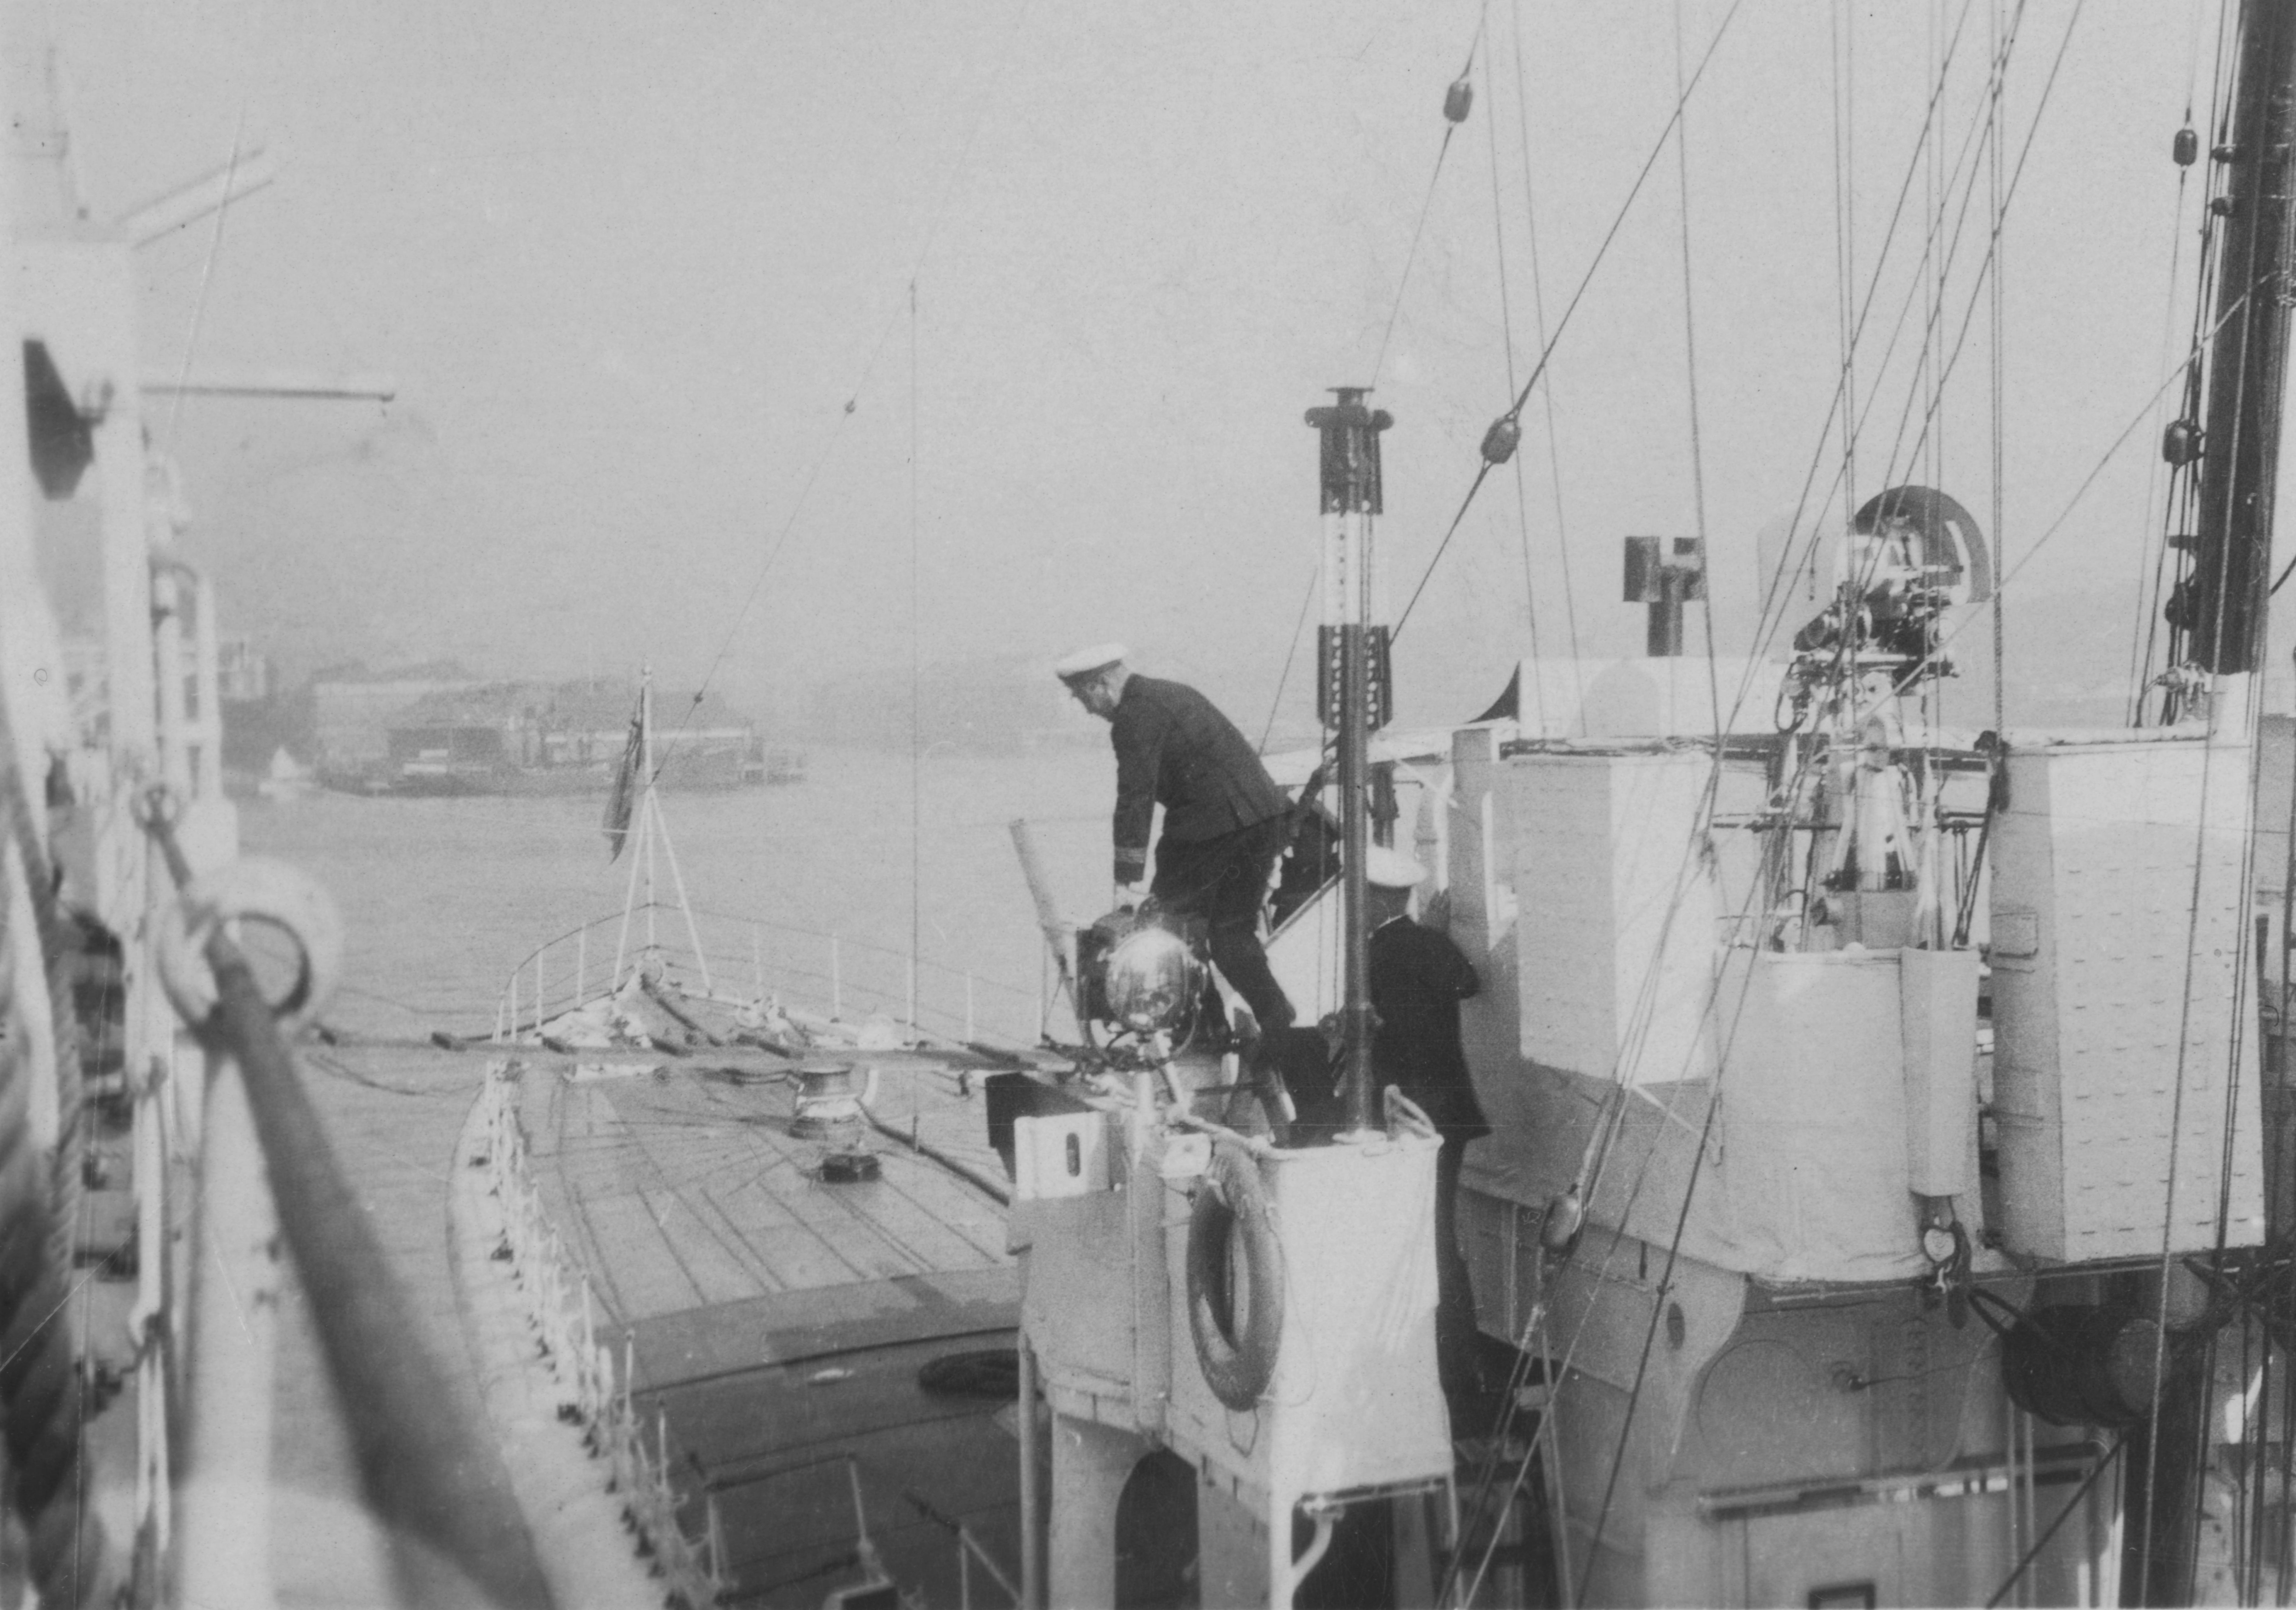
Rarely seen aspect of Warrego's port side and bridge. Note the mechanical semaphore device in the foreground.
By September 1916 Warrego (I) was back on the Australia Station remaining there until the following June. By this stage of the war German submarine warfare in the northern hemisphere had increased in intensity to such an extent that Britain was obliged to call on all its resources to combat it. In response to an Admiralty approach, the Naval Board agreed to the transfer of the Australian destroyers to the Mediterranean.
Warrego (I), Yarra (I) and Parramatta (I) consequently sailed from Sydney on 9 June 1917 bound for Aden, being joined en route on 7 July at Cocos Island by Huon (I), Torrens (I) and Swan (I), which had sailed from Singapore after refitting. From Cocos Island the flotilla proceeded to Diego Garcia to search the archipelago for survivors from two British ships, Jumna and Wordsworth, which had disappeared without trace early in 1917. Nothing was found and the destroyers continued their voyage to the Mediterranean, arriving at Port Said on 9 August 1917.
After refitting at Malta and conducting anti-submarine work-ups, the Australian Flotilla proceeded to its new base at Brindisi, on the heel of Italy, arriving there in October 1917. There the destroyers were assigned the task of patrolling the Strait of Otranto. The purpose of the patrol was to prevent the passage into the Mediterranean of enemy submarines operating from Austrian Adriatic ports. Deployed in two divisions the Australian Destroyer Flotilla maintained patrols on a basis of four days at sea, followed by four days in harbour.
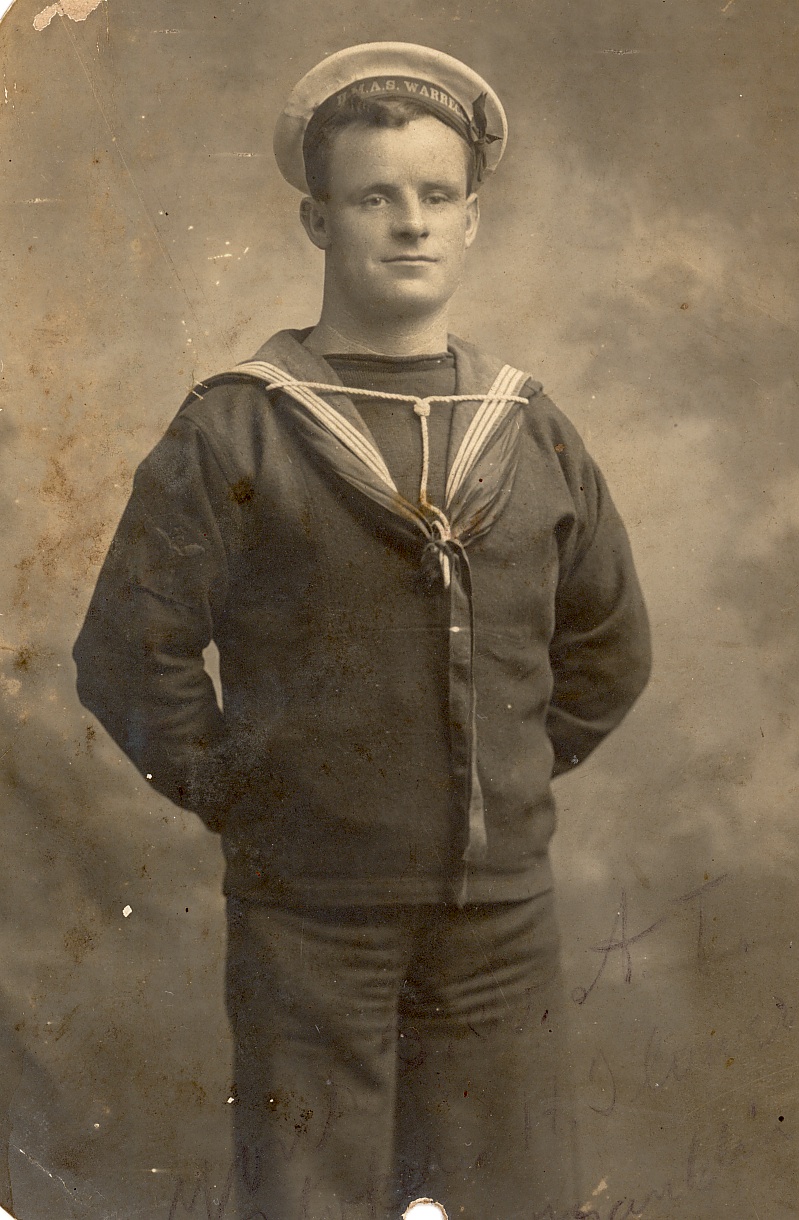
Many sailors of the young Australian Fleet took great pride in having their portraits taken as can be seen in this image of one of Warrego's stokers.
Joined first by a French flotilla and later by Royal Navy destroyers, the Australian ships eventually became part of an anti-submarine force numbering more than 200 vessels. During the early period of their involvement, the enemy, whose submarines were based in Pola at the head of the Adriatic, was active and detection and chases were common place. Later, however, as the Allies implemented more effective sea control and sea denial measures, the enemy’s effort diminished significantly. As new methods of detecting submarines were developed Huon (I), Parramatta (I) and Yarra (I) were each fitted with captive observer balloons whose object was to detect lurking submarines from the air while attendant destroyers stood by ready to act as ‘killer’. Other duties involved screening British and Italian cruisers and bombarding the Albanian port of Durazzo on 2 October 1918.
On 16 November 1917 Warrego, in company with Huon, was involved in rescuing troops and crew from the torpedoed Italian transport Orione. Yarra (I) and Parramatta (I), also on the scene, assisted too, bringing the damaged transport safely into port. For their work in rescuing the men in the heavy sea and successfully salvaging Orione, whose stern was blown off, the crews of the Australian destroyers received high praise from the Italian naval authorities.
In January 1918, Warrego (I) and Huon (I) conveyed the Greek Premier Venizelos and his suite from Taranto to Athens on his return from an Allied conference in London. Tragedy struck the Australian destroyer flotilla on 13 April 1918 when its leader, Commander WHF Warren, RAN, was accidentally drowned in Brindisi Harbour. Command of the Australian flotilla consequently passed to Commander AGH Bond, RN.
When the Armistice was declared, Warrego (I) was attached to an Allied fleet which made a demonstration before Constantinople. A short visit to the Russian Black Sea port of Sebastopol followed before returning to the Mediterranean. After assembling at Gibraltar, the Australian Flotilla sailed for England on 3 January 1919 in preparation for its return to Australia. En route the flotilla became separated in a storm off Cape St Vincent, with Torrens (I) and Warrego (I) taking refuge in the Tagus - they subsequently arrived in Devonport together on 11 January 1919.
Finally, after many delays, the six destroyers assembled at Malta and in the company of HMAS Melbourne (I) sailed for home waters on 17 March 1919. Warrego (I) arrived in Sydney on 21 May 1919 and paid off on 22 July 1919.
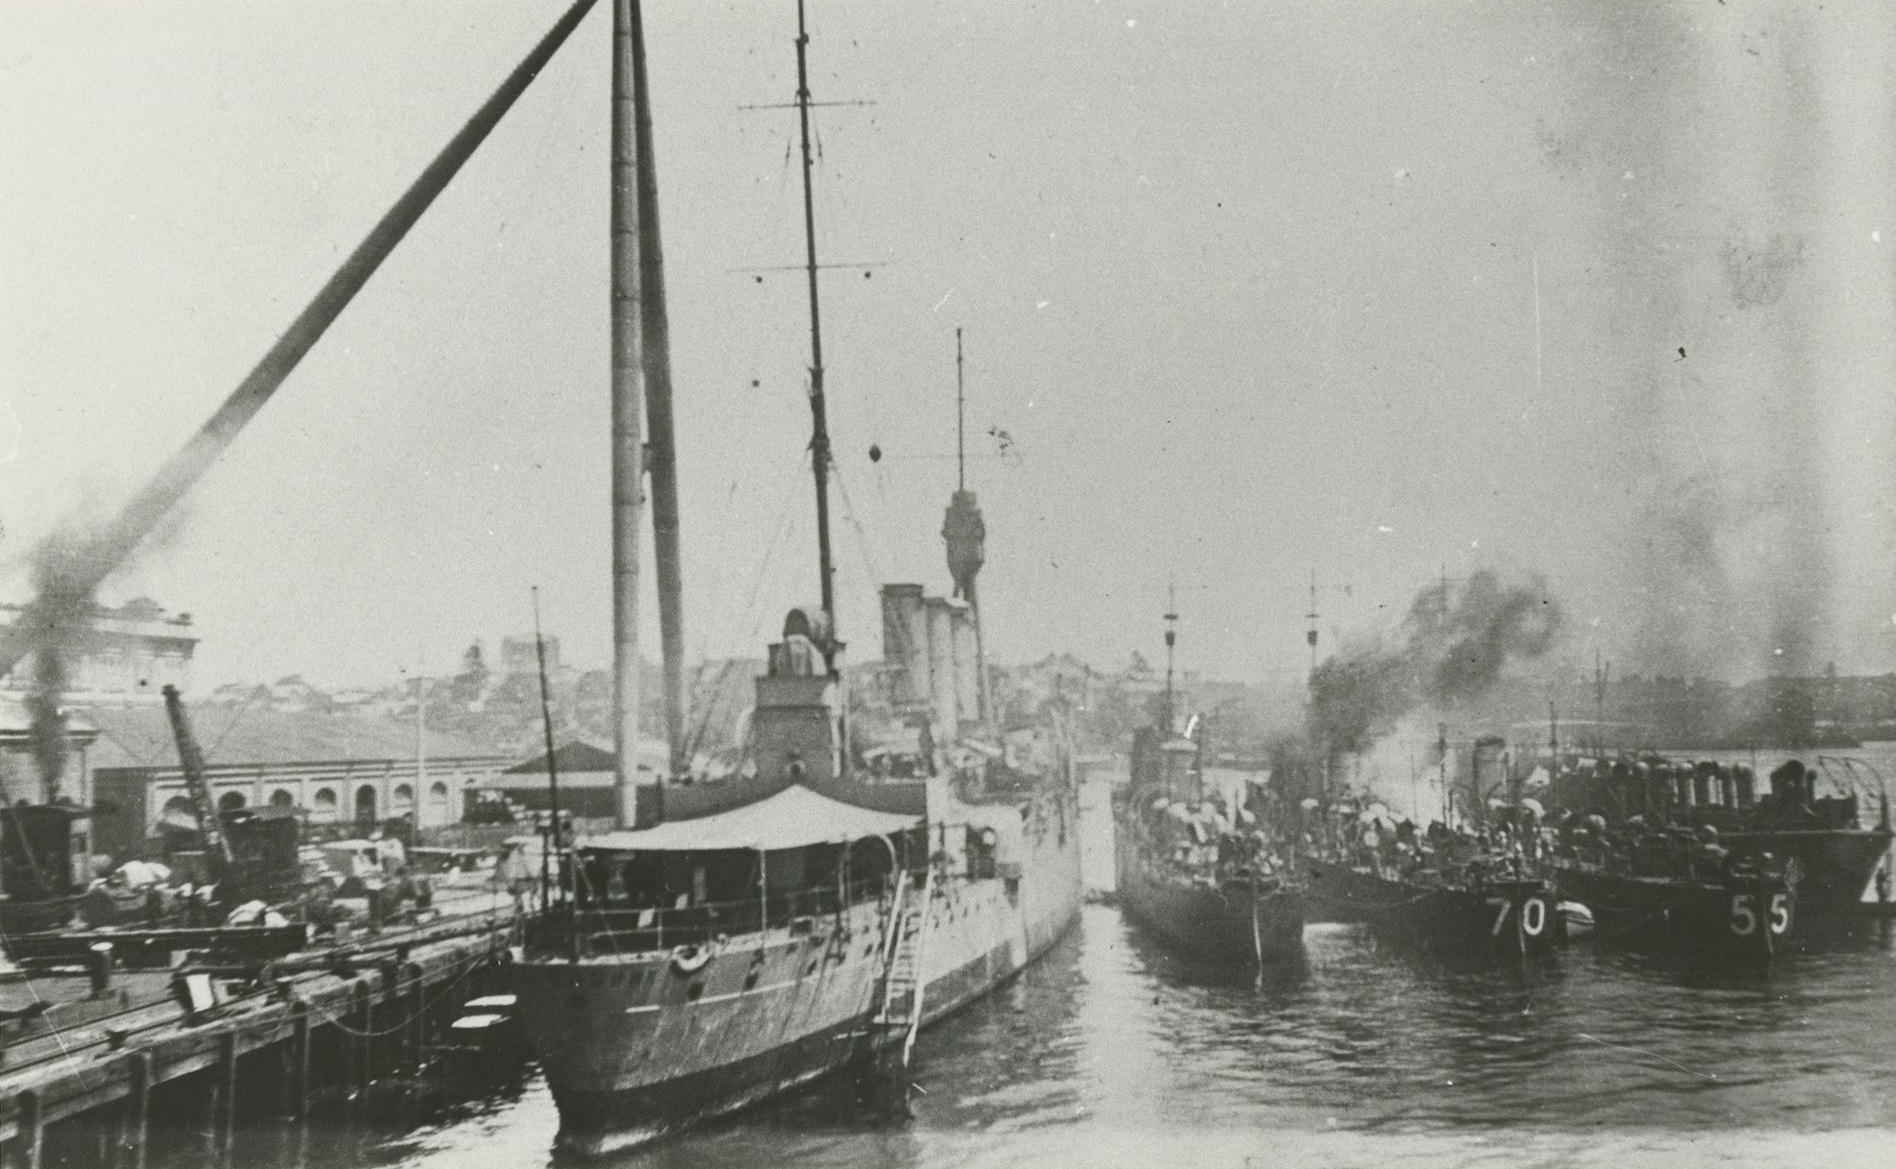
Warrego and her sister destroyers nested at Garden Island following their return to Australia.
She recommissioned on 17 January 1920 for the visit to Australia of the Prince of Wales, before paying off again on 24 August 1920.
On 9 August 1924 she was again commissioned, this time as a training ship for the Royal Australian Naval Reserve before finally paying off on 19 April 1928. She was then handed over to Cockatoo Dockyard in October 1929 and was broken up in 1930.
The RAN’s early torpedo boat destroyers each provided valuable service during World War I.
