HMAS Australia (II)
HMAS
Australia
(II)
 |
| Class |
County Class |
|---|---|
| Type |
Heavy Cruiser |
| Pennant |
I84/D84/C84 |
| Motto |
Endeavour |
| Builder |
John Brown & Co Ltd, Clydebank, Scotland |
| Laid Down |
26 August 1925 |
| Launched |
17 March 1927 |
| Launched by |
Dame Mary Cook, wife of Australian High Commissioner, UK |
| Commissioned |
24 April 1928 |
| Decommissioned |
31 August 1954 |
| Fate |
Sold for scrap on 25 January 1955 |
| Dimensions & Displacement | |
| Displacement | 9072 tonnes (standard) |
| Length | 192.02 metres |
| Beam | 20.83 metres |
| Draught | 6.60 metres |
| Performance | |
| Speed | 31.5 knots |
| Range |
|
| Complement | |
| Crew |
|
| Propulsion | |
| Machinery | Brown-Curtis geared turbines, 4 screws, 80,000 hp |
| Horsepower | 80,000 |
| Armament | |
| Guns |
|
| Awards | |
| Inherited Battle Honours | |
| Battle Honours | |
HMAS Australia (II) was one of two 10,000 ton County Class heavy cruisers ordered by the Australian Government as part of a five year naval development program begun in 1924 and completed in 1929.
She was built to the Kent Class design of County Class cruisers, her sister ships being HMAS Canberra and HM Ships Kent, Berwick, Cornwall, Cumberland and Suffolk.

HMAS Australia's launching, 17 March 1927.

HMAS Australia fitting out. Visible here are her three original 'short' funnels. The height of these were later increased.
She commissioned at Clydebank on 24 April 1928, two months before her sister ship HMAS Canberra, under the command of Captain Francis HW Goolden RN. HM King George V visited Australia on the morning of 17 July and was received with a Royal Guard and Band. The King inspected the upper and main decks taking time to speak with a number of Australia's ship's company.
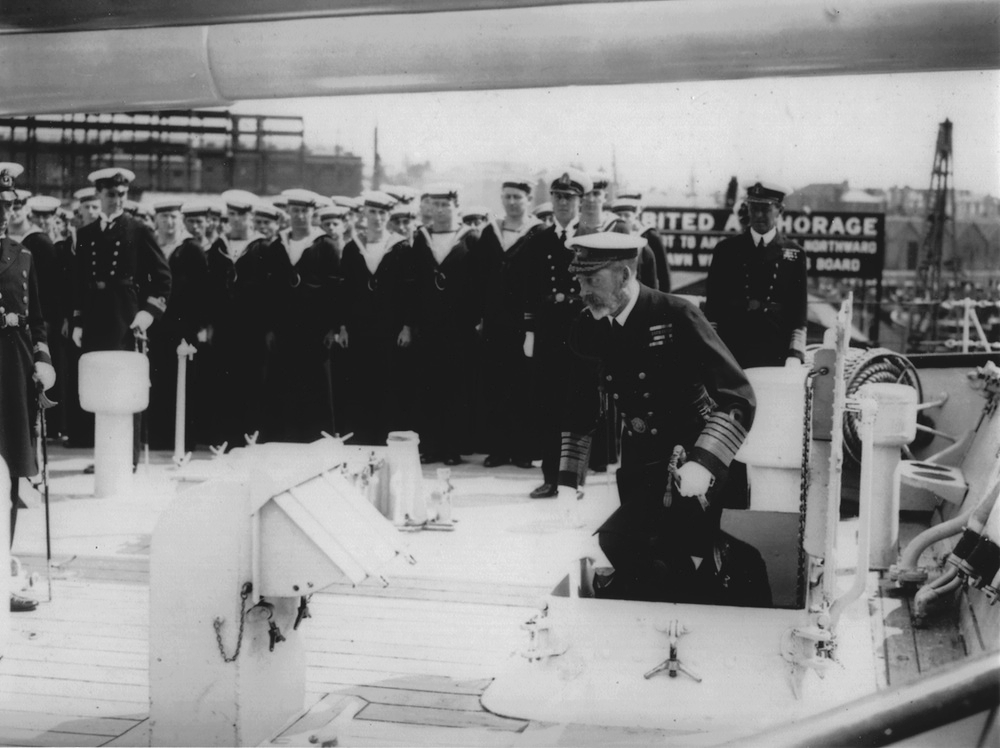
HM King George V during his visit to Australia, 17 July 1928.
Following a period of trials Australia (II) departed Portsmouth on 3 August 1928 and proceeding via Montreal, Quebec, Halifax, Boston, New York, Annapolis, Kingston, Balboa, Tahiti, Wellington and Brisbane, reached Sydney on 23 October 1928.
She spent the first six years of her commission on the Australia Station, mostly in home waters. In 1932 she cruised to various Pacific Islands and in 1933 she visited New Zealand.
On 10 December 1934 she sailed for England, with His Royal Highness The Duke of Gloucester embarked, on exchange duty with the Royal Navy, her place on the Australia Station being taken by HMS Sussex. Proceeding via New Zealand, Fiji, Balboa and Kingston, Australia (II) reached Portsmouth on 28 March 1935.
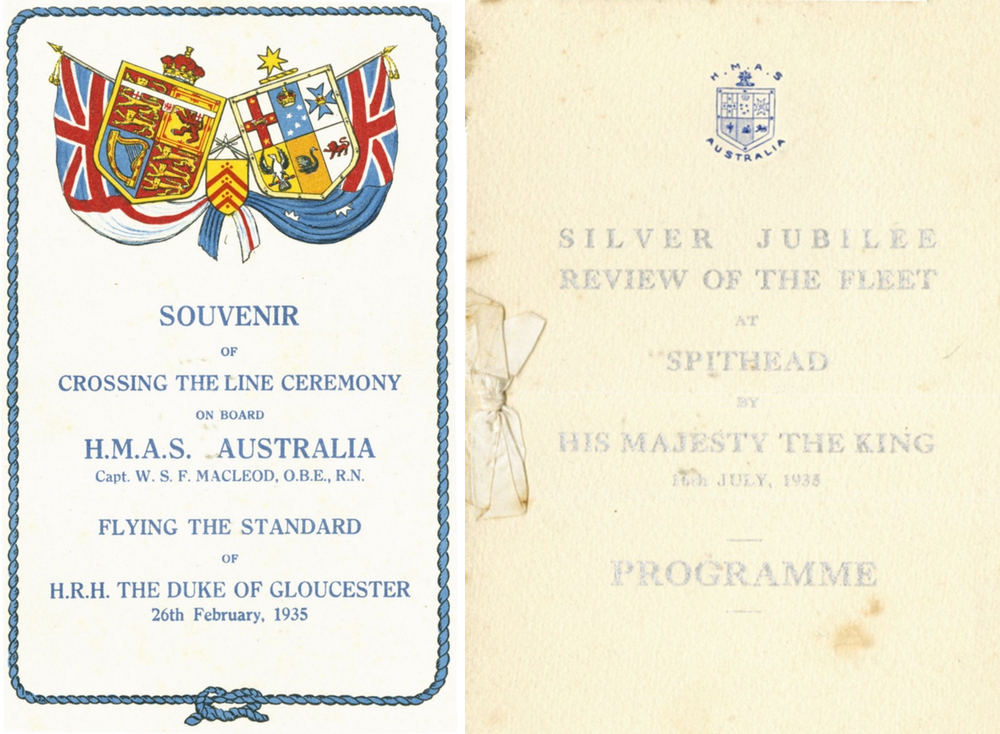
In May 1935 Australia (II) proceeded to the Mediterranean where she served with the British forces until July 1936. She returned to England during the period of 21 June 1935 to 12 September 1935 to take part in the July Jubilee Review at Spithead. On 14 July 1936 she departed Alexandria to return to Australia via Aden and thence direct to Fremantle. She arrived in Sydney on 11 August 1936 after an absence of 615 days on exchange service. Apart from a visit to Melbourne in November 1936, Australia (II) spent the remainder of the year at Sydney and Jervis Bay.
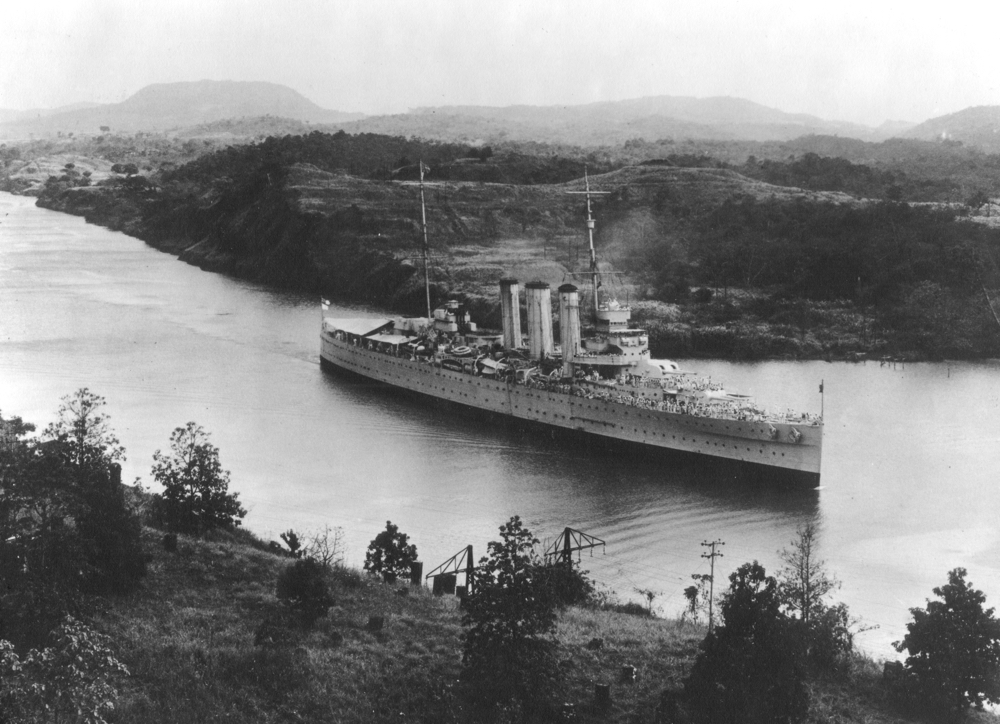
HMAS Australia transiting the Panama Canal, circa 1935.

A postcard depicting Australia's world cruise between 1934-1936.
Australia (II) spent the first three months of 1937 in home waters and in April cruised to New Zealand visiting Wellington, Otago and Auckland. In July she proceeded on a northern cruise to Queensland ports, New Guinea and New Britain, returning to Sydney on 10 September. In November she made her annual visit to Melbourne, which, except for a brief cruise to Hobart in February 1938, brought her peace time seagoing activities to a close. She paid off into Reserve on 24 April 1938.

HMAS Australia Ratings proceeding on shore leave during one of their many port visits.
Australia (II) recommissioned at Sydney on 28 August 1939 under the command of Captain Robert R Stewart RN. The first nine months of World War II were spent on the Australian coast and on one occasion she investigated a doubtful report of an ‘unknown raider’. Between May and July 1940 she was employed on convoy escort duties, initially between Fremantle and Capetown and later between Capetown and Freetown on the African west coast.

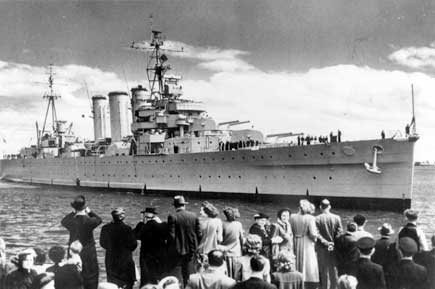
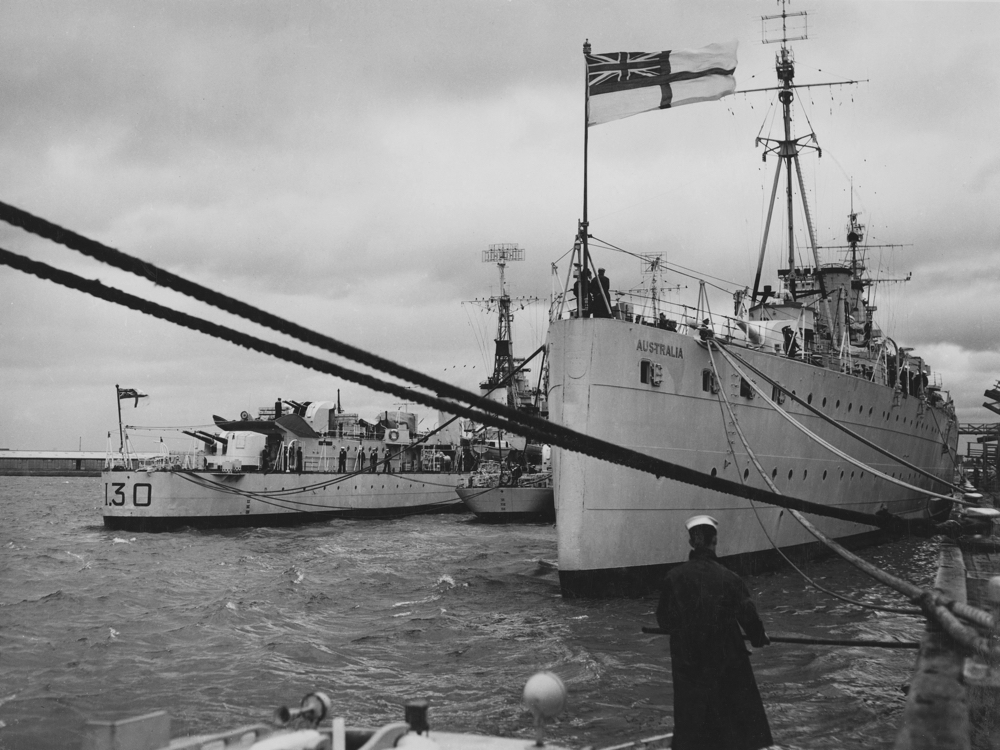
HMAS Australia II in Sydney Harbour.
As part of the Dakar Squadron in July 1940, Australia (II), in company with HM Ships Hermes, Dorsetshire and Milford, was patrolling off the French West African coast, observing the French fleet. During this month Australia (II) fired her first shot in World War II when she was attacked by an enemy bomber. On 9 July she joined a convoy for the United Kingdom and for the rest of the month she was patrolling off Norway in the vicinity of the Faeroes with the 1st Cruiser Squadron, at one time engaged in a search for the German battleship Gneisenau. The patrol continued throughout August.
September 1940 found Australia (II) involved in Operation MENACE and patrolling off Dakar, French West Africa, shadowing French cruisers Gloire, Montcalm and Georges Leygues. The object of Operation MENACE was to install General de Gaulle and a Free French force in Dakar thereby evicting the existing Vichy government and forestalling any possible German occupation.
The optimistic belief that the population of Dakar would welcome de Gaulle proved to be ill-founded and shore batteries opened fire on the fleet. Australia (II) escaped damage, but Cumberland and Foresight were both hit. Australia (II) with Fury and Greyhound attacked a French destroyer which was set ablaze from end to end. On the following day, 24 September, Australia (II) was engaged in a general fleet bombardment of French ships and forts and was twice subjected to high level bombing attacks by French planes. On 25 September Australia (II) and Devonshire moved in towards Dakar to attack French cruisers. During the engagement which followed Australia (II) received two hits aft and her Walrus spotting aircraft was shot down. Fifteen minutes after engaging the French ships the British cruisers withdrew. In 13 minutes Australia (II) had fired 15 salvoes.
In October 1940 Australia (II) was patrolling off the Azores and escorting troop ships between Gibraltar and the United Kingdom. On 29 October, in the Orkney/Shetland area, Australia (II) succeeded in rescuing nine crew members of a Sunderland Flying Boat, despite Force 10 winds and very high seas. The remainder of 1940 was spent docked in Liverpool for a refit. During December the city was subjected to a period of heavy air raids. On one occasion a large bomb fell between the ship’s side and the dock wall and incendiaries fell on board but were quickly extinguished. The catapult wire was damaged and square port windows in the Captain’s cabin broken. The bombing proved too much for both ship’s cats who deserted, and the ship’s company apparently missed out on their Christmas poultry that year when the ducklings were incinerated in the contractor’s premises which were burnt out.
After a period escorting convoys to Freetown, Durban, Suez and Colombo, Australia (II) finally arrived back in Sydney on 24 March 1941. Between April and November the ship was on duty in the Indian Ocean and on 6 November carried out a reconnaissance of the Crozet Islands. She returned to Sydney in December and became Flagship of the Australian Squadron and two months later, in February 1942, Flagship of ANZAC Squadron, having Noumea as its operational base.
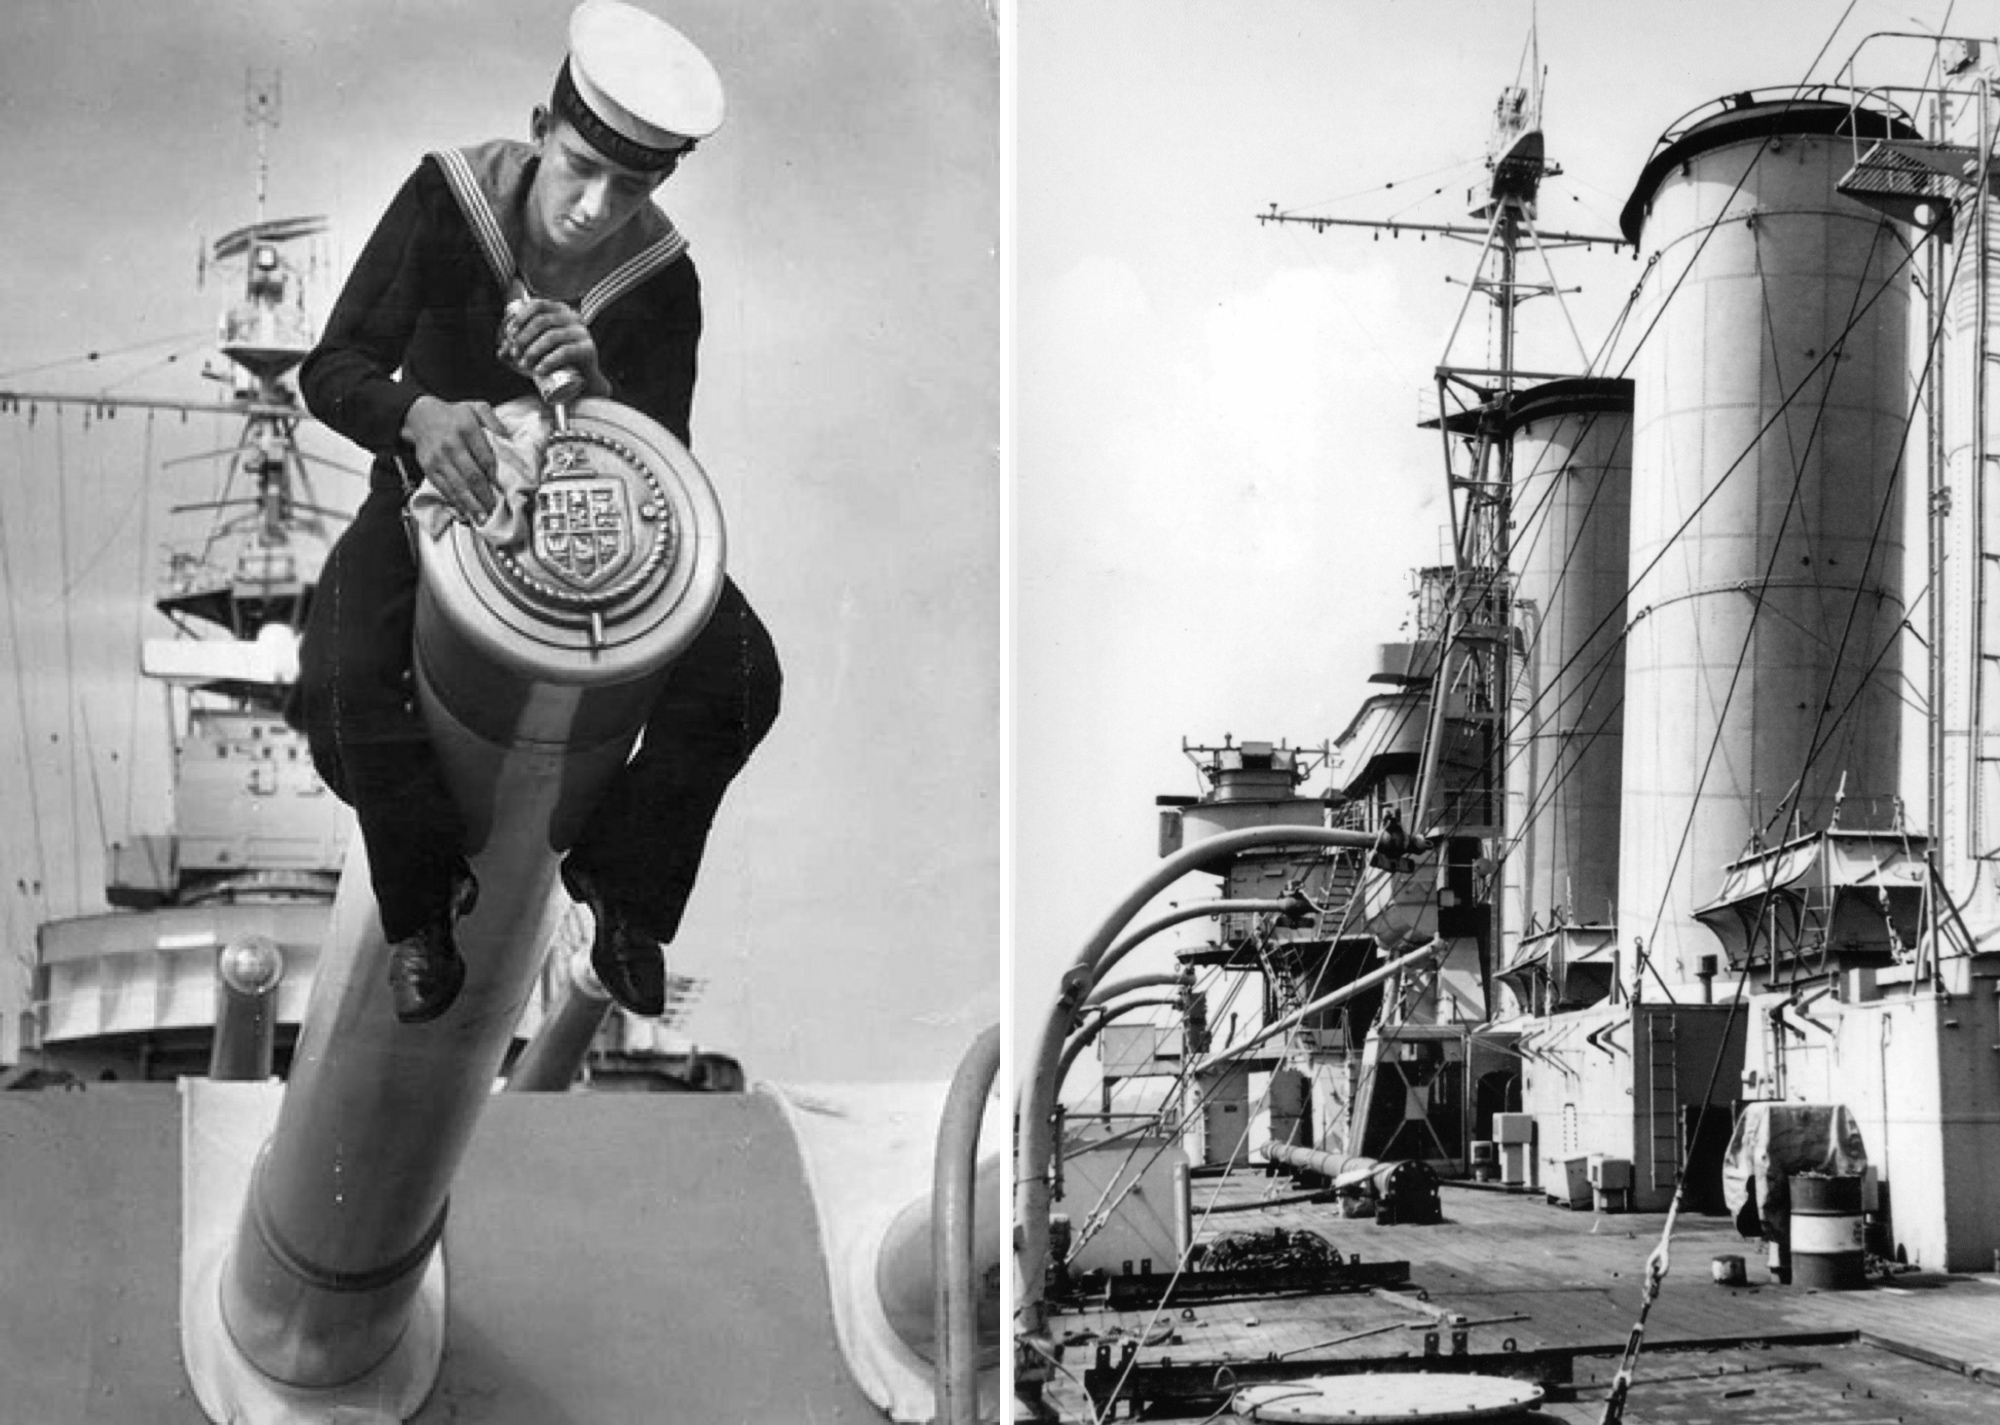
Left: A rating polishes one of Australia's gun tompions. Right: An imposing view of two of Australia's three funnels. The forward funnel would later be damaged during the hotly contested fight for the Philippines.
In March and April 1942 Australia (II) operated in the South West Pacific in support of United States naval forces attempting to halt further Japanese southward expansion. On 22 April the Naval Command in the South West Pacific Area was reorganised and renamed. ANZAC Squadron became Task Force 44 with Australia (II) as Flagship, and on 5 May Task Forces 11, 17 and 44 united as one, Task Force 17.
The Battle of the Coral Sea (7 May 1942) saw Australia (II) as Flagship of the Support Group (Task Group 17.3) attacking enemy transports and light cruisers reported to be heading for Port Moresby through Jomard Passage. The Support Group was attacked by eight torpedo bombers and nineteen high level bombers on this date.
On 7 August 1942 Australia (II) led the escort of nine transports and six store ships containing the forces for the landing at Guadalcanal. She remained in the area until the end of August 1942, during which period she was subjected, with the remainder of the forces, to frequent heavy air attacks.
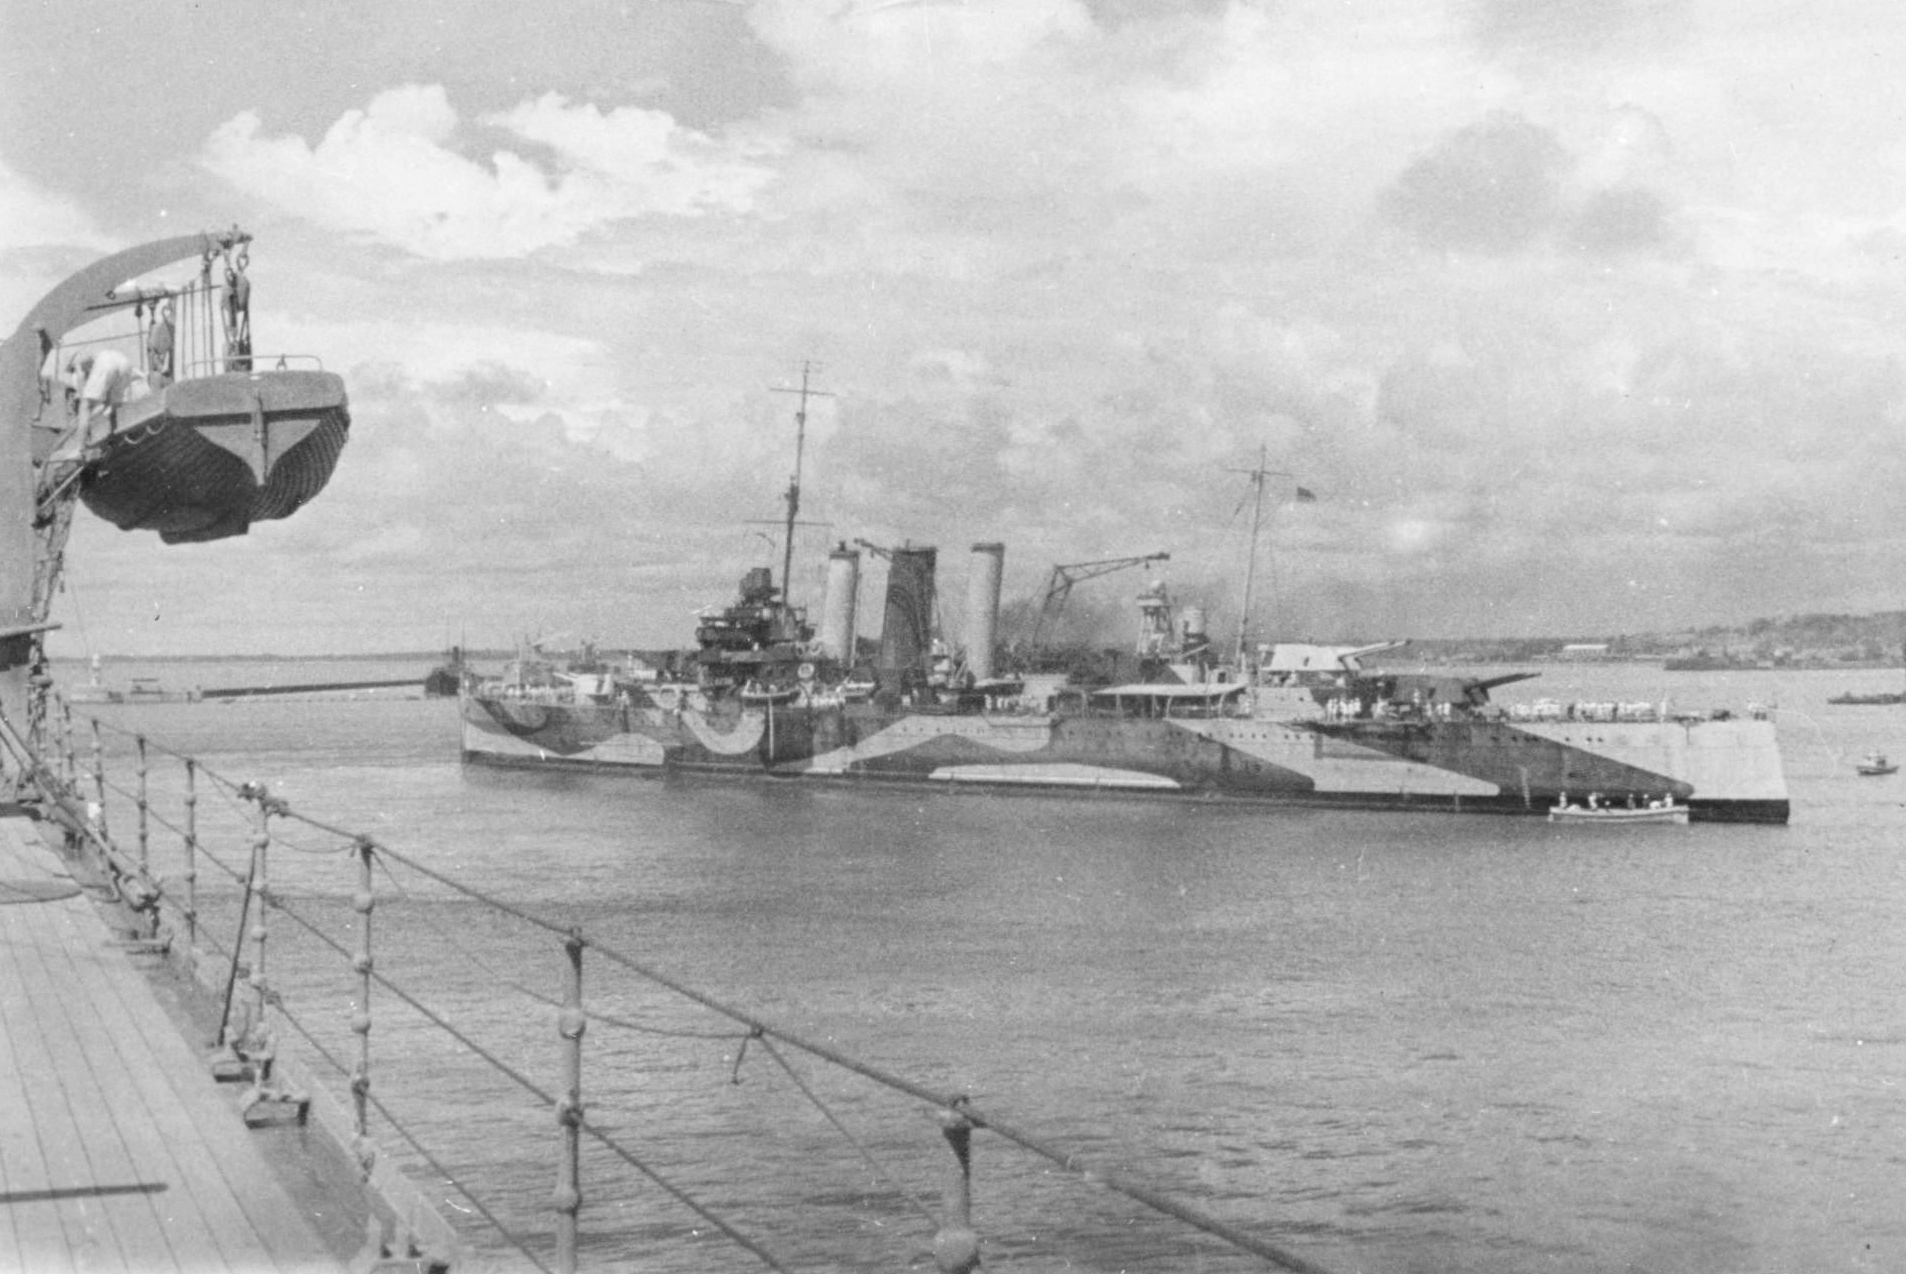
Australia wearing her disruptive camouflage paint scheme.
The early months of 1943 were spent in support of the Coral Sea Group and patrolling the east coast of Australia. On 11 April Australia (II) received a report of a Japanese landing on the south east shore of the Gulf of Carpentaria. Although subsequent investigations proved negative, it appeared likely that the Japanese were either establishing fuel caches for submarines or aircraft or both, or landing small parties of men as commandos or coast watchers.

Back Left to Right: Clive Douglas (Photographer), Flying Officer Davis (Pilot) , Lieutenant Gerrett (Navigator), Gordon Poole (Fitter 2A), Arthur Litt (Clerk) Middle Left to Right: Ray Bennett (Fitter 2E), Bluey Ross (Fitter 2H), Eric Payne (Armourer) Front Row: Eric Atkins (Mess AB), Vic Davis (TAG).

Excerpt from the journal of Midshipman (later Rear Admiral) Andrew Robertson. (Robertson Collection)
From November 1943 to September 1944, Australia (II) was involved in bombarding enemy held islands in the South West Pacific, prior to allied assaults, from Cape Gloucester in the New Britain area to Morotai in the Netherlands East Indies.
The Battle for Leyte Gulf
On 20 October 1944, General MacArthur’s Philippines invasion force, comprising some 550 ships and covered by Admiral Halsey’s Third Fleet, arrived off Leyte Island in the central Philippines.
Australia’s contribution to this famous amphibious operation was Commodore John Collins’ Task Force 74, including HMA Ships Australia, Shropshire, Warramunga and Arunta attached to the US Seventh Fleet. Also present were the Landing Ships Infantry (LSI) HMAS Westralia, Manoora and Kanimbla carrying troops of the US 21st Regimental Combat Team; the frigate Gascoyne, HDML 1074 and the auxiliaries Bishopdale, Poyang, Yunnan and Mekur.
By 09:00 on 20 October hundreds of small boats and destroyers headed for the beaches of Leyte, accompanied by a tremendous bombardment from the accompanying battleships and cruisers. Australia and Shropshire passed through the battle line as the small boats approached and opened fire on assigned targets. At 10:00, after the landing, Shropshire, Arunta and Warramunga shelled set targets and carried out intermittent bombardments throughout the day.

One of Australia's gun's crews during a lull in the action.
The following morning at 06:05 HMAS Australia (II) was hit by a Japanese suicide aircraft. Australia’s Commanding Officer, Captain Dechaineux and 29 other officers and ratings were killed or died of wounds and Commodore Collins and a further 64 were injured. Command of the Australian ships consequently passed to Captain RF Nicholls in Shropshire. Nicholls recalled the attack in the following report:
During the dawn stand-to, a low-flying aircraft approached from the land between Australia and Shropshire. It was taken under fire and retired to the westward. Observers in Shropshire report that the aircraft was hit and touched the water but recovered. It was then turned east again and although under heavy fire, passed up the port side of Australia and crashed into the foremast at 06:05. There was a large explosion and an intense fire was started in the air defence position and bridges. Type 273 radar hut and lantern fell on to the compass platform; both HA Directors and DCT [Director Control Tower] were put out of action and the port strut of the foremast was broken. The fire was brought under control very quickly and by 0635 the large quantity of wreckage on the compass platform and ADP had been cleared away. Commodore JA Collins suffered burns and wounds; Captain EFV Dechaineux and Commander JF Rayment were mortally wounded...
Whether this was the first deliberate kamikaze attack on an Allied ship remains the topic of debate. After this action Australia (II) was escorted by HMAS Warramunga (I) to Manus Island and thence to Espiritu Santo in the New Hebrides for repairs. Captain JM Armstrong, RAN, subsequently assumed command on 29 October.

The damage to Australia's bridge and foremast following the aerial attack of 21 October 1944.
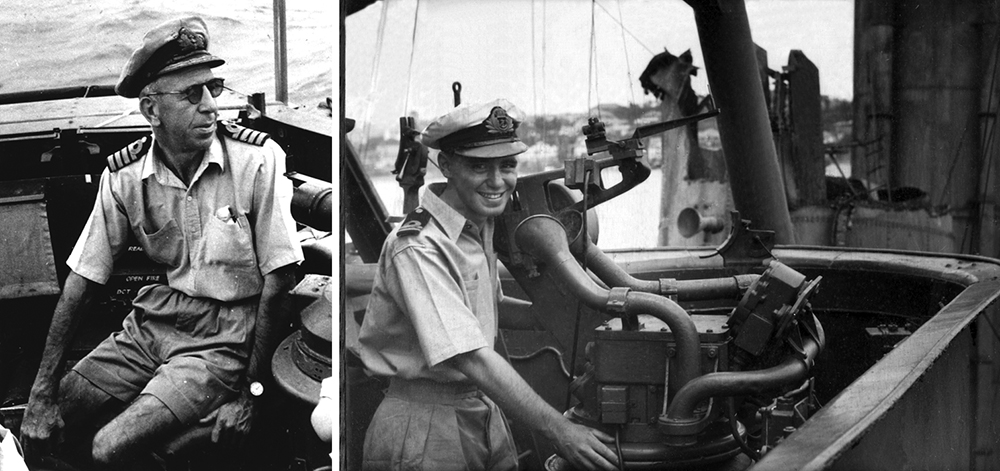
Left: Captain EFV Dechaineux who, along with 29 officers and sailors, was killed in the Japanese dive bomber attack of 21 October 1944. Right: Lieutenant DJ Hamer, RAN was awarded the Distinguished Service Cross for gallantry, skill and devotion to duty while serving in HMAS Australia during the successful assault operations in the Lingayen Gulf, Luzon Island.
By 5 January 1945 she was back in action in the Lingayen Gulf covering the allied invasion of Luzon Island. Here she was subjected to repeated suicide attacks, this time there was no doubt of the kamikaze nature of the Japanese planes. Australia (II) was hit on 5, 6, 8 and 9 January, losing three officers and 41 ratings killed and one officer and 68 ratings wounded. This was the ship’s last action in World War II. After repairs in Sydney, Australia (II) sailed for the United Kingdom via the United States on 24 May 1945 for a major refit, arriving at Plymouth on 1 July. She was still in the United Kingdom at the end of the war.

Left: Captain JM Armstrong, RAN in conversation with Mr SM Bruce, the Australian High Commissioner to England, in July 1945 following the ship's arrival at Plymouth. Visible in the foreground is the propeller of one of the Japanese kamikaze aircraft that struck Australia during the bitter fighting in the seas surrounding the Philippines. Right: One of the aircraft relics now preserved and on display at the RAN Heritage Centre, Sydney.
After a somewhat leisurely voyage home via the Cape of Good Hope, Australia (II) arrived at Fremantle on 25 January 1946 and Sydney on 16 February where she paid off into Reserve.
Apart from a three month deployment in Far Eastern waters between September and November 1947, Australia (II) spent the next three and half years in home waters, paying a goodwill visit to New Zealand in March 1948 and a brief visit to New Guinea in 1949.
HMAS Australia, Culgoa and Arunta berthed at Princes Pier Melbourne 4 April 1947.
Australia (II) spent the last five years of her active commission as a training cruiser, visiting New Zealand on three occasions with the Australian Squadron, from 24 February to 31 March 1950, mid September to 6 October 1952, and a brief visit in October 1953.
From 1 to 14 August 1950, Australia (II) was engaged in a mercy mission to the Australian Antarctic base at Heard Island where a member of the staff, Dr Serge Udovikoff, was ill. Apart from the uncomfortable conditions created by gale force winds that gusted up to 65 knots, sleet, snow and hail, the ship experienced feed water difficulties due to the increased prevalence of plankton in the sea. Use of ship’s water was restricted to drinking and teeth cleaning and no one was allowed to wash. Weather conditions were no better when Australia (II) arrived at Heard Island, but when a reasonable break occurred the cutter was lowered and Dr Udovikoff eventually brought on board for the journey to Fremantle.
In May 1951 the Governor of New South Wales, Lieutenant General Sir John Northcott, was embarked for Jubilee celebrations at Lord Howe Island. In July of the same year the ship paid a brief visit to New Caledonia and also visited New Guinea, New Britain and the Solomon Islands. During her visit to the Solomon Islands a ceremony was held to commemorate the sinking of her sister ship, HMAS Canberra, on 9 August 1942 in the Battle of Savo Island. A wreath was laid by 31 year old Able Seaman Harold Watts, then serving in Australia, who as a young Ordinary Seaman had survived the sinking of the heavy cruiser in 1942.
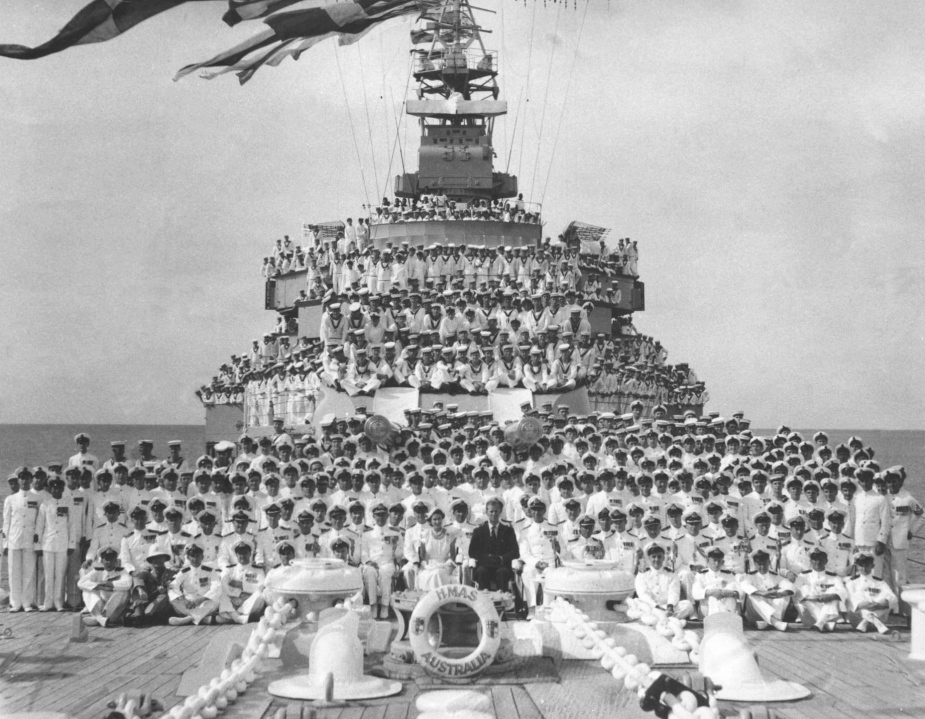
HMAS Australia's ship's company on the occasion of a visit from Her Majesty Queen Elizabeth II and His Royal Highness The Duke of Edinburgh, March 1954.
In the final year of her career, Australia (II) was awarded the Duke of Gloucester’s Cup and carried out both Royal and Vice Regal duties. When Her Majesty Queen Elizabeth II and His Royal Highness The Duke Of Edinburgh visited Australia in February and March 1954, formed part of the naval escort for the Royal Yacht Gothic and HMNZS Black Prince. During the Royal Visit to North Queensland, Her Majesty and His Royal Highness visited Australia (II) for an hour. After all officers were presented, the ship’s company marched past in single file and the Royal Party inspected and talked to 20 selected senior and 20 junior ratings.

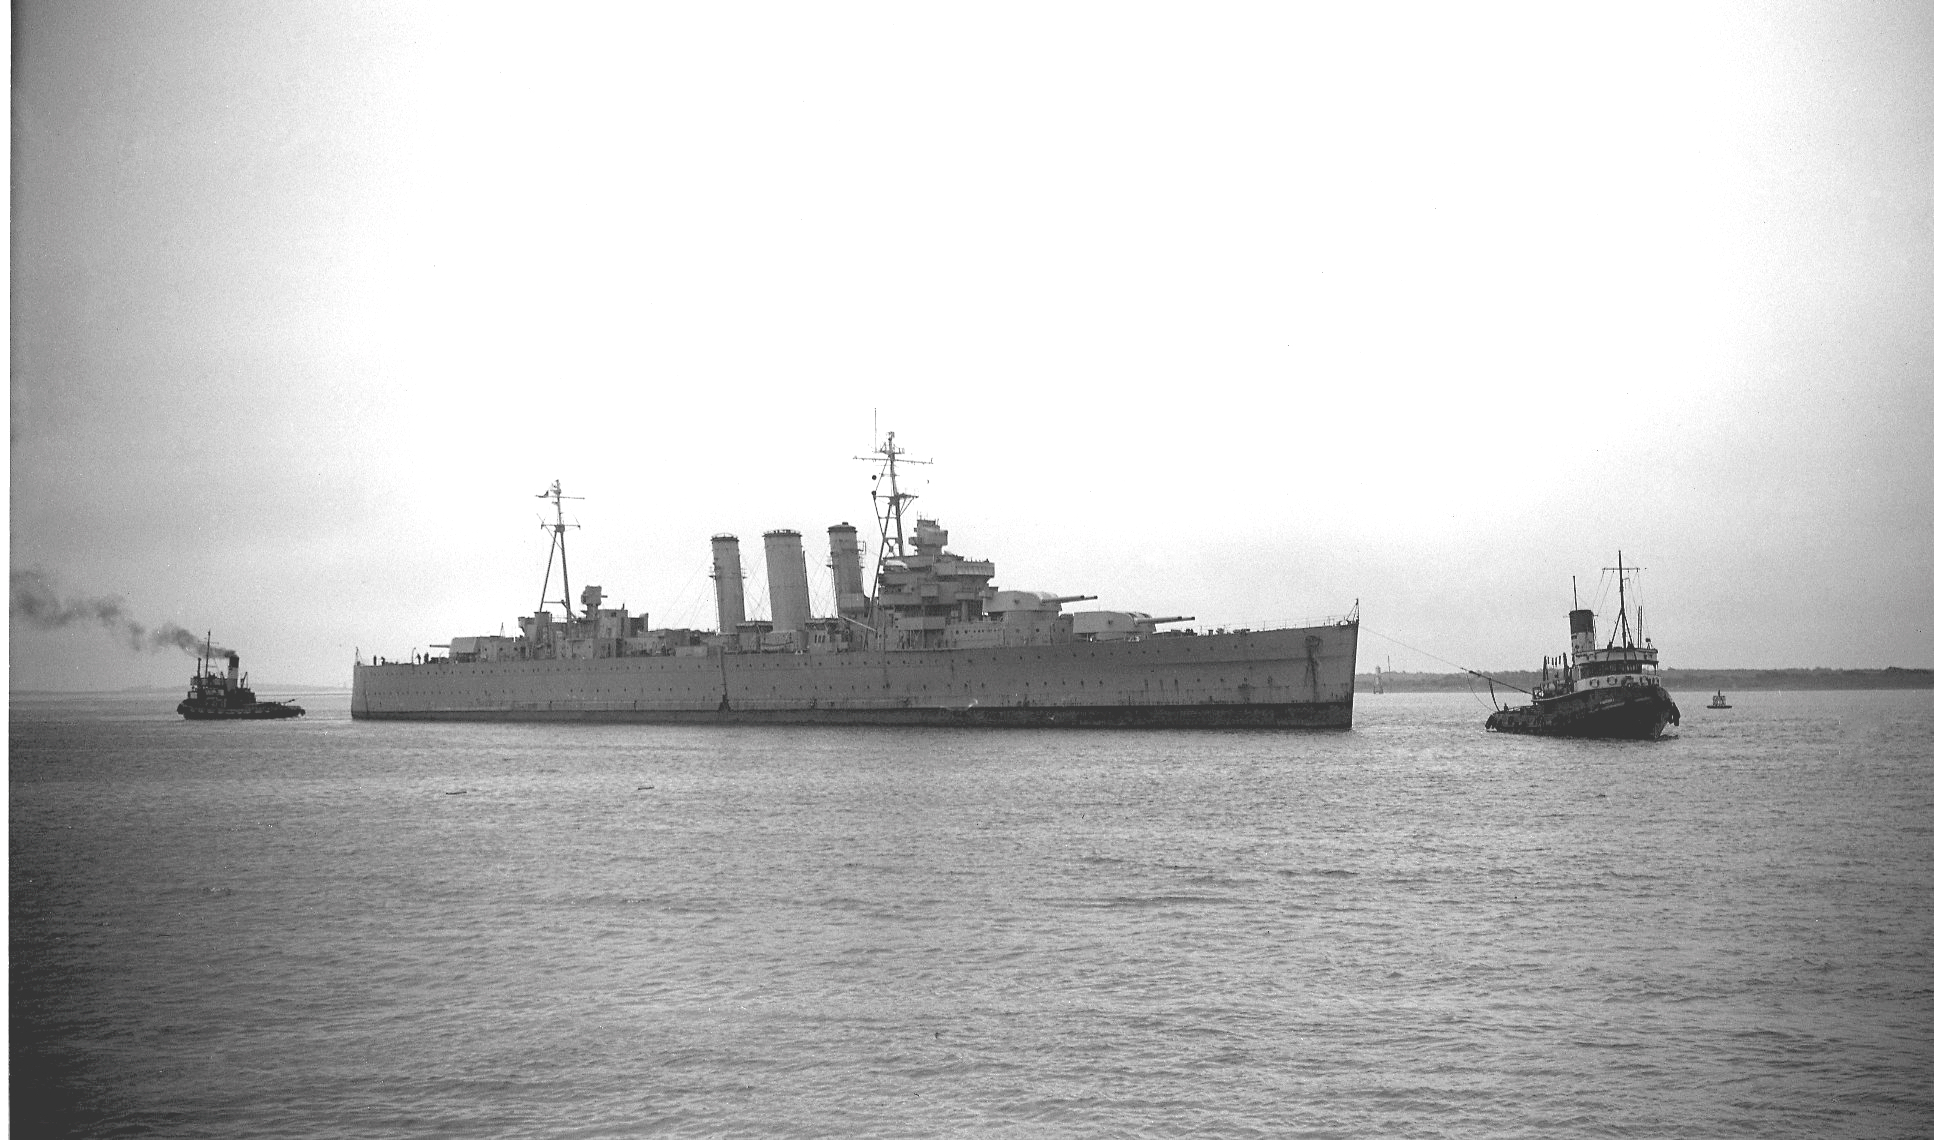
Her fighting days behind her Australia swings peacefully at a buoy in Sydney Harbour, circa 1954. (Courtesy Ian Collis)
On 4 May 1954 the Governor-General, Sir William Slim, Lady Slim and their staff were embarked for a voyage to the Coral Sea, the Great Barrier Reef and the Whitsunday Passage. Australia (II)’s 8-inch guns were fired for the last time on 6 May 1954 and ‘possibly for the last time in any of the Queen’s navies’. While in the Coral Sea, a disabled Dutch LCT was taken in tow for Cairns.
Australia (II) paid off for disposal on 31 August 1954, having steamed 477,301 miles in the period since August 1939. She was sold as scrap to British Iron and Steel Corporation (Salvage) Ltd on 25 January 1955. Australia (II) was towed from Sydney by the Dutch tug Rode Zee on 26 March 1955 and was broken up at the Thomas Ward Shipbreaking Yard at Barrow-in-Furness, England, between 1955 and 1957.
Australia arriving at Barrow-in-Furness for breaking up, 5 July 1955. (Image used with permission of Ken Royall)
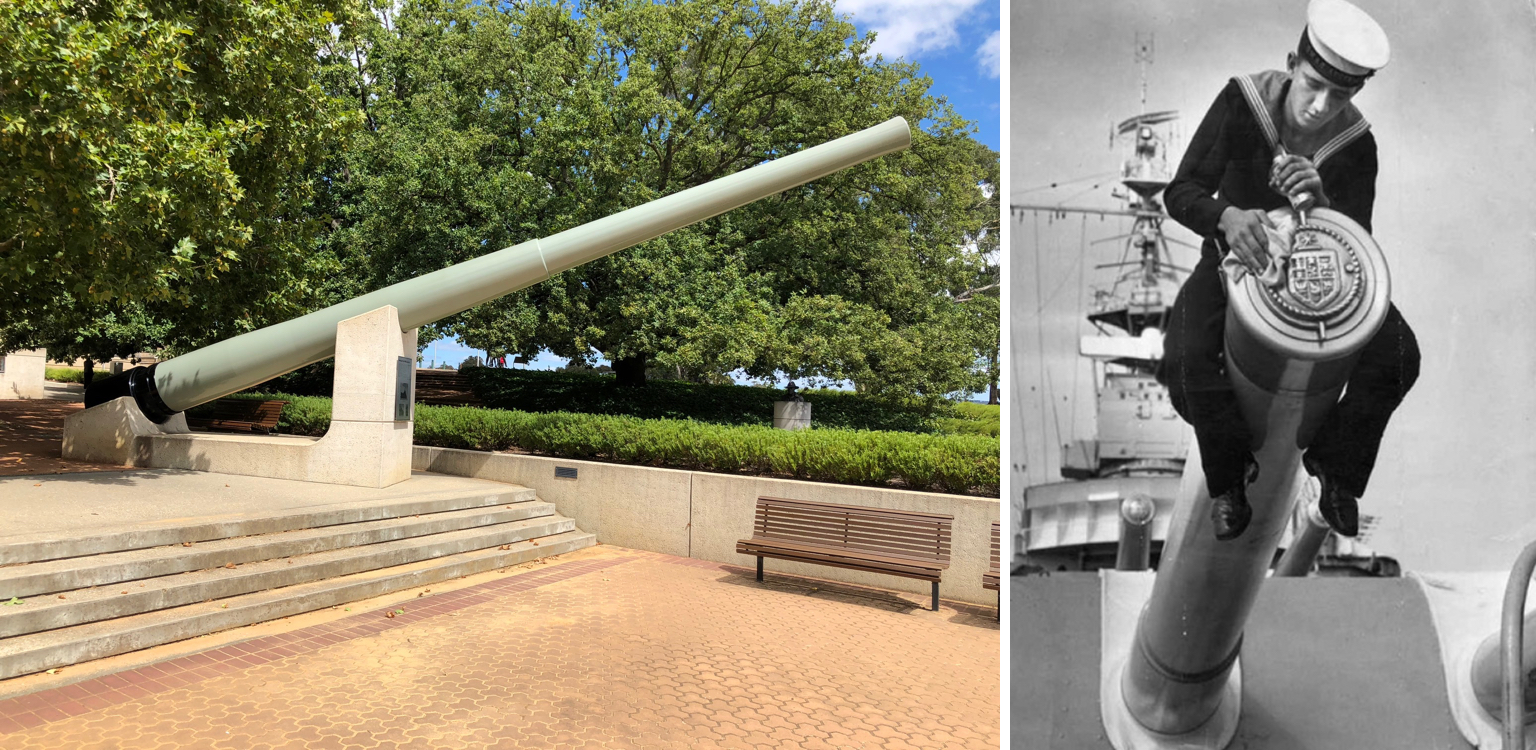
Left: One of HMAS Australia's 8-inch gun barrels on display in the grounds of the Australian War Memorial Canberra. Right: A similar barrel as fitted to the ship when in commission. Each barrel weighed 17.3 tonnes and could fire a 116kg projectile 26.7kms. The life of each barrel was 550 rounds.
Commanding Officers of HMAS Australia (II)
| 24 Apr 1928-23 Apr 1929 | Captain Francis Goolden, RN |
| 24 Apr 1929-26 Sep 1931 | Captain William Chalmers, DSC, RN |
| 27 Sep 1931-31 May 1933 | Captain Frederic Bradley, RN |
| 01 Jun 1933-31 Mar 1935 | Captain William MacLeod, OBE, RN |
| 01 Apr 1935-04 Apr 1937 | Captain Herbert Forster, MVO, RN |
| 05 Apr 1937-23 Apr 1938 | Captain Hubert Acland, DSO, RN |
| Paid off for modernisation | |
| 28 Aug 1939-13 Aug 1941 | Captain Robert Stewart, RN |
| 14 Aug 1941-23 Dec 1941 | Captain George Moore, RAN |
| 24 Dec 1941-08 Mar 1944 | Captain Harold Farncomb, MVO, DSO, RAN |
| 09 Mar 1944- 21 Oct 1944 (KIA) | Captain Emile Dechaineux, DSC, RAN |
| 21 Oct 1944-28 Oct 1944 (Temporary) | Commander Harley Wright, RAN |
| 29 Oct 1944-05 Aug 1945 | Captain John Armstrong, DSO, RAN |
| 06 Aug 1945-19 Nov 1945 | Commander Harley Wright, DSC, RAN |
| 20 Nov 1945-13 Apr 1946 | Captain David Harries, RAN |
| 14 Apr 1946-14 Jun 1946 | Commander Harley Wright, DSC, RAN |
| 15 Jun 1946-27 Nov 1946 | Commander Lindsay Gellatly, DSC, RAN |
| 28 Nov 1946-29 May 1947 | Commander Glen Cant, RAN |
| 30 May 1947-15 Oct 1948 | Captain Herbert Buchanan, DSO, RAN |
| 16 Oct 1948-25 Oct 1949 | Captain Henry Burrell, RAN |
| 26 Oct 1949-05 Aug 1951 | Captain George Oldham, DSC, RAN |
| 06 Aug 1951-23 Nov 1952 | Captain James Morrow, DSO, DSC, RAN |
| 24 Nov 1952-15 Jul 1954 | Captain Alan McNicoll, GM, RAN |
| 16 Jul 1954-02 Aug 1954 | Commander John Adams, OBE, RAN |
| 03 Aug 1954-31 Aug 1954 | Acting Commander Arthur Chapman, RAN |

This plaque, commemorating the 87 men killed while serving aboard HMAS Australia (II), is located at the Australian War Memorial.
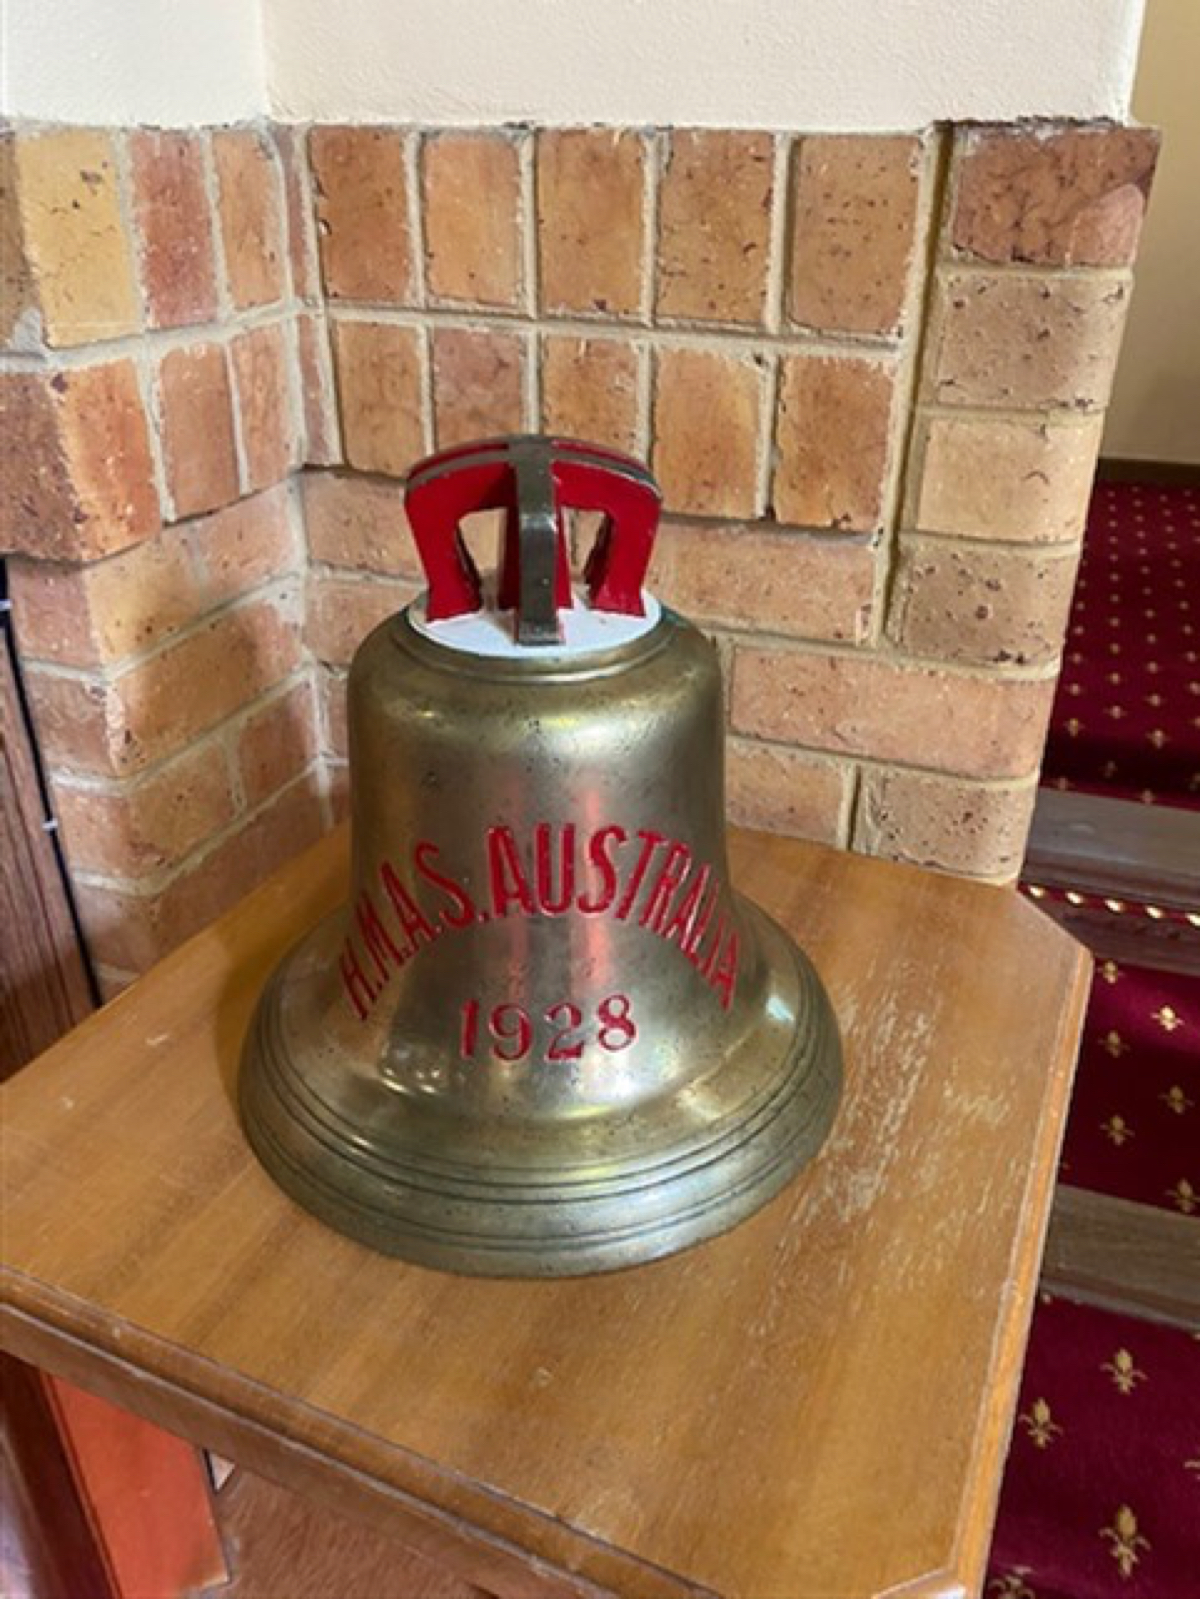
The HMAS Australia (II) ship bell is held at St Mark's Chapel, HMAS Cerberus.
