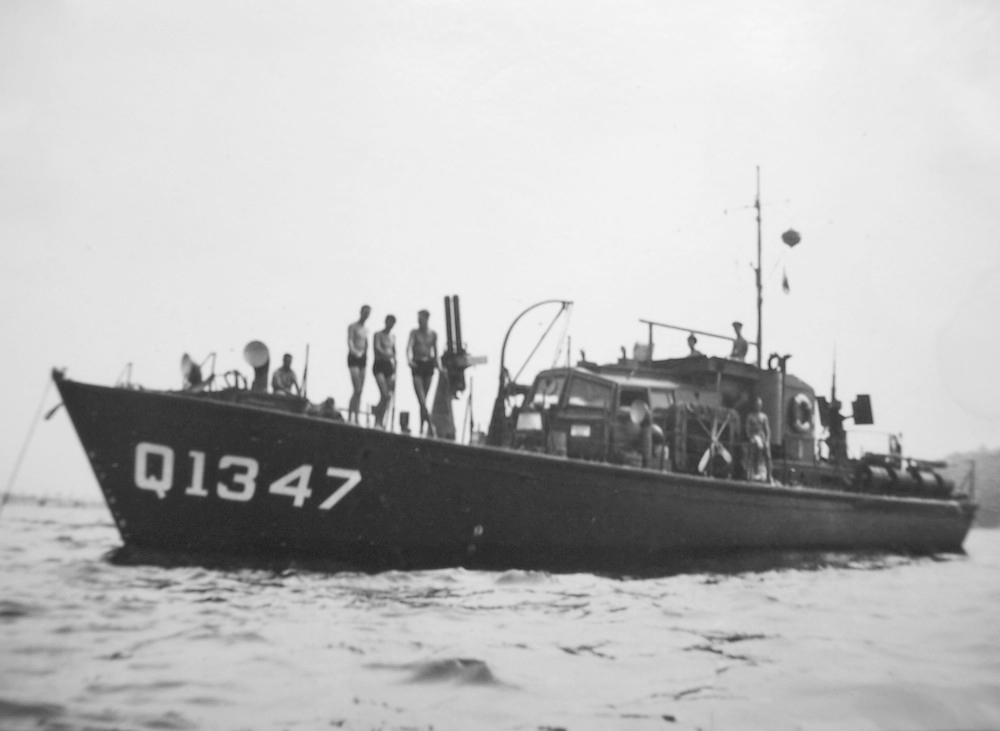
HDML 1347
HDML
1347
 |
| Type |
Harbour Defence Motor Launch |
|---|---|
| Pennant |
Q1347 |
| Motto |
Naves Ligno et Homi Ferro (Wooden Ships and Iron Men) |
| Builder |
Truscott Boat and Dock Company, St Joseph Michigan, USA |
| Commissioned |
1 January 1945 |
| Decommissioned |
29 April 1946 |
| Dimensions & Displacement | |
| Displacement |
|
| Length | 72 feet |
| Beam | 15 feet 6 inches |
| Draught | 4 feet 3 inches |
| Performance | |
| Speed | 12 knots |
| Range | 3000 nautical miles |
| Complement | |
| Crew | 10-12 |
| Propulsion | |
| Machinery | Twin Hercules DNX6 diesels, 390 BHP each, twin screws and twin rudders |
| Armament | |
| Guns |
|
| Other Armament |
|
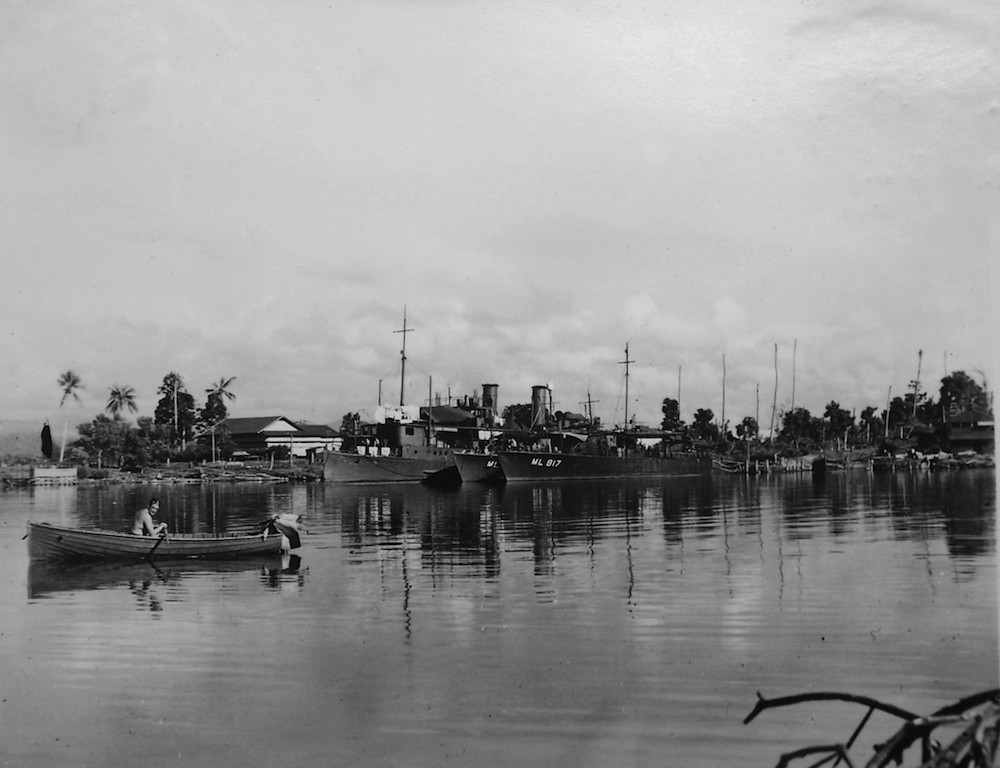
HDML 1347 was built by the Truscott Boat & Dock Company of St Joseph, Michigan, USA. She was transported to Australia as deck cargo on a United States Liberty Ship and was lifted into the water at Garden Island, Sydney by the floating crane Titan. She commissioned on 1 January 1945 under the command of Lieutenant Marsden ‘Tony’ Hordern, RANVR, a young but experienced Small Ships Officer who had seen previous service in HMAS Abraham Crijnssen, ML 814, ML 817 and ML 823 in Australian, Timorese and New Guinea waters.
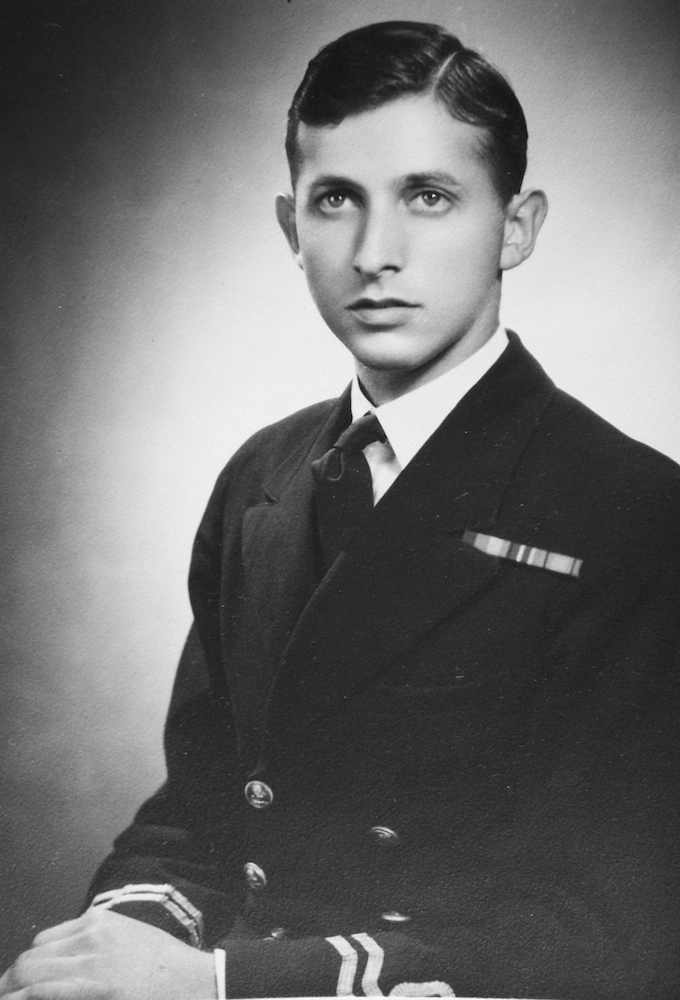
Lieutenant MC Hordern, RANVR.
Soon after commissioning, Sub Lieutenant Clem F MacMahon, RANR a former shipmate of Lieutenant Hordern’s, joined as his first Lieutenant. The officers and men of 1347 were soon engaged in readying the ship for sea and it did not take long for them to become a close-knit crew. To reflect pride in their ship it was proposed by the crew that 1347 should have a personalised badge. Able Seaman Richard Jeffs soon came up with a design to which Lieutenant Hordern added the motto “Naves Ligno et Homi Ferro”, meaning “Wooden Ships and Iron Men”. This badge was used variously on letterheads and also appeared on a specially commissioned felt souvenir pennant produced for each member of the crew.
After completion of dockyard work and subsequent trials, 1347 sailed on 4 March 1945 for Brisbane via Port Stephens and Coffs Harbour. Shortly before sailing, MacMahon received orders that he had been posted ashore and Sub Lieutenant Thomas Clifton Wilkinson, RANR, subsequently joined as the new first Lieutenant.
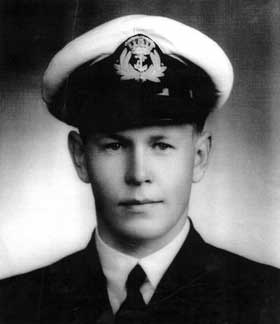
Sub Lieutenant Clif Wilkinson, RANR.
1347 arrived in Brisbane on 7 March and remained there until May conducting super-charger calibration trials while at the same time providing morale boosting sea experience to members of the Women’s Royal Australian Naval Service (WRANS) based at HMAS Moreton. During this period, peace was declared in Europe and hostilities with Germany came to an end. The crew of 1347 celebrated this welcome news in Brisbane before receiving orders to sail for the New Guinea area of operations where the war against Japan continued to be waged.
On 19 May, 1347 departed Brisbane for passage to Port Moresby in company with three of her sister ships, HDMLs 1341, 1354 and 1355 and the Services Reconnaissance Department vessel HMAS Karina. The voyage to New Guinea was punctuated with visits to Gladstone, Mackay, Townsville and Thursday Island before arriving in Port Moresby on 13 June. Following the passage north, 1347’s engineers busied themselves in stifling tropical conditions below decks carrying out routine maintenance on her engines before she sailed in heavy weather on passage to Milne Bay on 28 June.
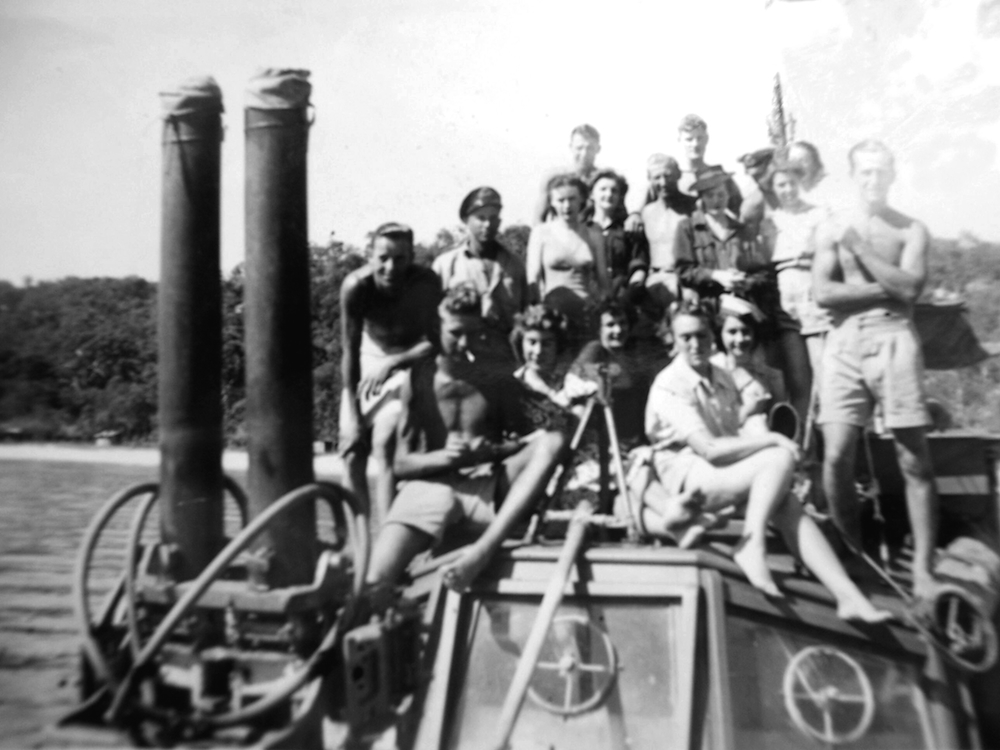
Members of the Women’s Royal Australian Naval Service (WRANS) being entertained onboard HDML 1347 in Moreton Bay.
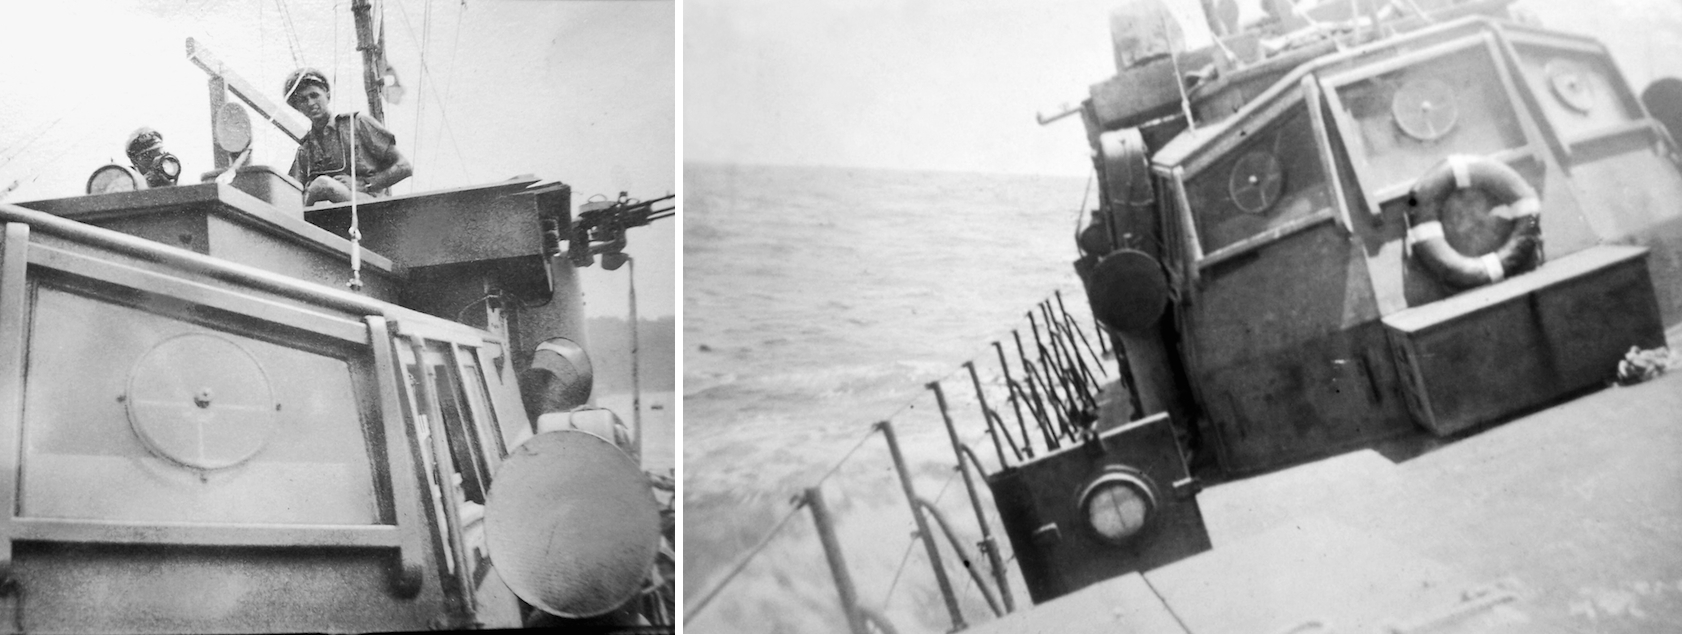
Left: Lieutenant Hordern on HDML 1347’s flying bridge. Note the close range weapons mounted on the port side. Right: 1347 rolling heavily on passage to New Guinea.
Under the direction of a Papuan guide named Guba, 1347 cautiously proceeded through coral reefs and shoals before seeking shelter from rough weather off the village of Hula on 29 June. She remained at anchor until 1 July before continuing on the next leg of her voyage to Ainioro Island and Fife Bay before entering the China Strait and berthing at the US jetty at Milne Bay on 3 July.
Two days later 1347 sailed from Milne Bay and proceeded to anchor off the village of Ibulai where she remained for several hours before getting underway that evening and making passage for Goodenough Bay. Hazy conditions, a freshening wind and fatigue placed additional demands on 1347’s officers as they continued their passage in darkness without the aid of radar. At 23:00 Lieutenant Hordern observed what he at first took to be a planet shining in the dark New Guinea skies. Moments later he realised that the light was much brighter and closing on a steady bearing. Reaching for his binoculars his worst fears were confirmed when he identified the light as a large ship bearing down upon 1347. Reacting swiftly he grasped the helm and put the vessel hard over to starboard. 1347 responded immediately and disaster was narrowly averted as the pressure wave of the oncoming vessel helped push them clear. Continuing the passage, 1347 berthed at Oro Bay on 6 July, finding it crowded with American vessels and vast amounts of the machinery of war.
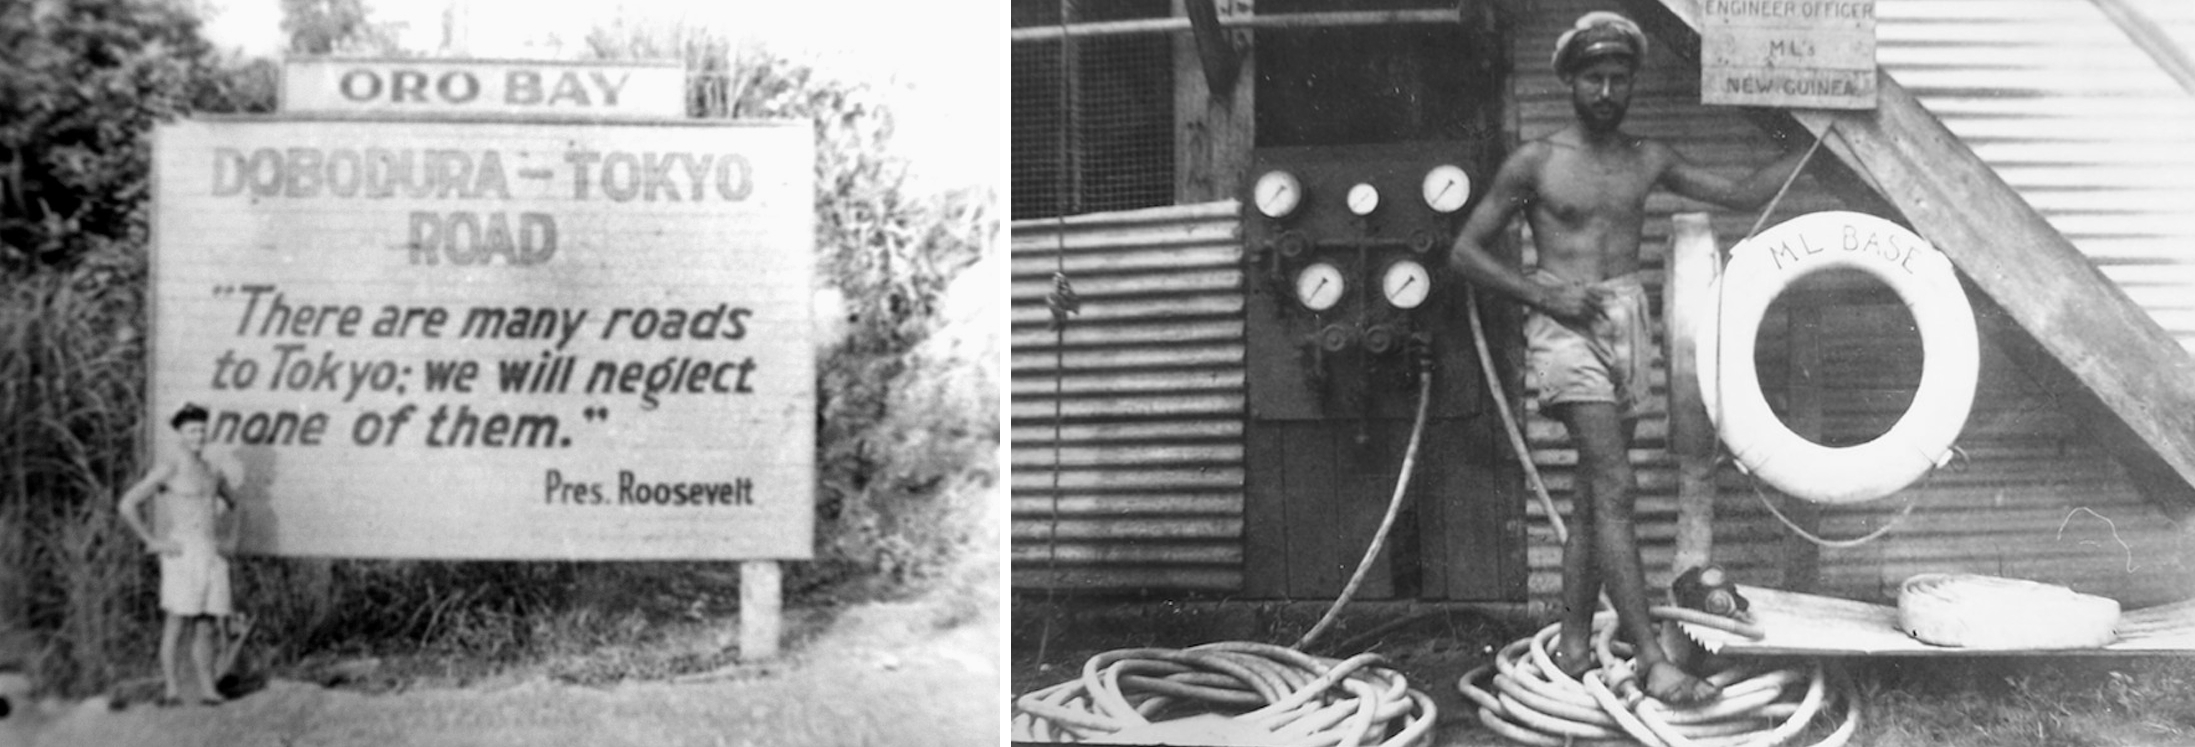
Left: Motor Mechanic Jack Page ashore at Oro Bay. Right: Lieutenant Hordern ashore in Alexishafen, New Guinea.
The next day she continued her voyage westward to Langemak Bay just south of Finschafen and from their proceeded to Madang where she arrived on 9 July. Routine repairs were carried out at the nearby Fairmile repair base at Alexishafen where 1347 was placed on a slipway and given a hull scrape to remove marine growth. Two days later Lieutenant Hordern received orders to proceed to Hollandia, some 400 miles distant, to provide anti-submarine protection for the American base there.

HDML 1347 berthed alongside at Madang; home to numerous other RAN Fairmile motor launches and HDMLs.
Soon after dawn on 24 July, 1347 was again at sea on passage from Madang to Hollandia when she entered the turbulent muddy waters which extend as far as twenty miles out to sea from the mouth of the Sepik River. The Japanese had built gun emplacements on Cape Girgir at the Sepik’s western entrance and although no Japanese had been reported active in this area for some time, the opportunity to exercise 1347’s gun crews seemed too good to pass up. At 08:00 the crew was ordered to action stations and shortly afterwards 1347 turned parallel to the beach closing to a distance of about 400 yards. The area was then raked by her main and secondary armament but no return fire was received. Having fired upon the King’s enemies 1347 resumed course for Hollandia.
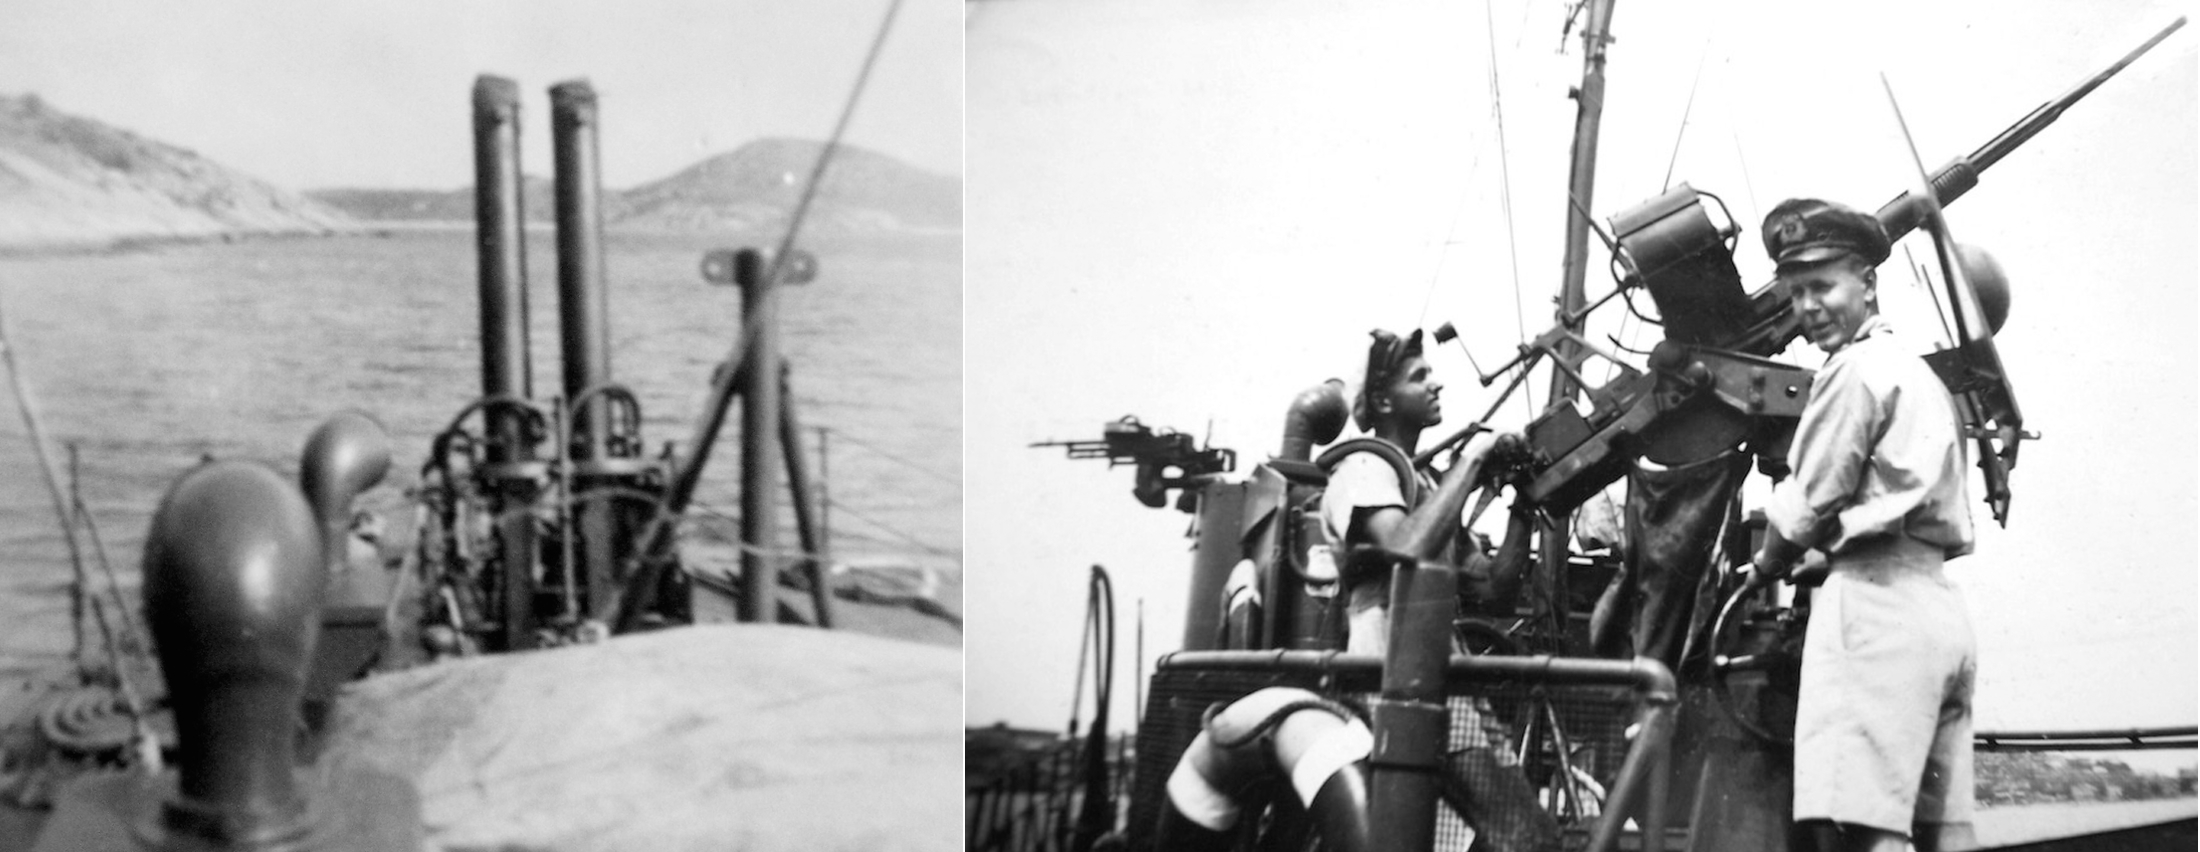
Left: HDML 1347’s main armament. Right: Lieutenant Hordern and Sub Lieutenant Wilkinson manning 1347’s Oerlikon gun.
Approaching Wewak, about halfway en route to Hollandia, 1347 received fire from ashore, with bullets splashing close to the vessel and whining overhead. Hordern quickly turned away suspecting that the fire may have been coming from friendly forces as the Japanese were known to be located mostly in the distant hills. Flashing their Aldis signalling lamp at the shore soon had the desired effect and the firing ceased. It was later confirmed that weapons training was being conducted in the area by Allied troops.
HDML 1347 arrived at Wewak on 24 July where the atmosphere ashore was tense. Armed sentries were posted everywhere and everyone carried a weapon. The Japanese were still in the area and raids on Wewak were not uncommon. The following day was spent watering and exploring Wewak and its surrounds where the signs of battle were visible everywhere. The Japanese, although starving and cut off from their lines of communications, were still fiercely contesting every inch of ground as the war ground on.
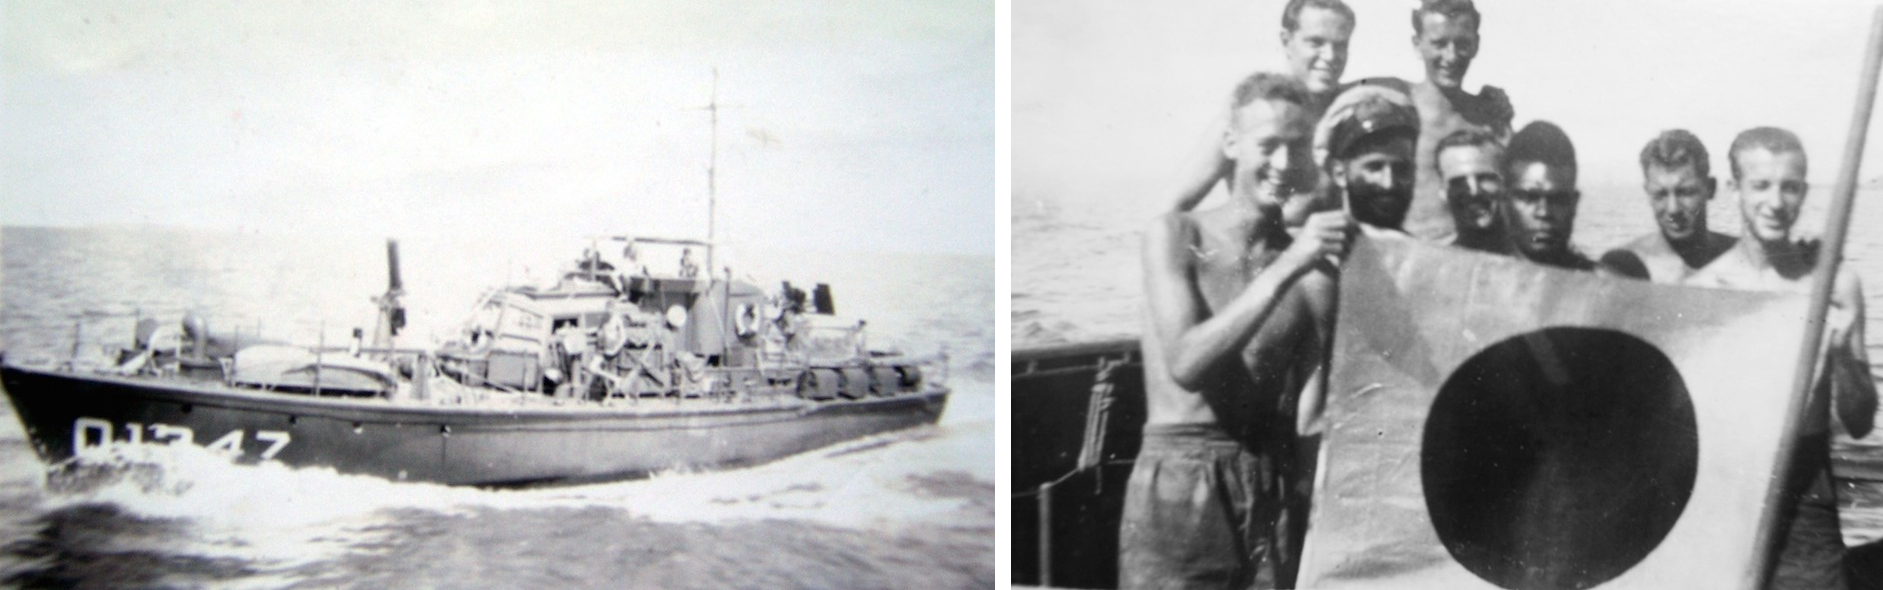
Left: HDML 1347 en route to Wewak. Right: Lieutenant Hordern and his crew pose with a captured Japanese flag, Wewak, 1945.
On 26 July 1347 sailed on the last leg of her journey to Hollandia. En route she fired upon a group of enemy soldiers spotted on Muschu Island before continuing on to Aitape where she anchored overnight. The following day 1347 continued westward past Cape Concordia and Mount Bougainville and entered Humboldt Bay, Hollandia. Hollandia was a major American facility and staging point complete with cinemas, Coca Cola bars, doughnut stalls and recreational halls which came as quite a shock to the Australian sailors. The ‘Stars and Stripes’ flew everywhere and with the exception of the White Ensign worn by 1347, her sisters 1354 and 1358 and the motor yacht HMAS Martindale, the American flag reigned supreme.
RAN motor launches nested alongside a tender, possibly HMAS Koopa, New Guinea, 1945.
Hordern's ship soon settled in to the task of conducting anti-submarine patrol work and his crew got off to an exciting start when on their first patrol they detected what was believed to be solid ASDIC contact. Action stations were sounded and the stationary target was attacked with depth charges set to explode at 50 feet. The resulting detonation sent columns of water soaring into the air but there were none of the tell-tale clues indicating that they had destroyed an enemy. It was later concluded that the contact may have been one of the submerged logs which were ever present in New Guinea coastal waters. These logs presented other dangers as well and were a constant hazard to navigation. 1347 was one of many small craft that were damaged by sizeable logs drifting just below the surface of the water damaging propellers and ships hulls.
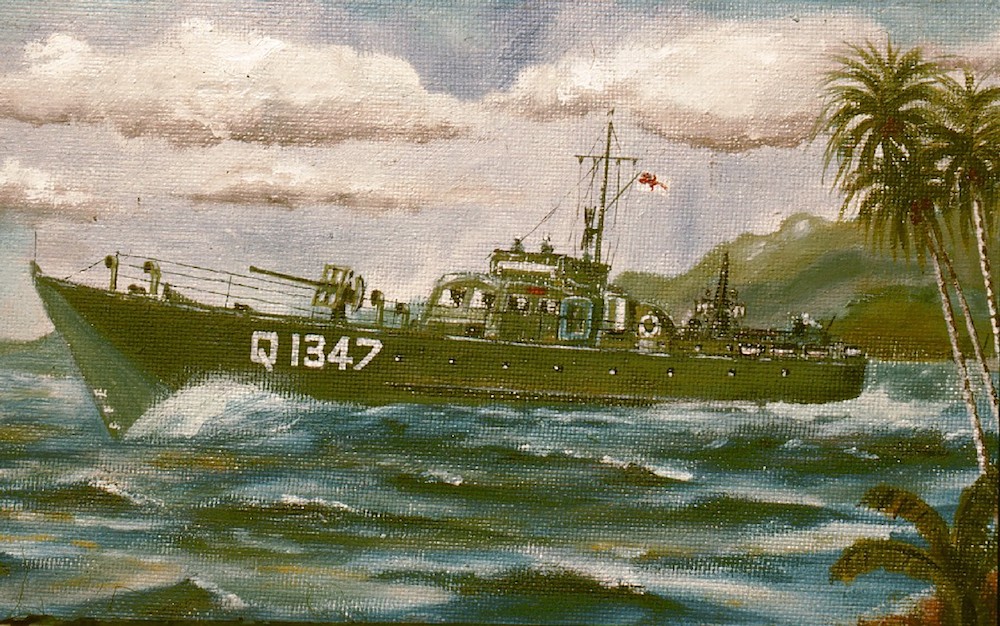
Many of the Australian motor launches were painted green when operating in New Guinea waters, as depicted in this painting by crew member Able Seaman Richard Jeffs.
Until the end of hostilities, 1347 was engaged mainly on anti-submarine patrols or on Army cooperation duties in the New Guinea area. In early August news of the atomic bomb strikes by the Americans on Hiroshima and Nagasaki was received and the Allies were hopeful that Japan would soon capitulate and prevent the need to launch a final sea borne invasion on the Japanese mainland.
On 15 August 1945, HDML1347 was in Humboldt Bay, which was packed with American destroyers, oilers, victory ships, liberty ships, support ships, landing craft, general purpose vessels and craft of all shapes and sizes when news of the Japanese surrender was received. Lieutenant Hordern subsequently made the following entry in the ship’s log of 1347:
Today Japan unconditionally surrendered. Pipe Down - No Work - Celebrations - Dress Ship - Firing Guns and Rockets.
He recorded in his journal:
As darkness fell...the fireworks broke out again and seldom before have I seen such a display. Scarlet, orange and white magnesium flares and parachutes and rockets blossomed and flowered in the starry tropical night and Tommy gun, rifle, machine gun, Bofors and general gunfire broke out in a general pandemonium of noise and coloured brilliance. Sirens hooted and bells rang and we joined in the general jubilation firing our rockets and sounding our horn...tracer shells soared into the air...pieces of burned out shells and expended rockets fell hissing into the water about us...and the words of the American anthem were vividly interpreted for us this night: “And the rocket’s red glare, the bombs bursting in air gave proof thro the night that our flag was till there”.
He later added:
Notwithstanding the cessation of hostilities, the Japanese High Command had great difficulty in conveying news of their surrender to its far flung forces, and as such the threat of continued hostile activity by isolated Japanese forces was ever present. Formal surrender of the Japanese forces in New Guinea and the surrounding islands did not take place until 6 September 1945.

The formal instrument of surrender for Japanese forces in New Guinea.
On 4 September, 1347 was ordered to proceed to Madang where Hordern received orders that he would be remaining in New Guinea waters in support of the Army, which had the task of guarding and supplying surrendered enemy forces. Following a short maintenance period at Alexishafen, during which 1347’s ASDIC dome and 20mm gun were removed to better prepare her for the role of constabulary duties, she then shaped course for Wewak.
There she joined her sister ships 1342 and 1356 spending the immediate post-war period conducting further patrols as well as the usual type of miscellaneous duties which were the lot of small craft. Army patrols were sometimes landed on islands to inspect Japanese positions and many of the former enemy were found to be in very poor health suffering from malnutrition and disease.
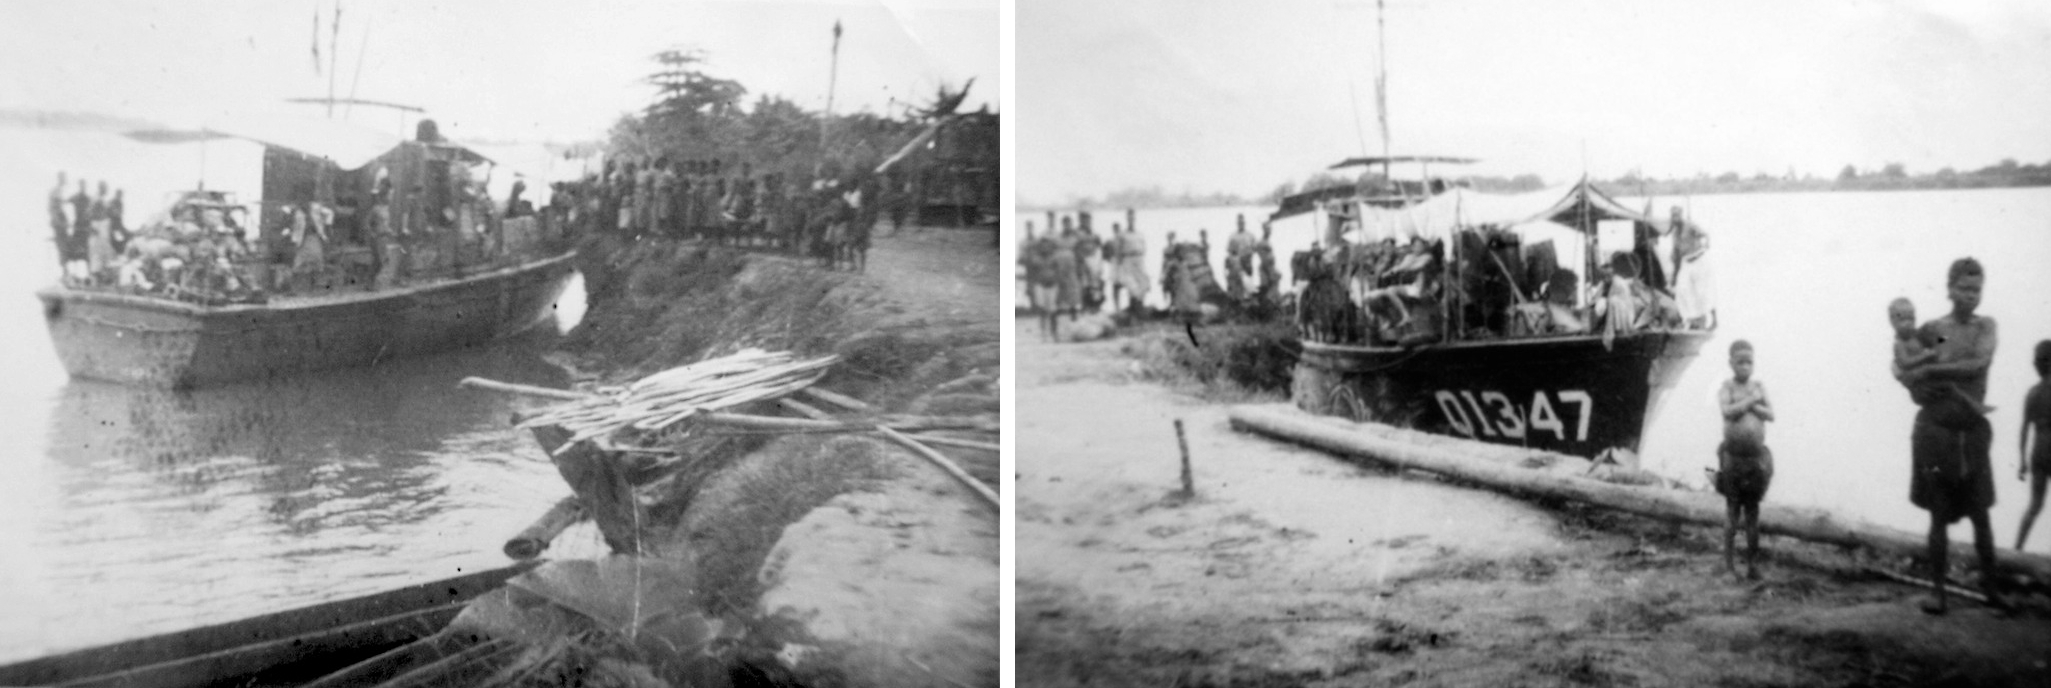
On 10 October, HDMLs 1347 and 1356 left Wewak on a mission to transport four barges from the 43rd Army Water Transport Division up the Sepik River to Angoram where there were large numbers of Japanese soldiers and reportedly a number of former prisoners of war (POW) from the Indian Army. These unfortunate soldiers had been captured by the Japanese during the fall of Singapore and used for slave labour throughout the islands. The Japanese were to be disarmed and the worst of their sick along with the former POWs taken in the barges to Muschu Island. 1347 was instructed to escort the barges while 1356 went on ahead to Angoram to detail the Japanese to prepare their sick for transportation.
Navigation in the muddy Sepik was made difficult by the ever present flotsam that ranged in size from small branches to large logs and trees that were carried down steam by its swirling four knot current. Continuing the passage during darkness was out of the question and consequently the small convoy was compelled to stop overnight. Early the following morning they continued their journey heading for the Japanese base at Marienberg where they arrived later that afternoon hoping to find signs of the Indian POWs.
HDML 1347 securing alongside the muddy banks of the Sepik River, October 1945.
Some 300 Japanese were at Marienberg and for the most part they were in deplorable physical condition, suffering from beri-beri and malaria. The appalling sights at the outpost left a lasting impression on the crew of 1347. On interrogating the senior Japanese officer it was learned that the Indian POWs were at Angoram and preparations were made to proceed there the following day. In the early hours of 12 October, 1347 and her charges continued upstream and shortly after 09:00 secured alongside 1356 at Angoram. There eleven Indian Army POWs were found in what Hordern described as “pitiful condition, diseased and undernourished with wounds, sores and ulcers all over their bodies”. Ironically their officer, Jemadar (Lieutenant) Chint Singh, took his rescuers to also be former POWs, as by now several of the Australian small ship men wore long beards and their overall appearance was somewhat dishevelled. The Indians were subsequently taken on board 1347 where they were cared for by her crew.

Left: Some of the Indian soldiers liberated by the crew of HDML 1347. Right: After the war a commemorative plaque was dedicated to the memory of the Indian soldiers by their former Commanding Officer.
The next day 1347 escorted barge loads of Japanese prisoners from Angoram to Marienberg before leading the motley convoy down the Sepik River into the Bismarck Sea bound for Wewak. In a cruel twist of fate, 10 of the 11 Indian soldiers later died when the aircraft in which they were travelling, on their first leg home to freedom, crashed into a mountain side at Rabaul. Chint Singh, who had remained in Wewak to testify against the Japanese, was the only one to return to his homeland.
For several weeks 1347 was engaged in escorting Japanese barges, freighting stores and food from Wewak to Muschu Island, patrolling and making fruit runs to the Schouten Islands. On 24 October the monotony was broken when 1347 was working close inshore near the island of Blup Blup. While navigating close to the island’s coral reef Hordern happened to look to seaward where he was alarmed to see the rising waves of a tsunami racing towards his vessel. Full speed was immediately ordered and the course altered sharply to put 1347’s bows into the oncoming sea. Responding quickly, 1347 hit the first wave rising buoyantly over it before encountering two further waves and finding calm seas in the wake of the threat. The tsunami raced inshore where it was observed to violently crash onto the reef with a tremendous roar. Again, 1347 had narrowly averted what could have been a disaster.
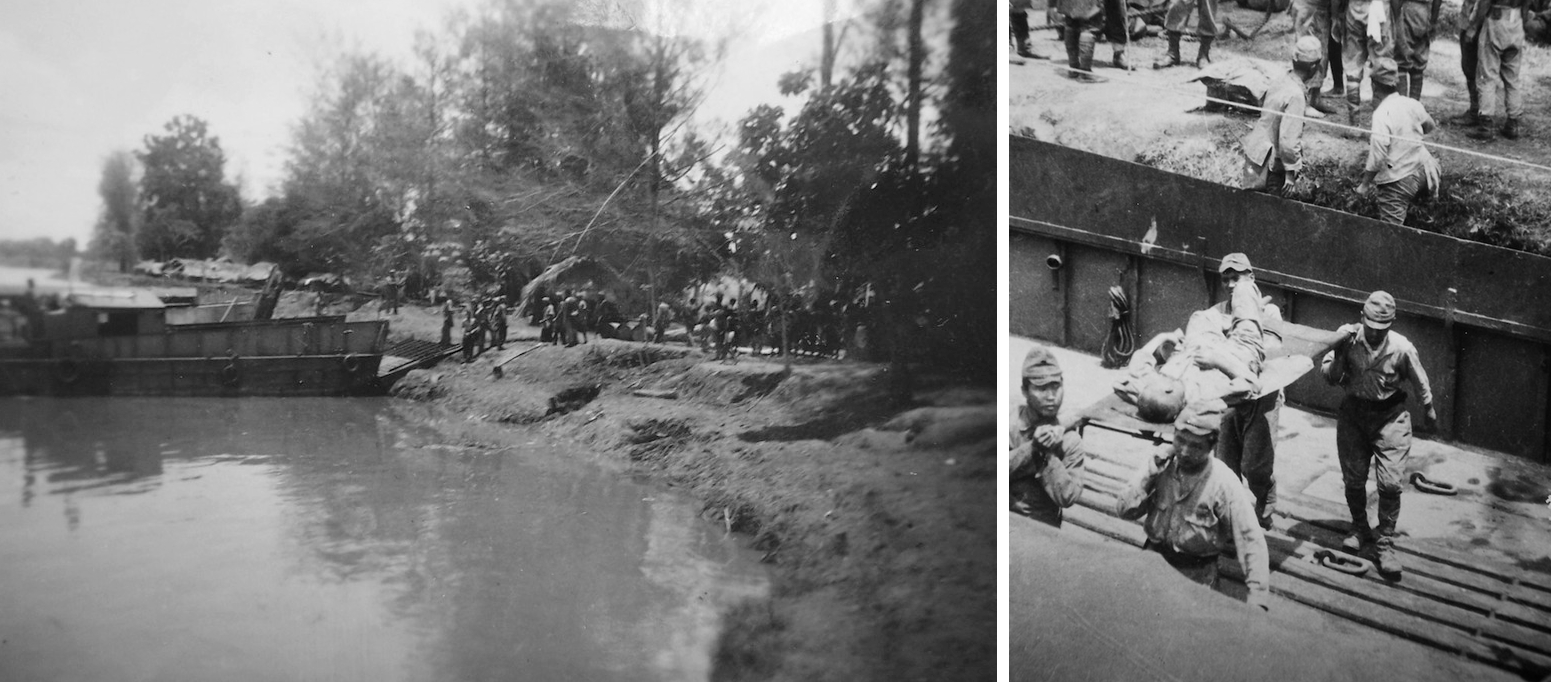
The work of the RAN’s small ships continued for many months following the official cessation of hostilities performing myriad tasks. Repatriating POWs from both sides became a priority as many were in poor health. The crew of HDML 1347 were involved in this type of mission at Angorum on the Sepik River.
A week later while operating with HDML 1356 in the vicinity of Koil Island in the Schouten Group both vessels were damaged while navigating in restrictive waters. 1356 grounded on a reef becoming stuck fast, requiring the assistance of 1347 to pull her clear while 1347 damaged her starboard screw when she also struck coral in the vicinity. While 1356 escaped submitting a formal report due to a lack of obvious damage, 1347 was not so lucky, requiring repairs in Alexishafen and a formal grounding report to be submitted by Hordern who had an anxious wait while the matter was investigated. He was later cleared of any wrongdoing and following repairs 1347 returned to the Wewak area of operations.

ML 431 on the slipway at Alexishafen. 1347 also underwent repairs and maintenance at this facility.
On 26 November, the surrendered Japanese cruiser, Kashima arrived off Wewak and 1347 received orders to maintain a continuous patrol around her to prevent her from taking unauthorised Japanese prisoners onboard. Kashima had been stripped of her guns and lay toothless at anchor while the Australian motor launch patrolled around her. On each pass the Japanese were obliged to pay her marks of respect - a condition of the Japanese surrender. Later Kashima was ordered to follow 1347 into Dallman Harbour at Muschu Island and prepare to embark Japanese POWs.

The Japanese cruiser Kashima. On 26 November 1945, some one thousand one hundred Japanese troops of the 18th Army held on Muschu Island, boarded the cruiser for repatriation.
In early December the crew of 1347 began loading provisions for another patrol up the Sepik River. Sailing from Wewak on 9 December, she entered the river early the following morning and began the careful passage up stream passing Marienberg and arriving at Angoram later that day. Since their previous visit much had been done to improve infrastructure and 1347 was able to secure overnight alongside a recently built wharf. The following day an armed detachment of native police, under the command of Lieutenant Derick Monk of the Australian New Guinea Administrative Unit, embarked in 1347 and proceeded further up the Sepik River to show the flag at villages which had for years been in Japanese controlled territory. Several villages were called upon before eventually arriving at the village of Kanduonum, 130 miles from the sea. Having shown the flag, 1347 reversed course, dropping her passengers at Angoram before proceeding to Wewak where Lieutenant Hordern received orders to return to Australia.
On 22 December 1945, 1347 commenced her passage home through New Guinea waters calling at Madang, Langemak Bay, Samarai and Port Moresby. By now 1347 was carrying a number of niggling engineering defects and the voyage was beset with difficulties. Accurate navigation was difficult for small ships at the best of times when operating out of sight of land and darkened and overcast skies further hampered accurate navigational fixing. This led to some anxious moments during the transit through the Gulf of Papua. At one point 1347 became lost in the darkness and all eyes searched for the navigational light on the small islet of Bramble Cay that would lead them safely through the reefs and islands to the Great North East Channel to Torres Strait and the Queensland coast.

The area in which HDML 1347 operated in New Guinea.
Having been unable to accurately fix his position for 16 hours Hordern stopped engines and assessed his position. He and one of his crew, Able Seaman ‘Smiler’ Edwards, then scaled the mast in an effort to see beyond their low horizon for any sign of the Bramble Cay light. Eventually it was spotted by Edwards far away on 1347’s starboard quarter. With great relief an accurate navigational fix was taken and 1347, then heading straight for the Warrior Reefs, was able to set a new course for safety and survival.
By 23 December, 1347 was off the Queensland coast where she encountered foul weather common for that time of the year. As the small craft was buffeted in steep seas, thoughts of Christmas in Cairns were soon dismissed as the crew became more concerned for their own safety. This led to an unscheduled call being made at Cooktown on Christmas Day as they sought shelter from the weather.
Sailing on Boxing Day, 1347 was again subject to the pounding of heavy seas and strong winds which caused further damage to the vessel. Passing Cape Tribulation, the weather eased considerably and by midday conditions were much better, however, the unfortunate vessel’s troubles continued when a mine, which had broken free of its moorings, was spotted directly ahead of 1347’s track. After taking avoiding action, several unsuccessful attempts were made to sink it with gunfire and although pieces were seen to fly off it, it remained a threat. The mine’s position was subsequently reported by signal to Naval authorities in Townsville and the passage to Cairns resumed.
HDML 1347 riding at anchor.
Cairns was a welcome port of call for the crew of 1347 who spent three days there drying clothes and bedding, cleaning and airing the boat, fuelling, watering, provisioning and enjoying a taste of home. Following an overnight passage, 1347 arrived in Townsville the next day before resuming the voyage to Brisbane on 3 January 1946. During the forenoon 1347 was dealt another blow when she struck a coral spur near Salamander Reef which damaged a propeller and rendered the port engine unserviceable. With Brisbane still some 700 miles distant the voyage continued on one engine at a speed of 9 knots.
Hordern’s troubles, however, were far from over. Later that evening his engineer was stuck down with acute peritonitis. It was clear that he was in need of urgent medical attention and 1347 altered course for Mackay where she arrived at 0500 the following morning. The engineer’s life was saved but there was no replacement engineer available in Mackay and to make matters worse a cyclone was threatening the Queensland coast.
Electing to press on, 1347 prepared to get underway for the last leg of her voyage. The remaining engine was started but emitted a “frightful clatter and clouds of smoke” heralding the presence of what was believed to be a cracked piston. This dashed any hopes of reaching Brisbane under their own steam and arrangements were made for HMAS Sterna, a small General Purpose Vessel, also bound for Brisbane to take the hapless 1347 in tow.
With the tow connected 1347 and Sterna sailed from Mackay on 7 January. In the early hours of 8 January the two vessels struck further heavy weather causing the tow to part and 1347 to swing beam-on to the wind and sea where she lay rolling heavily as her crew attempted to retrieve what was left of the tow line. Sterna circled back and with some effort resecured the tow, enabling the voyage to continue at a pitiful two knots. Later that day shelter was sought at Pearl Bay before making a dash for Gladstone when the weather eased.

HDML 1347 in company with Sterna in Pearl Bay.
Sterna and 1347 arrived in Gladstone on 12 January and remained there for three days before putting to sea again only to encounter further gale force winds and seas all the way to Sandy Cape. Again the tow line parted, and again it was reconnected as the two small craft strove on.
Finally, at 18:15 on 17 January, 1347 was nudged gently alongside the wharf at the Fairmile base in Brisbane. There the service career of HDML 1347 came to an end. Most of her crew were discharged and returned to take up occupations in civilian life while their ship was prepared for disposal. Lieutenant MC Hordern remained with 1347 until she was paid off at Brisbane on 29 April 1946. He had been with her throughout her entire commission and was her only Commanding Officer. HDML 1347 was later identified for disposal and subsequently sold.
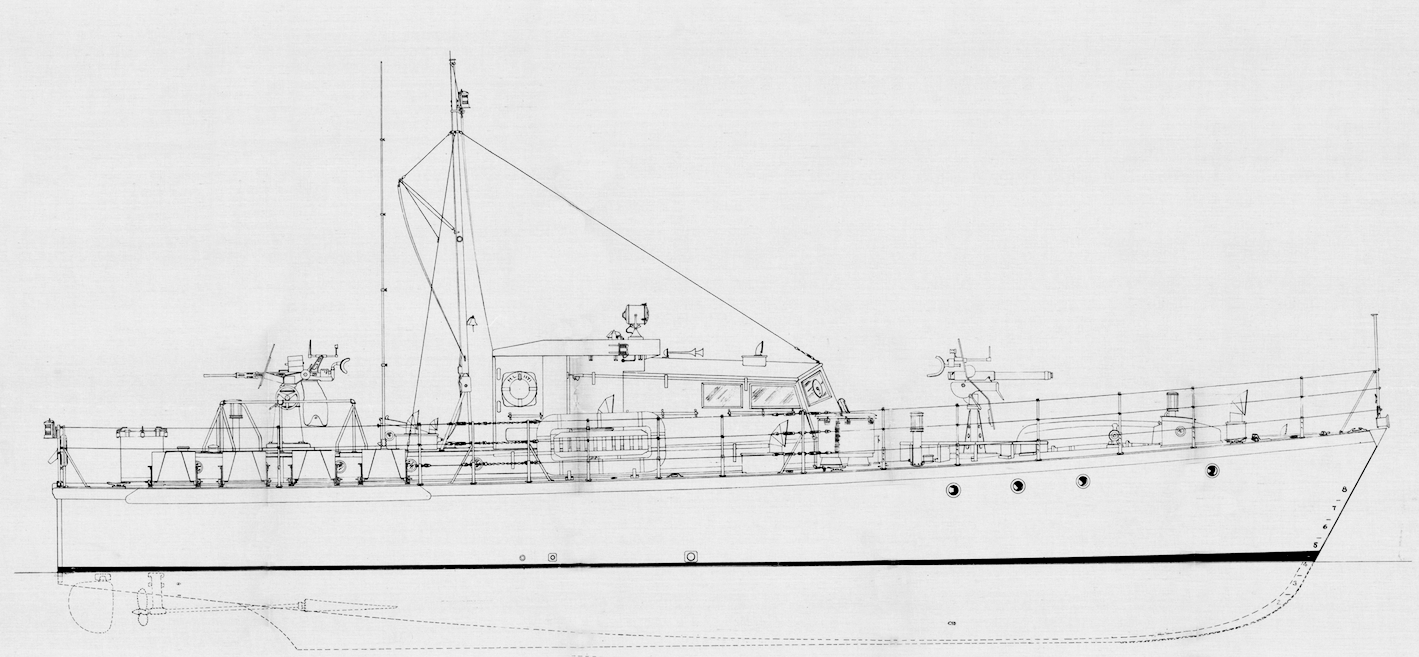
HDML General Arrangement Plan.
The officers and ratings who served with Lieutenant Hordern in HDML 1347 throughout her commission included:
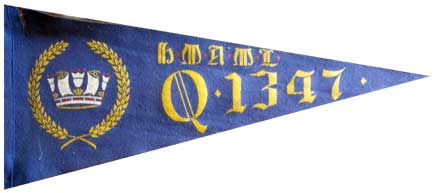
A souvenir pennant commemorating the war service of HDML 1347. (MC Hordern collection)

Lieutenant MC Hordern, RANVR showing the effects of malaria and three years war in the tropics.
- Sub Lieutenant TC Wilkinson, RANR
- Sub Lieutenant CF MacMahon, RANR
- Sub Lieutenant PHL Noad, RANR
- Petty Officer WA Bennetts, RANR
- Leading Seaman LW Clarkson
- Motor Mechanic JA Page
- Motor Mechanic AW Copeland
- Motor Mechanic A Boxer
- Motor Mechanic GJ Russell
- Stoker K Akers
- Stoker JM Tassell
- Telegraphist JA Dobbs
- Telegraphist KT Johnston
- Telegraphist DJ Kelly
- Telegraphist Sharpe
- Able Seaman KA Arkinstall
- Able Seaman RM Jeffs
- Able Seaman ET Barry
- Able Seaman CP Edwards
- Able Seaman SL Keith
- Able Seaman N Whitehurst
- Able Seaman WT Nye
- Able Seaman CA Wallace
References and further reading
- Special thanks to Dr Marsden Hordern, OAM, VRD, RANR, (Ret’d) for permission to use images from his personal collection and draw on his memoirs.
- A Merciful Journey, Recollections of a World War II Patrol Boat Man, Marsden Hordern, The Miegunyah Press, 2005.
- Fairmile Ships of the Royal Australian Navy Volumes I & II, The Fairmile Association, Australian Military History Publications, 2005.
