HMAS AE1
HMAS
AE1
 |
| Class |
E Class |
|---|---|
| Type |
Submarine |
| Pennant |
80 |
| Builder |
Vickers, Barrow-in-Furness, England |
| Laid Down |
14 November 1911 |
| Launched |
22 May 1913 |
| Commissioned |
28 February 1914 |
| Decommissioned |
14 September 1914 |
| Fate |
Lost at sea on 14 September 1914 |
| Dimensions & Displacement | |
| Displacement |
|
| Length | 55.17 metres |
| Beam | 6.86 metres |
| Draught | 3.81 metres |
| Performance | |
| Speed |
|
| Complement | |
| Crew | 35 |
| Propulsion | |
| Machinery | 2 sets of 8 cylinder diesel engines, battery driven electric motors |
| Horsepower |
|
| Armament | |
| Torpedoes | 4 x 18-inch torpedo tubes |
| Awards | |
| Battle Honours | RABAUL 1914 |
| News Articles | |
His Majesty’s Australian Submarine AE1 was launched in the yard of Vickers Ltd at Barrow-in-Furness, England on 22 May 1913. She commissioned at Portsmouth on 28 February 1914 under the command of Lieutenant Commander Thomas Fleming Besant, RN. She was the first of two E Class submarines built for the fledgling Royal Australian Navy and was manned by Royal Navy officers with a mixed crew of sailors drawn from the Royal Navy and the Royal Australian Navy.
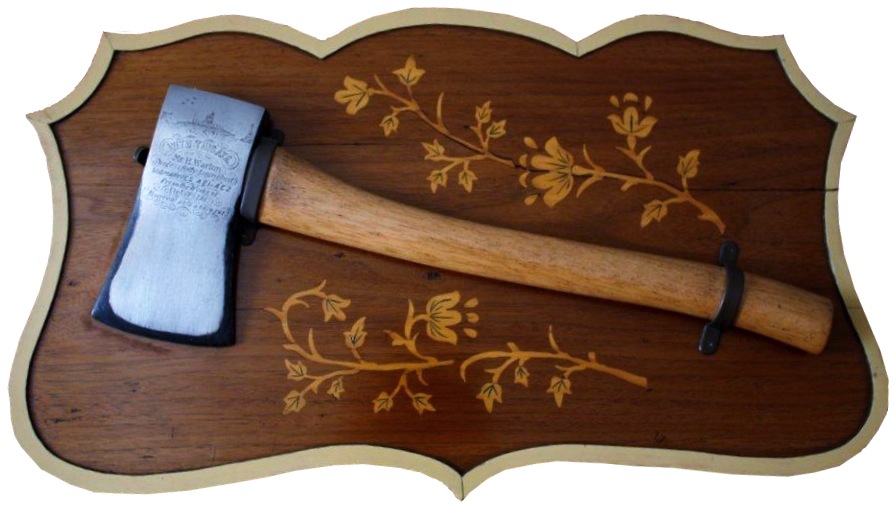
The axe used to ceremoniously launch both AE1 and AE2. (Tony Todd collection)

The inscription commemorating the launch of the RAN's first submarines. (Tony Todd collection)
Accompanied by her sister AE2, under the command of Lieutenant Commander Henry Stoker, RN, AE1 departed England in March 1914, transited the Suez Canal, and reached Sydney on 24 May 1914. Although the submarines remained surfaced for almost all of the delivery voyage it was at the time the longest transit distance ever traveled by a submarine.
At the outbreak of World War I, AE1 joined the naval forces assigned to the capture of the German Pacific colonies. With AE2, she took part in the operations leading to the occupation of German New Guinea, including the surrender of Rabaul on 13 September 1914.
The following day, at 7:00am the destroyer HMAS Parramatta left her night patrol ground off Raluana Point and proceeded at slow speed in the direction of Cape Gazelle to rendezvous with AE1 and conduct a patrol in St George’s Channel to the south and east of the Duke of York Islands. The two vessels met off Herbertshohe at 8:00am and exchanged signals before proceeding to Cape Gazelle where they arrived at approximately 9:00am. A further exchange of signals followed during which Parramatta advised AE1 that her “orders were to search to the south’ard with submarine and anchor off Herbertshohe at 5:30pm.”
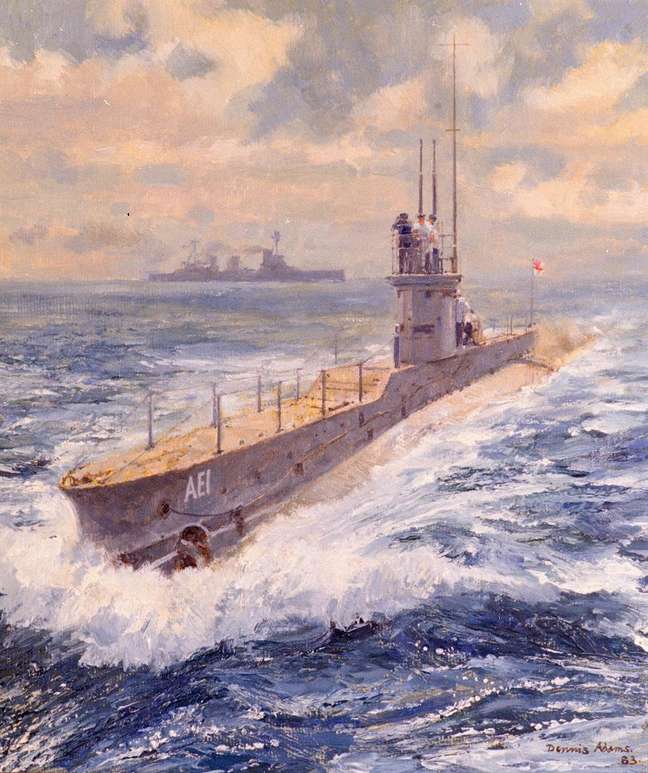
HMA Submarine AE1 on patrol in waters off New Britain. (Dennis Adams 1983)
Parramatta then proceeded independently in a southerly direction while AE1 advanced in a north-easterly direction. The weather was hazy and visibility was observed to be between 9 and 10 nautical miles, at times decreasing to 5 miles. Parramatta reported that AE1 was obscured by the haze for some time, as was the nearest land. Given these conditions, Parramatta’s Commanding Officer, Lieutenant William Warren, RAN, considered it advisable not to lose sight of the submarine for too long.
At 12:30 Parramatta turned to the north west and by 2:30 she was close to AE1 when the submarine asked by signal: ‘What is the distance of visibility?’ Parramatta responded: ‘About 5 miles’. At 3:20 the submarine was lost sight of and Parramatta altered course and steamed in the direction she was last seen. No sign of AE1 was found and it was considered that she must have steamed back to harbour without informing Parramatta. Consequently Parramatta proceeded to the north-west and rounded Duke of York Island before heading to Credner Island, later anchoring off Herbertshohe at 7:00pm.
By 8:00pm the submarine had not returned and Parramatta and her sister ship HMAS Yarra were ordered to search for the submarine. The light cruiser HMAS Sydney, on her way to the west coast, also received instructions to keep a lookout and later HMA Ships Encounter and Warrego also joined the search together with launches from Rabaul and Herbertshohe. No trace of AE1 was found, not even the tell-tale shimmer of escaping oil floating on the surface of the water.

The last known image of AE1, 9 September 1914, with HMA Ships Yarra and Australia in the background.
The loss of AE1 with her entire complement of three officers and 32 sailors was the RAN’s first major tragedy and it marred an otherwise successful operation to seize the German colonies in New Guinea and the South Pacific. It is not known what caused AE1 to disappear without trace, and the first of several new searches was conducted in 1976 to establish her location. Until 2017 none of these had been successful.
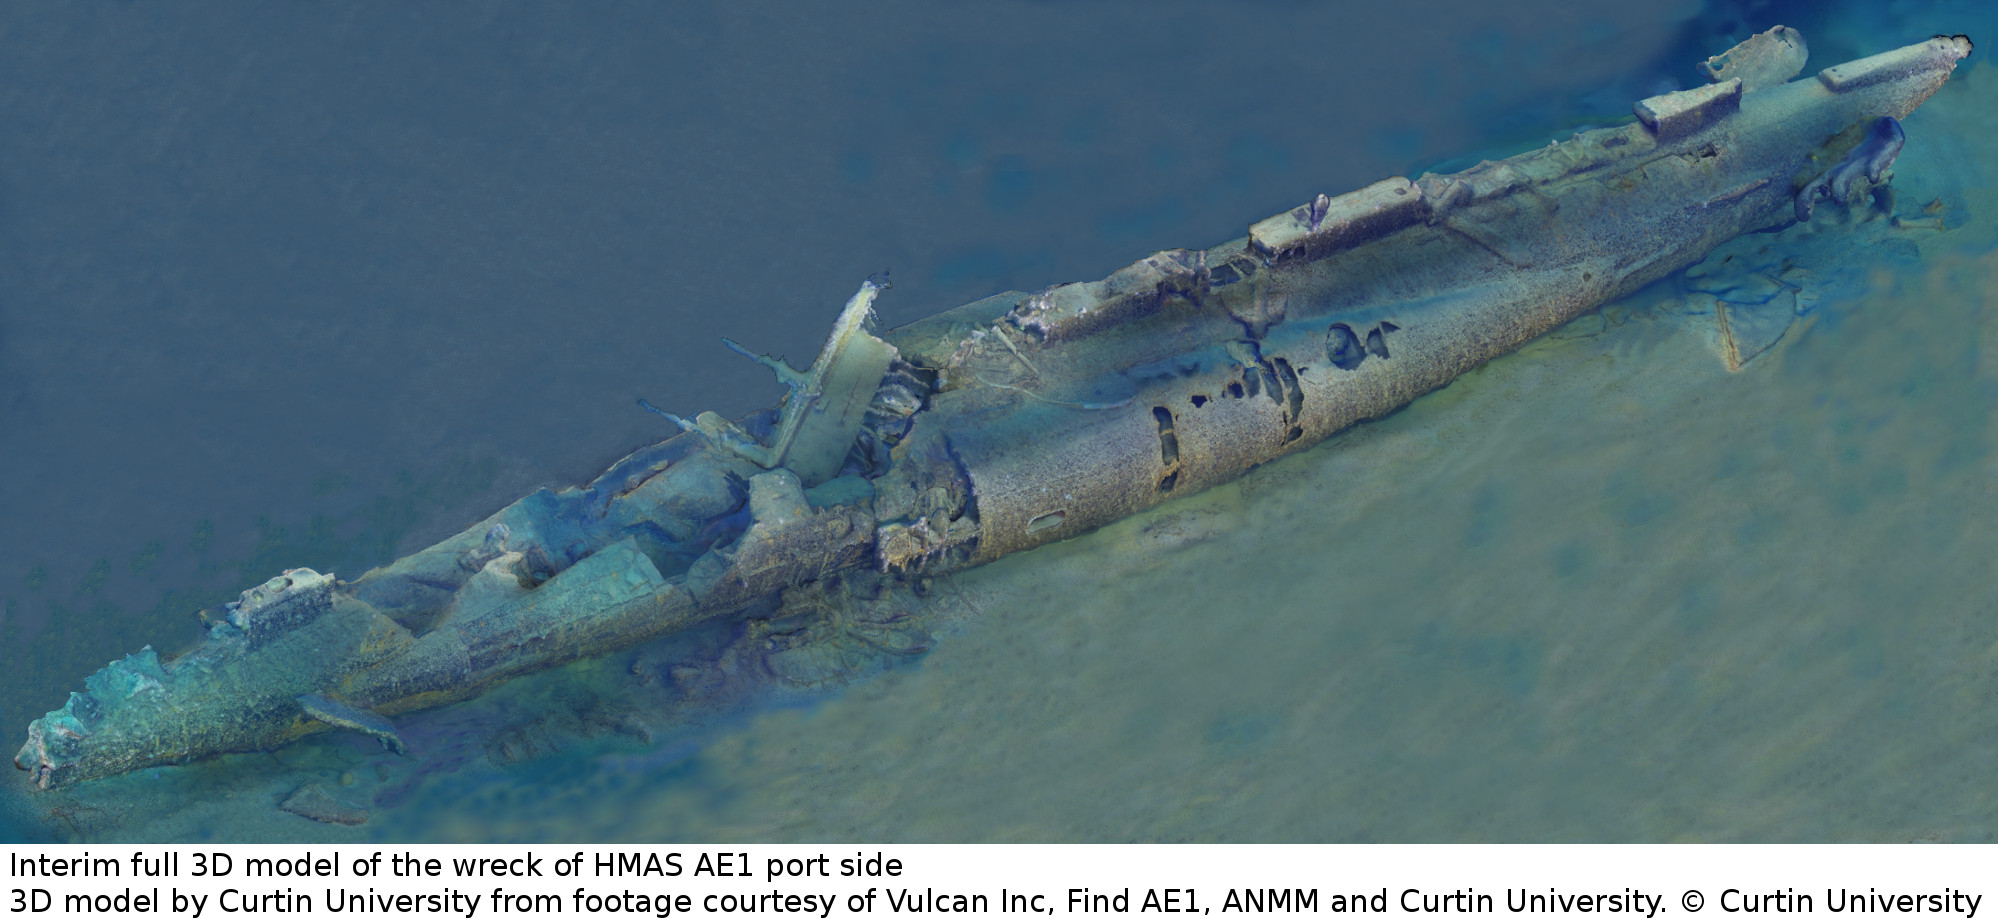
In December 2017 a new search, using the vessel Fugro Equator, located the wreck of AE1 in 300 metres of water off the Duke of York Island group. On 21 December 2017 the Australian Government formally announced that the exact location of the wreck would not be publicly disclosed.
In April 2018, an expedition was conducted using the Research Vessel RV Petrel to perform a detailed Remotely Operated Vehicle (ROV) survey of the wreck of HMAS AE1. The ship's ROV, fitted with high-definition video and stills cameras, undertook a comprehensive, non-invasive inspection of the submarine, revealing new information. Over 8000 digital still images were collected during the survey and those images have been processed to generate a full photogrammetric 3D model of the entire wreck. A team of experts is now analysing the footage to better understand what happened to AE1.
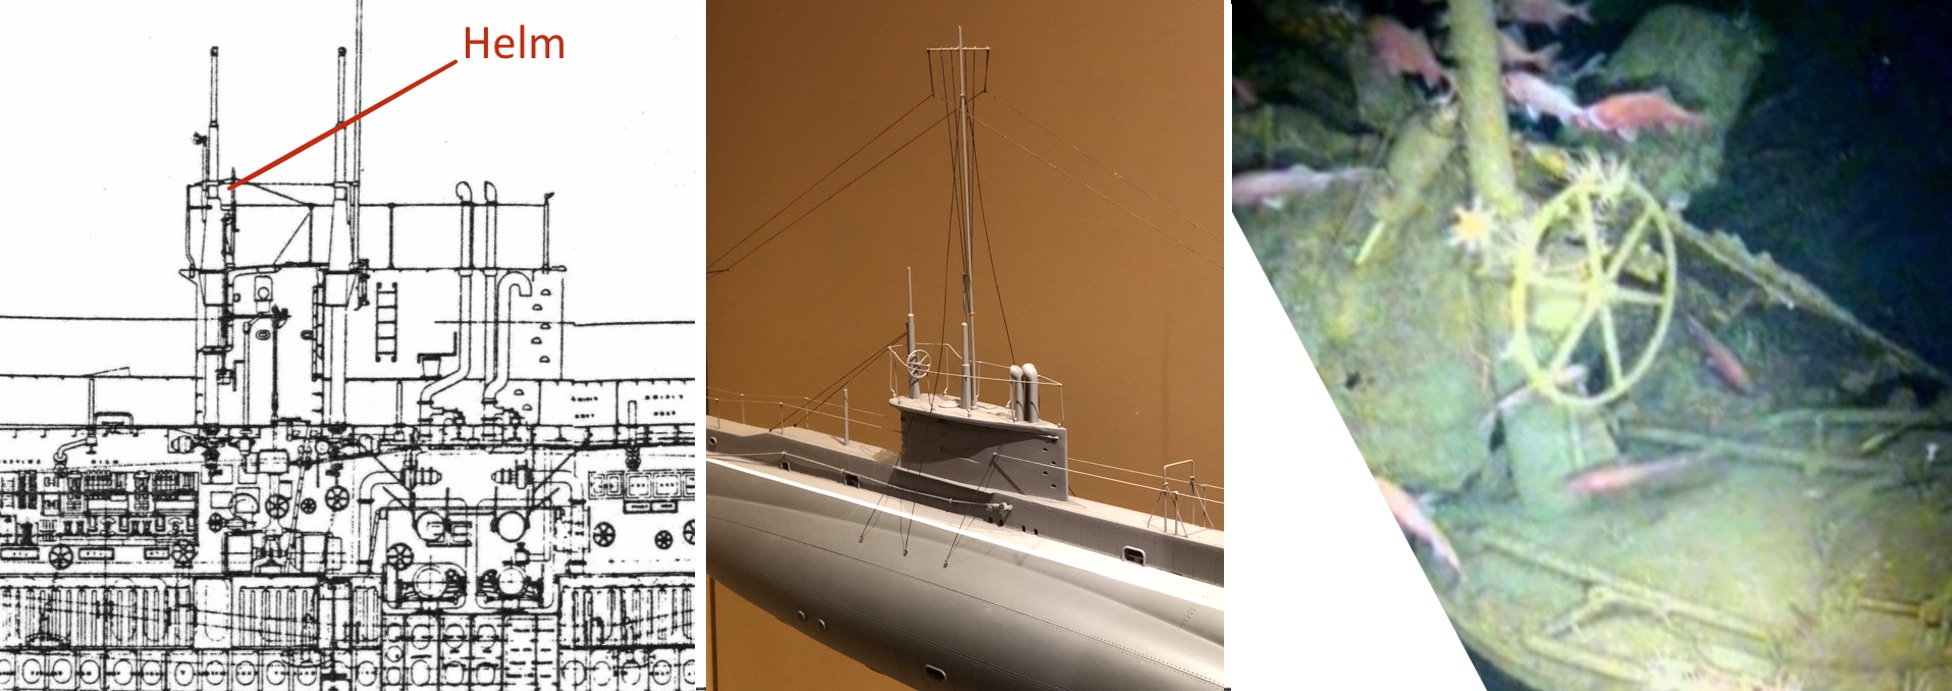
AE1’s helm, mounted on the top of her conning tower, as viewed on her general arrangement plan and on the wreck.
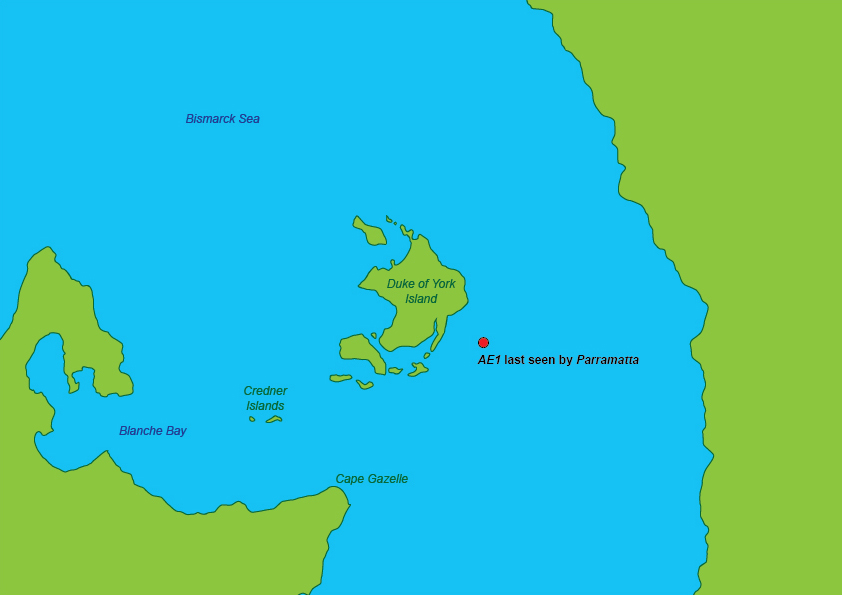
Chart showing the last known position of AE1 as observed by HMAS Parramatta.

In Memoriam Officers and Men lost in AE1.

HMA Ships AE1 & AE2 General Arrangement Drawing (Starboard Elevation & Sections). Download original file (15.3 MB)

HMA Ships AE1 & AE2 General Arrangement Drawing. Download original file (40.8 MB)

HMAS AE1 Battle Honour Board.

Each year the RAN pauses to remember the loss of both AE1 and AE2 and commemorate the men who served in them.

