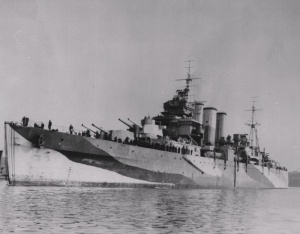
HMS Shropshire prior to its transfer to the RAN.
On 10 November 1937 Shropshire again commissioned for Mediterranean service. On 19 September 1938 it became the flagship of Rear Admiral J D H Cunningham CB MVO RN and wore his flag until 25 May 1939.
On the outbreak of war in September 1939 Shropshire was ordered to take up patrol in the south Atlantic and for the next 4 months it was almost continuously at sea on trade protection duties. During the period of October to December 1939 it steamed some 34 000 miles and was under way more than 1800 hours. Atlantic patrols ended early in 1940, and Shropshire returned to England for refit before proceeding for service in the Indian Ocean, where it was employed on patrol and escort duties between Capetown, Durban, Mombasa and Aden.
In 1941 the cruiser operated against Italian Somaliland, bombarding Mogadishu and Kismaya during the advance of the South African Army from Kenya to Abyssinia. With HM Ships Hawkins, Hermes and Kandahar, Shropshire played a leading part in the campaign which ended with the collapse of the whole of the Italian Empire.
In June 1941 Shropshire withdrew from the Indian Ocean and returned to England for refit which was not completed until March 1942. It then returned to the Atlantic for a second period of patrol and escort duty.
Following the loss of the heavy cruiser HMAS Canberra (I) on 9 August 1942 in the Battle of Savo Island, the British Government approved the transfer of Shropshire to the Royal Australian Navy as a replacement. The transfer was announced in the House of Commons on 8 September 1942 by the Prime Minister Winston Churchill. Mr Churchill said:
His Majesty’s Government consider that the Commonwealth should not bear this grievous loss following the sinking of other gallant Australian ships. We have therefore decided to offer, freely and unconditionally, to transfer His Majesty’s 8-inch gun cruiser Shropshire to the Commonwealth Government, this offer has been most warmly received.
The decision to transfer Shropshire to the Royal Australian Navy brought its recall from service on the South Atlantic Station. Captain J T Borrett OBE RN relinquished his command at Chatham on 23 December 1942, and 5 days later Commander David H Harries RAN assumed command to supervise refit and transfer to the Royal Australian Navy. At this stage in its history Shropshire had steamed some 363 000 miles of which 220 000 had been on war service. During the refit the ship’s aircraft and catapult were landed. It did not carry an aircraft during its Australian service.
Captain John A Collins CB RAN took command on 7 April 1943 and it commissioned as HMAS Shropshire at Chatham on 20 April 1943. However, the pretransfer refit occupied many months, and it was not until 25 June 1943 that Shropshire was formally handed over to the Royal Australian Navy by Admiral Sir George d’Oyly Lyon KCB, Commander-in-Chief, The Nore.
In August 1943 Shropshire began its voyage to Australia escorting a Gibraltar bound convoy. It arrived at Capetown on 4 September, Fremantle 3 weeks later and finally Sydney on 2 October 1943. On 30 October at Brisbane the cruiser joined the Australian Squadron (Task Force 74) under the command of Rear Admiral Victor A C Crutchley VC RN, flying his flag in HMAS Australia (II).
In December 1943 Shropshire took part in the New Britain operations covering the landings at Arawe and Cape Gloucester. In March 1944, with other ships of Task Force 74, it took part in the operations leading to the seizure of the Admiralty Islands and the following month was again in action at the Hollandia/Humboldt Bay operations.
Continuing support of the American northward sweep, it was at the Wakde/Sarmi/Biak operations in May 1944 before returning briefly to Sydney.
On 12 July Shropshire proceeded to the New Guinea area operating in support of the 6th Army. On 14 July Japanese forces were bombarded in positions east of Aitape after mounting a major attack against the American garrison on the Driniumor River line. On completion of that operation Shropshire joined the bombardment group covering the last landing in New Guinea at Cape Sansapor on the Vogelkop Peninsula.
Its next objective was Morotai Island, lying midway between New Guinea and the southern Philippines. There, HMA Ships Shropshire, Australia, Arunta and Warramunga delivered a preinvasion bombardment on 15 September before the invasion force landed. On that occasion Shropshire fired 161 rounds of 8-inch shells. No resistance was encountered and Morotai fell into Allied hands without struggle.
The Battle for Leyte Gulf
On 20 October 1944, General MacArthur’s Philippines invasion force, comprising some 550 ships and covered by Admiral Halsey’s Third Fleet, arrived off Leyte Island in the central Philippines.
Australia’s contribution to this operation was Commodore John Collins’ Task Force 74, including HMA Ships Australia, Shropshire, Warramunga and Arunta attached to the US Seventh Fleet. Also present were the Landing Ships Infantry (LSI) HMAS Westralia, Manoora and Kanimbla carrying troops of the US 21st Regimental Combat Team, the frigate Gascoyne, HDML 1074 and the auxiliaries Bishopdale, Poyang, Yunnan and Mekur.
By 9 am on 20 October hundreds of small boats and destroyers headed for the beaches of Leyte, accompanied by a tremendous bombardment from the accompanying battleships and cruisers. Australia and Shropshire passed through the battle line as the small boats approached and opened fire on assigned targets. At 10 am, after the landing, Shropshire, Arunta and Warramunga shelled set targets and carried out intermittent bombardments throughout the day.
The following morning at 6.05 am HMAS Australia was hit by a Japanese suicide aircraft. Australia’s Commanding Officer, Captain Dechaineux and 29 other officers and sailors were killed or died of wounds and Commodore Collins and a further 64 were injured. Command of the Australian ships consequently passed to Captain C A G Nichols in Shropshire. Nichols recalled the attack in the following report:
During the dawn stand-to, a low-flying aircraft approached from the land between Australia and Shropshire. It was taken under fire and retired to the westward. Observers in Shropshire report that the aircraft was hit and touched the water but recovered. It was then turned east again and although under heavy fire, passed up the port side of Australia and crashed into the foremast at 06:05. There was a large explosion and an intense fire was started in the air defence position and bridges. Type 273 radar hut and lantern fell on to the compass platform; both HA Directors and DCT [Director Control Tower] were put out of action and the port strut of the foremast was broken. The fire was brought under control very quickly and by 06:35 the large quantity of wreckage on the compass platform and ADP had been cleared away. Commodore JA Collins suffered burns and wounds. Captain EFV Dechaineux and Commander JF Rayment were mortally wounded.
By 24 October 144 800 Americans were ashore and fanning out when reports were received of the approach of a Japanese fleet through the Sulu Sea. The Japanese Navy’s plan was to bring 3 fleets from different locations to converge on the American transports in Leyte Gulf and defeat the seaborne invasion.
The Japanese aircraft carrier fleet moved south from the Inland Sea with the aim of decoying Admiral Halsey’s 3rd Fleet away from the Gulf, while Admiral Kurita with a force including 5 battleships slipped through the San Bernadino Strait and descended on Leyte from the north and from the south. Vice Admiral Nishimura advanced towards Leyte through the Surigao Strait. As the Japanese had hoped Admiral Halsey was attracted away from Leyte to counter the threat of Admiral Ozawa’s carriers approaching from Japan and this enabled Kurita with his battleships and cruisers to penetrate to Leyte Gulf where, on 25 October, he engaged 12 American escort carriers with their attendant destroyer screen and escorts off the beachhead.
Although Kurita had temporarily gained an upper hand, he mistakenly believed that he was up against Halsey’s fleet and failed to press home his advantage, electing instead to withdraw. In the meantime Halsey’s carrier aircraft had destroyed all 4 Japanese aircraft carriers in the northern group.
Meanwhile, to the south, the Japanese force under Admiral Nishimura had been approaching Leyte through Surigao Strait. Nishimura was under orders to be in Leyte Gulf at dawn as Kurita attacked from the north. But blockading Nishimura’s way was Rear Admiral J Oldendorf, who commanded an overwhelmingly powerful force of no fewer than 6 battleships as well as cruisers and destroyers. Both Shropshire and Arunta formed part of that group.
At approximately 3 am on 25 October, American destroyers opened fire with torpedos on Nishimura’s force, sinking the battleship Fuso and 2 destroyers. At 3.56 am Shropshire opened fire to starboard with its 8-inch guns on the battleship Yamashiro, as did the US cruisers Boise, Phoenix and 5 of the American battleships.
Captain Nichols later reported that:
A very high rate of fire was attained in rapid salvos; as many as 8 broadsides in 2 minutes being fired. We fired thirty two broadsides at what we thought to be a battleship - it was accurate and hits were obtained. The standard of drill was very high and reflects highly on the gunnery department. Shropshire suffered no damage even though 4 broadsides from the enemy passed overhead.
Chief Petty Officer Arthur Cooper, Shropshire’s chief gunner’s mate, whose action station was in the ship’s gunnery transmitting station later recalled:
The targets were picked up by radar at 32 000 yards and we opened fire at 15 000 yards - our fall of shot hooter soundings enabled corrections to be made especially as we took corrections from other ships firing and hitting the targets and illuminating the enemy vessels. After the fourth broadside we fired in accordance with the gun ready lamps showing at least 6 guns ready before ringing the fire gongs. The enemy, moving at 19 knots slowed to 15, then to 10 and finally stopped dead in the water. The battleship we hammered [was] below the horizon with explosions coming from its - quite a few went over us but no hits [were] sustained.
Able Seaman Stan Nicholls, the Commander’s Runner, recalled:
Yamashiro did not have a chance, it had been saturated by the fleet’s massive broadsides and put out of action.
At 4.19 am Yamashiro capsized and sank, taking most of its ship’s company with its. Japanese losses in the Battle of Leyte Gulf were so heavy that the Imperial Navy virtually ceased to exist as an offensive force and the Allies gained sea control.
The next major Allied advance towards Japan was to Lingayen Gulf in the northern Philippines, and the island of Luzon. On 9 January 1945 Shropshire, in company with HMA Ships Australia, Arunta and Warramunga, formed part of the bombardment and fire support group. Control of the Australian ships had passed backed to Australia (Captain J M Armstrong) which was flying the flag of Commodore H B Farncomb RAN, following the completion of repairs to damage caused by the suicide aircraft attack at Leyte Gulf.
The Lingayen invasion force was subjected to a fierce onslaught by Japanese kamikaze suicide pilots who swarmed over the fleet extracting a heavy toll on Australian sailors in this extraordinary form of attack. The suicide missions were launched well before the assault convoys reached Lingayen and again Australia became a victim when on 5 January, some 140 km west of Subic Bay, kamikaze aircraft penetrated the defensive screen damaging 7 ships. The kamikazes came in just above the water defying heavy anti-aircraft fire. At 4.35 pm one executed a steep turn and ended in a vertical dive hitting Australia on the port side of the upper deck amidships and inflicting heavy casualties. Arunta had its side holed and lost 2 men killed in a separate incident.
In spite of the damage sustained, Australia and Shropshire entered Lingayen Gulf on 6 January to carry out shore bombardments. At 5.34 pm Australia was hit by another kamikaze and it sustained 2 more direct hits on 8 January. A further hit followed on 9 January, the day of the landing, which cut off the top of its third funnel. With its bombardment duties complete Australia was withdrawn from the intense battle and returned to Australia for repairs and a welcome respite from the action.
Following Australia’s departure, Commodore Farncomb transferred his flag to Shropshire which the following month took part in the bombardment of the Corregidor beach area before the successful assault on the fortress which fell on 26 February 1945. On 16 March 1945 Shropshire returned to Sydney for maintenance and a period of rest and recreation for its crew.
In June 1945 Shropshire was back in the operational area and after supporting the landings at Brunei, it was part of the force at the Balikpapan landings on 3 July. Shropshire then returned to the Philippines and was there when the Japanese surrendered. It sailed for Tokyo Bay and was present for the surrender ceremony. It remained in Japanese waters until 17 November when the Broad Pendant of the Commodore Commanding Australian Squadron was transferred to HMAS Hobart (I) and Shropshire departed for Sydney.
In May 1946 Shropshire left Australia for the United Kingdom, carrying the Australian Contingent for the Empire Victory celebrations, returning to Australia in August.
In January 1947 she became Squadron representative in Japanese waters, returning to Sydney in March 1947 in preparation for paying off, her days as an active warship ended. Since first commissioning in the Royal Australian Navy she had steamed 506,445.9 miles. The ship paid off into Special Reserve on 10 November 1949 after a number of periods in different Reserve categories.
After several years lying in Sydney Harbour, Shropshire was sold as scrap on 16 July 1954 to Thomas W. Ward Ltd, Sheffield, on behalf of the British Iron and Steel (Salvage) Corporation. On 9 October 1954 she left Sydney in tow of the Dutch tug Oostzee bound for the shipbreakers in Scotland. Shropshire was broken up at Troon and Dalmuir.
Further Reading
Fire Across the Pacific by David Mattiske © 2000
H.M.A.S. Shropshire by Stan Nicholls. The Naval Historical Society of Australia, 1989. Available online: HMAS Shropshire