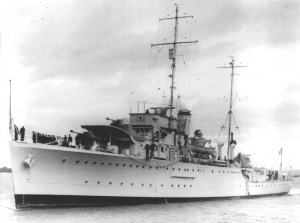
HMAS Yarra (II) was laid down on 24 May 1934 by Cockatoo Docks and Engineering Co Ltd, Sydney. It was commissioned on 21 January 1936.
The design of Yarra was based on the second batch of the successful Royal Navy Grimsby class minesweeping sloops. These vessels were designed for convoy escort duties. Unlike other Grimsby class vessels, the Yarra had three 4-inch high angle guns.
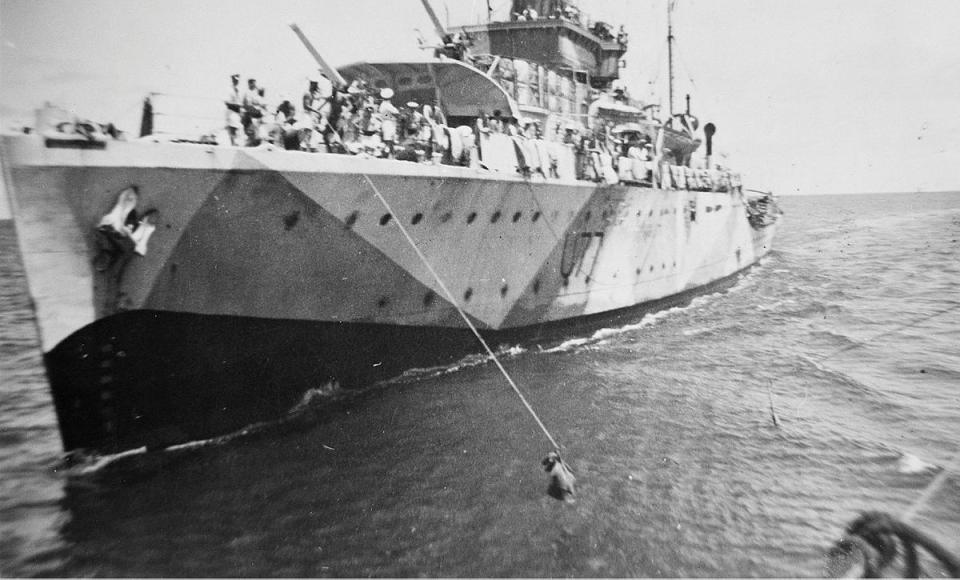
HMAS Yarra (II) at Batavia (Jakarta)
From its commissioning up to the end of the first 12 months of the Second World War, Yarra (II) did patrol and escort duties on the Australian coast.
On 28 August 1940 Yarra left Australia to join the Red Sea Force of the Royal Navy.
At Aden, Yarra escorted convoys up and down the Red Sea. It maintained the blockade between Africa and the Arabian coast.
In May 1941, Yarra took part in the Anglo-Iraqi war. It supported the land forces occupying Basra and its port of Ashar. Yarra also secured a bridge over the Qarmat Ali River above Ashar to prevent enemy reinforcements crossing and occupying a point at the mouth of the Shatt-el-Arab.
On 25 August 1941 Yarra sunk the Iraqi sloop Babr at Khorramshahr, and on 27 August it captured the 5000 tonne Italian ship, Hilda, at Banda Abbas on the Strait of Hormuz.
Yarra’s commanding officer, then Commander Wilfred Hastings Harrington RAN, was awarded the Distinguished Service Order (DSO) for his ‘courage, enterprise, and devotion to duty’ during the 1941 operations.
On 14 November Yarra sailed to Alexandria to take up duty as an escort vessel on the ‘Tobruk Ferry’.
On 9 December 1941 Yarra sailed for Colombo and on to Batavia (Jakarta). In January 1942 it began escort duties from Sunda Strait to Singapore as a unit of the China Force representing the British naval forces in the Malaya-Java theatre. Yarra conducted escort duties for ships evacuating the Dutch East Indies.
On 27 February 1942 orders were issued to clear all remaining British auxiliary craft from Batavia. On 2 March Yarra and the Indian sloop HMIS Jumna sailed for Tjilatjap (Cilicap Regency, Central Java). They were escorting depot ship Aanking, tanker Francol and a motor minesweeper.
On the morning of 3 March, two lifeboats were sighted from which Yarra (II) took several survivors from the Dutch ship Parigi, sunk by the Japanese two days earlier. At 6:30 am on 4 March 1942, Yarra saw the topmasts of heavy cruisers Atago, Takao and Maya to the north north-east.
Commanding officer Lieutenant Commander Robert William Rankin RAN ordered the ships of the convoy to scatter. He placed Yarra between the convoy and the Japanese forces. Yarra kept fighting as the Japanese sunk each of the four ships.
Yarra was last to sink. Just after 8:00 am on 4 March 1942, Lieutenant Commander Rankin ordered the crew to abandon ship, minutes before he was killed by an 8-inch salvo that hit the bridge.
Leading Seaman Taylor crewed the last remaining gun. He kept on firing until he too was killed.
The Dutch submarine K11 rescued 13 of Yarra’s sailors. The other 138 crew members were killed in the action or subsequently died on life rafts.
Specifications
 |
| Class |
Grimsby Class |
|---|---|
| Type |
Sloop |
| Pennant |
U77 |
| Builder |
Cockatoo Docks and Engineering Co Ltd, Sydney |
| Laid Down |
28 May 1934 |
| Launched |
28 March 1935 |
| Launched by |
Mrs Parkhill, wife of the Minister for Defence |
| Commissioned |
21 January 1936 |
| Decommissioned |
4 March 1942 |
| Fate |
Lost in action 4 March 1942 |
| Dimensions & Displacement | |
| Displacement |
|
| Length | 266 feet |
| Beam | 36 feet |
| Draught | 10 feet |
| Performance | |
| Speed | 16.5 knots |
| Propulsion | |
| Machinery | Parsons geared turbines, twin screws |
| Horsepower | 2000 |
| Armament | |
| Guns |
|
| Awards | |
| Inherited Battle Honours |
|
| Battle Honours |
|