HMAS Kapunda was one of 60 Australian Minesweepers (commonly known as corvettes) built during the Second World War in Australian shipyards as part of the Commonwealth Government’s wartime shipbuilding program. Twenty were built on Admiralty order but crewed and commissioned by the Royal Australian Navy (RAN). Thirty-six (including Kapunda) were built for the RAN and 4 for the Royal Indian Navy.
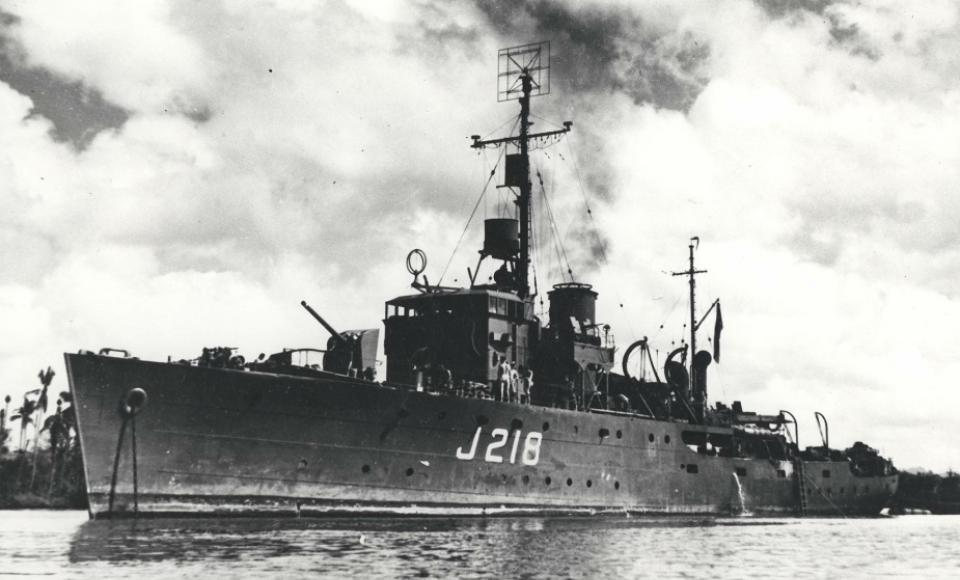
HMAS Kupunda
Kapunda commissioned at Sydney on 21 October 1942 under the command of Lieutenant Commander D A Menlove DSO RANR(S).
Kapunda began operational duty as a convoy escort vessel on the east coast of Australia, between Sydney and Brisbane. Until January 1943 the enemy were not active, but in that month Japanese submarines began their second sortie into Australian waters. Attacks on coastal shipping followed and 11 ships were lost before the enemy finally abandoned their attempt to halt the flow of supplies to forward areas.
No ships were lost while under escort by Kapunda. It was, however, concerned in the rescue on 18 January 1943 of survivors from the torpedoed and badly damaged tanker Mobilube off Sydney.
On 26 January 1943 at Sydney, the Mayor of Kapunda, Councillor Rees, on behalf of the residents of Kapunda, made a presentation to the ship comprising 5 pewter mugs for the wardroom, 4 irons and 4 toaster for the messdecks, and a bronze plaque.
In March 1943 Kapunda began escorting convoys from Queensland ports to Port Moresby and Milne Bay in New Guinea, a duty which kept the ship almost constantly at sea for the following 12 months.
In the same month Kapunda experienced its first engagement with the enemy when a flight of 8 Japanese bombers escorted by 12 fighters attacked the Milne Bay bound convoy it was escorting. Its fire and that of HMAS Bendigo diverted the attackers from their targets and the bombs fell harmlessly into the water.
On 12 April 1943, in New Guinea waters, an enemy formation of 37 aircraft attacked MV Gorgon, one of the ships of Kapunda’s convoy. One of the planes was shot down by Oerlikon fire from Kapunda and another hit by anti-aircraft fire from the merchant ship, but the others pressing home the attack scored several hits, setting Gorgon on fire. Kapunda’s commanding officer, however, took his ship alongside the burning vessel, put firefighting parties aboard and after a long struggle subdued the flames and brought the damaged ship safely to port.
On 1 April 1944 Kapunda arrived at Lae in New Guinea to begin operations in New Guinea waters. Until it returned to Sydney for refit in October 1944, it was engaged in the forward areas escorting, patrolling, including in the Solomon Sea, and furnishing bombardment support to Australian troops ashore.
The refit at Sydney was completed on 20 November and on 2 December Kapunda returned to New Guinea. Operational mainly in the Morotai and Biak Island areas it resumed patrol, bombardment and escort duty.
In June 1945 it proceeded to Darwin for docking and then returned to Morotai for escort duty to Borneo. On 29 July, en route to Balikpapan in Borneo, Kapunda steamed its 100 000 mile since commissioning.
Following the end of the hostilities, Kapunda assisted with the evacuation of Allied prisoners of war from Kuching where it was also present for the official surrender ceremony of the Japanese forces in the area. Major General Yamamura signed the instrument of surrender on board Kapunda.
When its work connected with the re-establishment of British authority in Borneo was completed, Kapunda returned to Australia, reaching Sydney on 17 November 1945. This marked the end of its seagoing career after 4 years of war service during which it had steamed 110 177 miles and had been nearly 12 000 hours under way.
Kapunda paid off into Reserve on 14 January 1946. After being declared for disposal on 30 December 1960 it was sold for scrap to Kinoshita (Australia) Pty Ltd on 6 January 1961.
Specifications
 |
| Class |
Bathurst Class |
|---|---|
| Type |
Australian Minesweeper |
| Pennant |
J218 |
| Builder |
Poole & Steel Ltd, Sydney |
| Laid Down |
27 August 1941 |
| Launched |
23 June 1942 |
| Launched by |
Mary Lily May Quirk, member for Balmain in the New South Wales Legislative Assembly |
| Commissioned |
21 October 1942 |
| Decommissioned |
14 January 1946 |
| Dimensions & Displacement | |
| Displacement | 768 tons |
| Length | 186 feet |
| Beam | 31 feet |
| Draught | 8 feet 6 inches |
| Performance | |
| Speed | 15.5 knots |
| Complement | |
| Crew | 77 |
| Propulsion | |
| Machinery | Triple expansion, 2 shafts |
| Horsepower | 1800 |
| Armament | |
| Guns | 1 x 4-inch HA/LA gun |
| Other Armament |
|
| Awards | |
| Battle Honours |
|